
- Key Takeaways
- What Does Part 107 Require for Drone Maintenance?
- Category 4 Operations
- What Should a Drone Preflight Inspection Include?
- Preflight Checklists
- How Do You Maintain Your Drone’s Airframe and Propellers?
- Airframe
- Propellers
- Motors
- How Should You Care for Your Drone Batteries?
- Why Are Firmware and Software Updates Critical?
- How Do You Build a Drone Maintenance Schedule?
- Scheduled Drone Maintenance
- Unscheduled Drone Maintenance
- Drone Storage
- Should You Keep Drone Maintenance Records?
- Frequently Asked Questions
- Does Part 107 Require a Preflight Inspection before Every Flight?
- Can I Do My Own Drone Maintenance under Part 107?
- How Often Should I Replace My Drone’s Propellers?
- What Happens if I Fly a Drone That Is Not in a Condition for Safe Operation?
- Do I Need to Report a Drone Crash to the FAA?
- Conclusion
So you’re out in the field on a major client gig. Your heart races as the drone powers up. The hum of the motor signals that paycheck you’ve been waiting for.
But wait…what’s that error? Your DJI Fly App just threw up a compass calibration failure notification. The client is watching, annoyed, as you fumble around trying to recalibrate it. You only have 20 minutes of a weather window left. If only you had performed a preflight inspection before trying to take off in front of the client.
Don’t get caught unprepared on a job. Proper drone maintenance can mean the difference between a job well done or a job lost.
This guide covers what maintenance Part 107 actually requires, what an efficient preflight inspection looks like, and how to build a routine that keeps your drone airworthy and your operations legal.
Key Takeaways
- Part 107 requires a preflight inspection before every flight, and the remote PIC is personally responsible for it.
- Routine maintenance covers five core areas: airframe, propellers, batteries, motors, and firmware.
- The FAA strongly recommends keeping written maintenance and inspection logs, even though Part 107 does not explicitly mandate them.
- A structured maintenance schedule prevents surprise failures on paying jobs and extends your aircraft’s service life.
What Does Part 107 Require for Drone Maintenance?
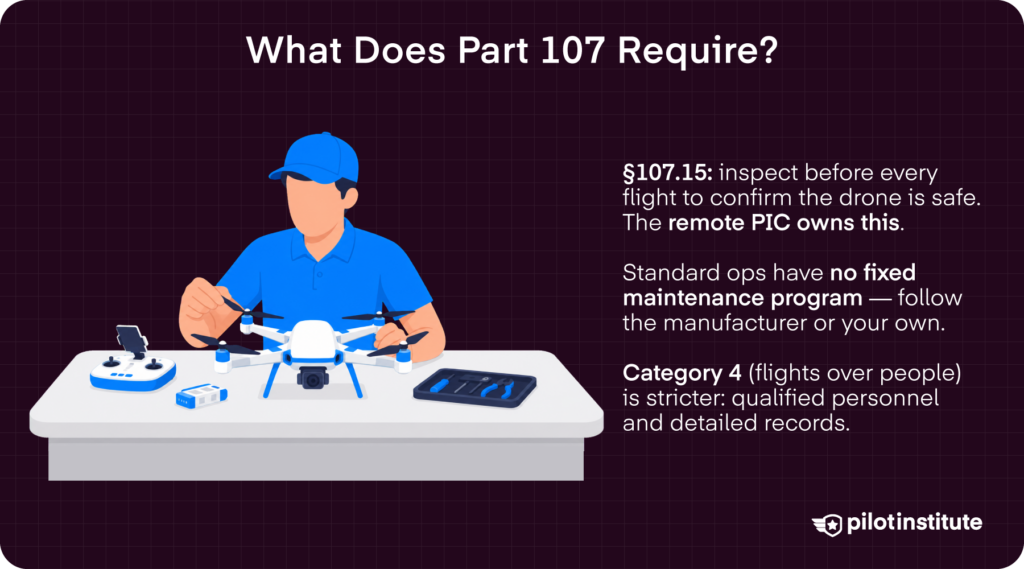
Simply put, Part 107 requires you to inspect your drone before every flight to ensure it is safe to fly.
More specifically, 14 CFR §107.15 states that the remote pilot in command (PIC) must check a small unmanned aircraft system (sUAS) “prior to each flight” to “determine whether it is in a condition for safe operation.”
Yet, the regulation does not prescribe a specific maintenance program for standard Part 107 operations. Rather, the FAA leaves it to the pilot to follow manufacturer guidelines or develop their own procedures based on the aircraft’s use or operational needs.
Category 4 Operations
The exception here is Category 4 operations, where drones are permitted to fly over people and moving vehicles. Category 4 operations require a drone airworthiness certificate as dictated by 14 CFR Part 21.
§107.140(c) requires the sUAS owner to ensure anyone performing maintenance or inspections uses the manufacturer’s prescribed methods, has the knowledge and skill to do the work, and maintains detailed records of all work performed.
These drones must have documented systems for maintenance performed as specified by the manufacturer to ensure the sUAS meets the conditions of its airworthiness certificate.
What Should a Drone Preflight Inspection Include?
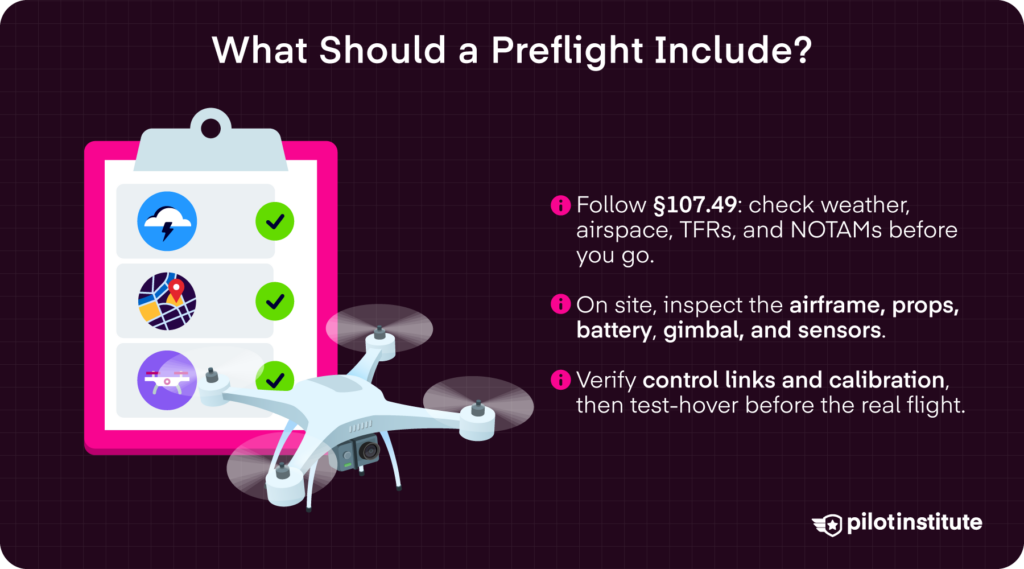
So, what should you include in your drone preflight inspection for standard Part 107 operations? §107.49 (Preflight familiarization, inspection, and actions for aircraft operation) outlines preflight inspection practices.
Before even heading to the job site, assess weather conditions and any flight restrictions in the area you’ll be working in. Look for incoming storms and wind levels. Also monitor KP index levels for increased geomagnetic activity that can affect your drone’s compass and IMU. Check for any temporary flight restrictions (TFRs) or notices to airmen (NOTAMs).
Make sure you have all your certifications and other documents (insurance, LAANCs) readily available. Your FAA Registration markings should also be visible somewhere on the drone’s body.
Once you’re there, check for obstructions or any other ground hazards. Brief anyone involved in the operation on their roles and responsibilities, emergency procedures, communication practices, and any hazards to look out for.
The PIC should also inspect the drone itself before taking off.
Before powering on, inspect the drone’s airframe and propellers for any damage or wear. Lightly turn the propellers to ensure smooth rotation and to get a closer look at any potential chips or other damage. Replace damaged propellers as needed.
Take a close look at the batteries for any bulging or obvious damage. Turn the drone on and confirm it is receiving sufficient power for flight.
Scroll the gimbal up and down to check it is functioning correctly. Check for any shaking indicating debris in the gimbal arms or an imbalance.
Check for any firmware or calibration updates. Also verify that the inertial measurement unit (IMU), compass, and other onboard sensors are functioning normally. You may need to recalibrate on a flat surface away from metal buildings or other electronic interference.
Verify all control links between the drone and the controller work properly. Ensure the drone responds accurately to all stick inputs before taking off. Watch the video signal for any interference or lag.
Check any attached payloads to make sure they are securely connected and do not adversely affect the drone’s flight operations. You can take off and hover at a low altitude for a few minutes to verify the drone stays stable and payloads are functioning as expected.
Preflight Checklists
Want something more detailed? The FAA’s AC 107-2A provides a great preflight checklist template in Appendix E, Sample Preflight Assessment and Inspection Checklist. It covers preflight assessment actions, like evaluating the operating environment and conducting crew briefings.
The template also features key drone inspection procedures, including inspecting the visual condition of the airframe structure, registration markings, airframe attachment points, propellers, power supply components, and any attachments.
Additionally, Part 43 Appendix D (used by manned aircraft) gives a structural framework for more systematic inspections for every 100 hours of flight time.
You can also build your own checklist. Establish a consistent preflight routine with a checklist tailored to your operations to ensure safe flight every flight.
We have a very useful guide to help you build a drone preflight inspection checklist. It walks you through the essential safety and inspection steps to perform before every flight.
How Do You Maintain Your Drone’s Airframe and Propellers?
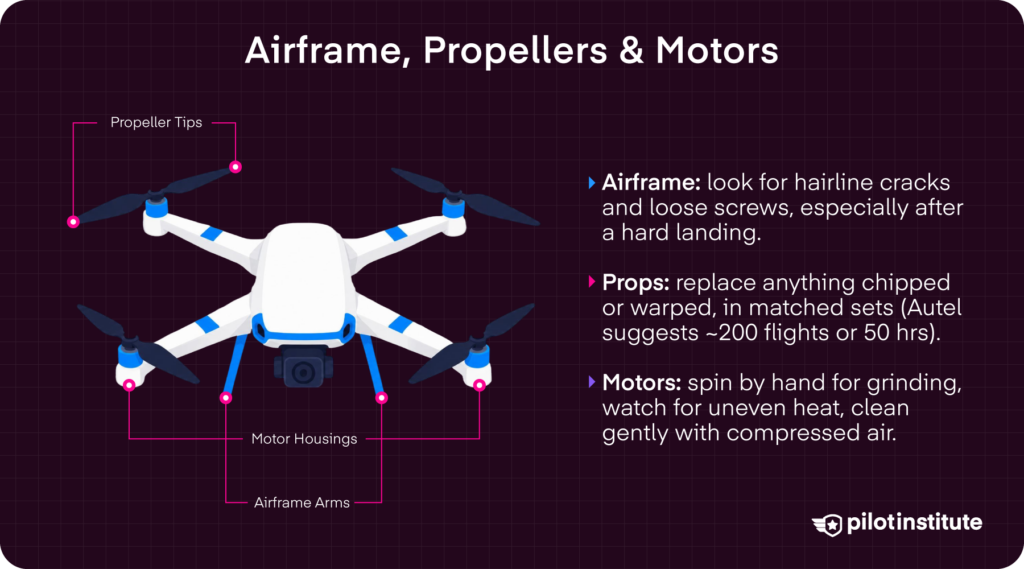
After a successful flight, don’t forget to conduct a post-flight inspection. Look for any damaged components and give your drone a thorough clean before stashing it back in your drone bag.
Airframe
Check your drone’s arms, body, and joints. Look for hairline cracks, stress marks, or loose screws. Take some extra time for the post-flight inspection if you had a hard landing or collisions.
Clean the chassis with a microfiber cloth or a can of compressed air.
Propellers
Propellers are subject to extreme forces during flight. Even minor chips can compromise stability.
Always conduct a drone propeller inspection before and after each flight. Replace any propellers that appear damaged or warped.
Drone manufacturer Autel recommends replacing your propellers every 200 flights or 50 hours of flight time. Pilots flying in high-UV environments should replace propellers sooner.
Always check your manufacturer’s guidance for your specific drone model, as these numbers may differ.
Replace propellers in matched sets to ensure your drone stays balanced in the air. Most drones have two clockwise propellers and two counter-clockwise propellers. You will need to replace both in a set and not just an individual prop.
On DJI drones, matched sets of propellers are typically marked with the same colored rings (typically white) to indicate their installation position.
Motors
Rotate each propeller gently by hand to check for grinding or resistance in the bearings. After each flight, touch-check motors for uneven heat distribution, which can signal internal friction or imbalance.
Clean motor chambers with compressed air. But avoid too much air pressure, as it can force debris deeper into the motor.
How Should You Care for Your Drone Batteries?
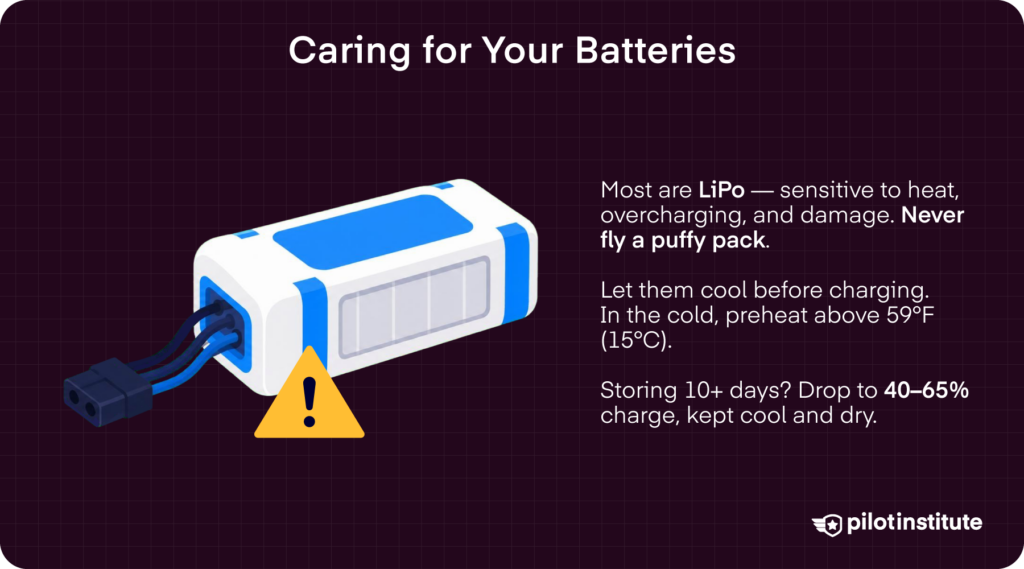
Most drone batteries are Lithium Polymer (LiPo). They are very sensitive to temperature, overcharging, and physical damage.
Think about it: most commercial airlines won’t let you pack lithium batteries in your checked luggage. If neglected, they can cause some serious damage. So, invest some time in your LiPo battery care.
Before and after each flight, inspect your batteries for swelling, leakage, and any physical damage. Never fly with a battery that looks the slightest bit puffy or damaged.
During flight, monitor your battery’s voltage and temperature through your flight app if possible. Reduce aggressive flying if your batteries get too hot. Wait until your batteries completely cool down before charging them.
Also, in cold conditions, preheat your batteries to 60 to 80 degrees F. DJI’s winter flying guide explains that flying in extreme cold temperatures can impact your drone’s battery performance. Flying at or below freezing (32 degrees F) can reduce flight time by 20-30% or more, depending on the drone and conditions, according to SkyWatch.
The best way to care for your drone batteries is proper storage procedures. If you plan on storing your LiPo batteries for more than 10 days, drain the charge to between 40% and 65%. DJI also recommends performing “a full charge and discharge cycle at least once every 3 months.”
Keep them in a cool, dry location. Aim for temperatures between 71 degrees F (22 degrees C) and 82 degrees F (28 degrees C).
Monitor the charging cycles and cell voltage of your batteries. A common industry guideline is to retire LiPo batteries when showing more than 0.1V difference between cells. DJI’s Intelligent Flight Batteries make this easy, with built-in battery management systems (BMS) that monitor cell voltage, temperature, charging cycles, and overall battery health in the DJI Fly App.
Why Are Firmware and Software Updates Critical?
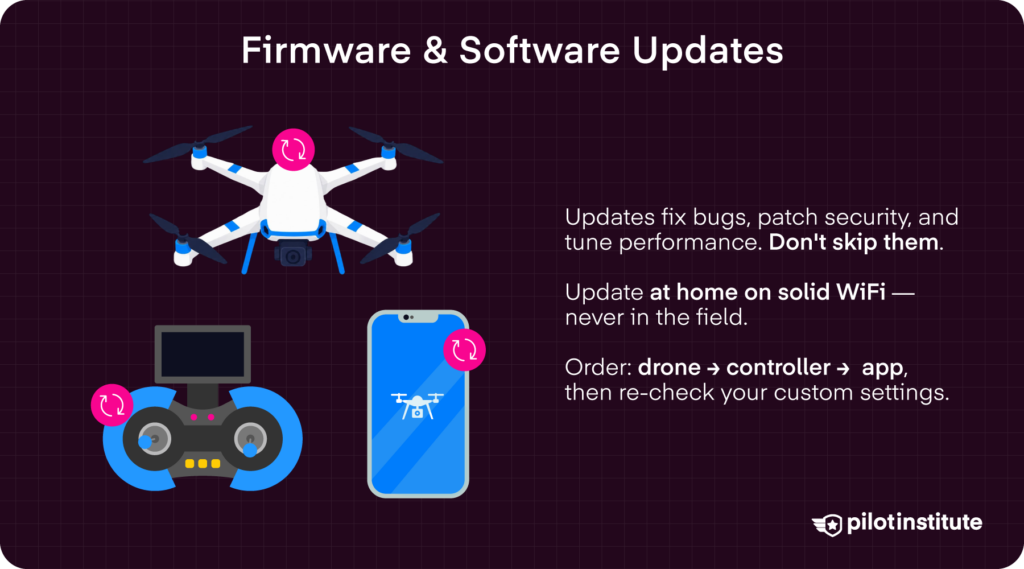
Drones need updating now and then. Firmware updates fix software bugs, patch security vulnerabilities, and optimize battery performance. Skipping an update could mean missing critical safety fixes.
But don’t wait until you’re out in the field to update your firmware. Update at home with a reliable WiFi connection to avoid costly delays.
Update your drone’s firmware first. Then update your controller and app. Verify any custom settings after each update, like RTH altitude, max distance, or flight modes.
IMU and compass calibration is also necessary from time to time. Recalibration is typically needed when you are in a new location far from your last flight, after a major firmware update, or whenever the app prompts you.
Calibrate in open areas away from metal structures and electronic interference. Make sure your aircraft is on a level, stable surface. Follow the manufacturer’s calibration instructions carefully.
How Do You Build a Drone Maintenance Schedule?
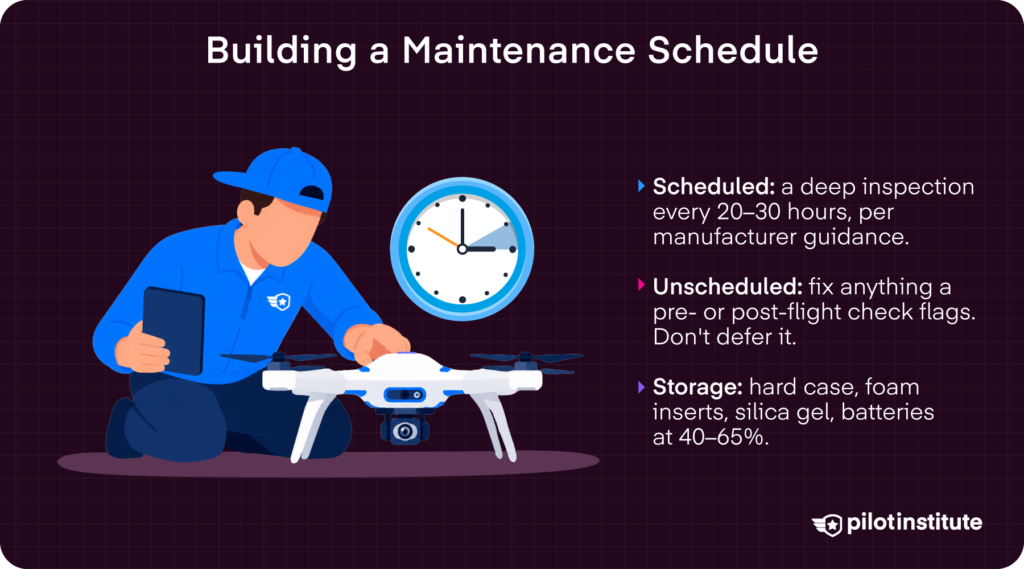
Maintenance can be both scheduled and unscheduled. This means maintenance should follow a predetermined schedule, but also be conducted as needed on the fly.
Scheduled Drone Maintenance
Scheduled maintenance is the first tier. After 20 or 30 hours of flight time, conduct a deep inspection.
AC 107-2A Chapter 7.2 recommends that scheduled maintenance should follow manufacturer guidelines. For example, a manufacturer may publish guidelines for periodic maintenance, like propeller replacement, battery health checks, firmware updates, and calibration.
Unscheduled Drone Maintenance
Meanwhile, unscheduled maintenance may be necessary after a preflight or postflight check. If any component is deemed “in need of servicing,” service it.
See a chunk of propeller missing? Replace it. The upfront costs of replacing parts pale in comparison to the much higher costs of repairing a damaged drone after a crash.
Drone Storage
The third tier of maintenance is proper storage practices. Store your aircraft in a structured case to protect it in transit. Use foam inserts customized to your drone’s airframe and other components, along with propeller guards to prevent the blades from flexing.
You can also toss in a silica gel pack in your drone bag to reduce moisture. As discussed earlier, store any LiPo batteries at around 40% to 65%.
Should You Keep Drone Maintenance Records?
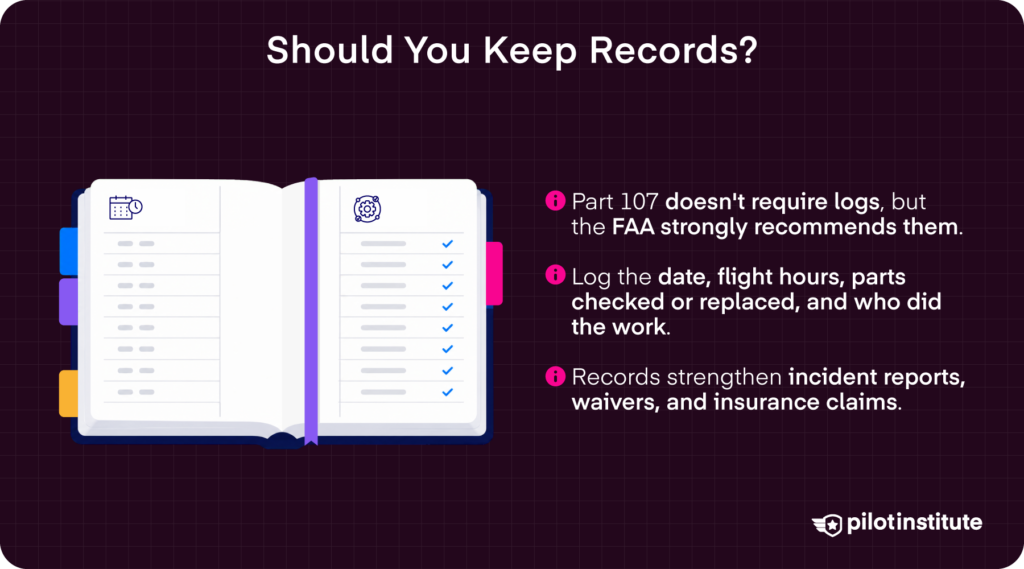
Yes, you should keep your sUAS maintenance records. While Part 107 does not explicitly require logbooks, the FAA strongly recommends them.
sUAS record keeping helps ensure that nothing is being overlooked. This is especially important if you have an incident that requires notifying the FAA or the National Transportation Safety Board (NTSB).
Log the date of any maintenance performed, along with any components inspected or replaced. List the flight hours at the time of any service. Don’t forget to mention who did the work.
It’s also a good idea to keep a drone flight log in general, tracking flight hours and other details.
Keeping detailed records has practical benefits as well. Maintenance logs track the service life of key components and help you spot recurring issues.
Logs can also help strengthen Part 107 waiver applications and support drone insurance claims.
You can keep a written log book or use digital options for your drone maintenance records. Notion has a great Drone Operator Suite template, but you can also build your own using Excel or Google Sheets.
Frequently Asked Questions
Does Part 107 Require a Preflight Inspection before Every Flight?
Yes, §107.49 requires it. The remote PIC must assess the environment and ensure the sUAS is in a condition safe to fly before taking off.
Can I Do My Own Drone Maintenance under Part 107?
Yes. It’s actually standard for Part 107 operations, where there is no formal requirement for certified mechanics. The FAA expects you to follow the manufacturer’s instructions or develop your own procedures.
Now, if you are flying Category 4 operations, things are a bit different. When flying over people or moving vehicles, the FAA requires sUAS maintenance to be conducted by qualified personnel in accordance with the manufacturer’s instructions (§107.140(c)).
How Often Should I Replace My Drone’s Propellers?
Replace your propellers immediately if you see any sign of damage, such as chips, cracks, or warping.
As a general guideline, Autel recommends propeller replacement every 200 flights or 50 flight hours. Replace sooner in high-UV or dusty environments.
What Happens if I Fly a Drone That Is Not in a Condition for Safe Operation?
If you fly a drone that is not in safe condition for operation, you are violating 14 CFR §107.15. Violations can result in FAA enforcement action. If an accident does happen, failing to do a proper preflight weakens your legal position.
Do I Need to Report a Drone Crash to the FAA?
Yes. Under 14 CFR §107.9, you must report any accident resulting in serious injury, loss of consciousness, or property damage exceeding $500 to the FAA within 10 calendar days.
Conclusion
That compass error in front of your client was completely avoidable if you had just made proper upkeep a habit, not an afterthought.
A few minutes of preflighting and a 30-minute monthly deep dive are the cheapest insurance you can buy. Catch small issues before they become expensive repairs, missed deadlines, or crashes.
Don’t wait for an error message or a disappointed client to remind you about the importance of maintenance; make it a key part of every mission.