-
Key Takeaways
-
Understanding the Benefits of Drones in Real Estate
- Gaining a Competitive Edge
-
Legal Considerations and Obtaining a Drone Pilot License
- Compliance with State and Local Laws
-
Choosing the Right Drone for Real Estate Photography
- Investing Wisely
-
Tips for Effective Real Estate Drone Photography
- Planning Your Shots
- Optimal Timing and Lighting
- Mastering Drone Flight Techniques
- Photo and Video Settings
- Post-Processing and Editing
-
Hiring a Professional Drone Operator
- What to Look for in a Drone Operator
-
Implementing Drone Photography in Your Real Estate Marketing
- Highlighting Surrounding Areas
- Staying Ahead with Technology
-
Conclusion
In today’s competitive real estate market, capturing a buyer’s attention is more challenging than ever. What could you do to make your listing stand out above all others?
The answer for many is a drone. Real estate listings with aerial images are 68% more likely to sell than those without; imagine the impact on your sales!
This guide will walk you through how to get started using drones to take your real estate game to the next level, even if you’re brand new to the industry.
Heads up: Some links in this article are affiliate links. As an Amazon Associate we earn from qualifying purchases. This helps support the site so we can keep creating content for readers like you.
Key Takeaways
- Adding aerial imagery to your marketing sets your listings apart and attracts more buyers.
- You need an FAA Part 107 Remote Pilot Certificate to fly drones commercially.
- Picking the right drone and mastering the basics will benefit you immensely.
- Understanding the basics of photo and video editing is a necessary skill – unless you outsource it.
Understanding the Benefits of Drones in Real Estate

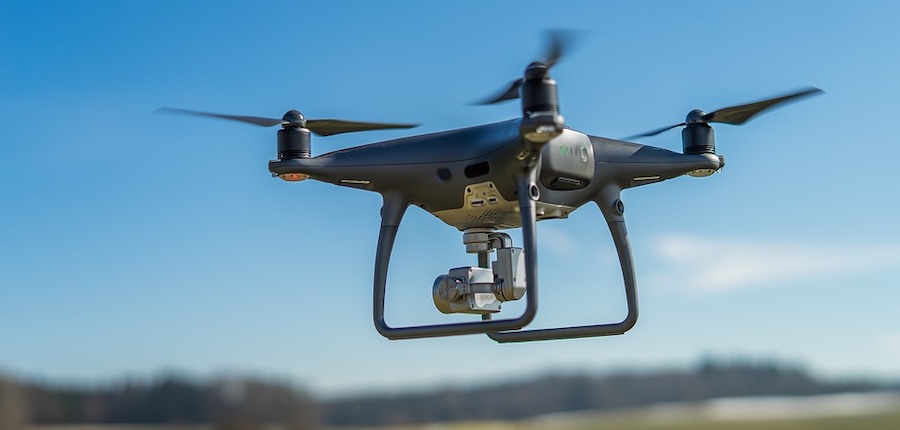
Drones give you the power to capture an all-encompassing aerial view of properties, showing the home and its surroundings at the same time. You can clearly display a property’s layout and its proximity to its surroundings – something most standard photography is unable to do.
When you combine aerial shots with ground-level shots, you create an immersive experience that helps listings stand out and keeps potential buyers engaged.
Gaining a Competitive Edge
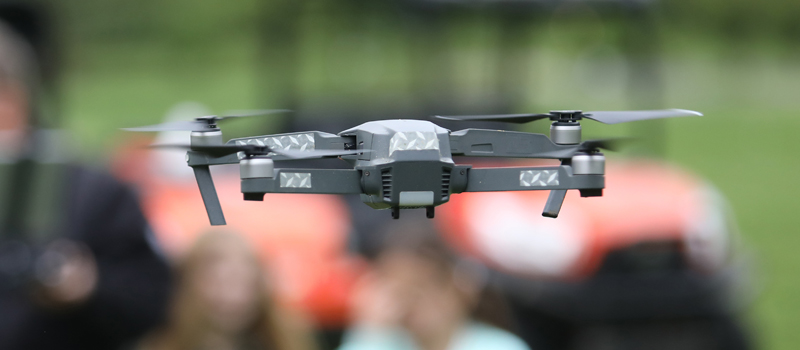
Using drone photography makes your listings look more visually appealing, and it gives you a distinct look that sets you apart from the competition that doesn’t use aerial imagery.
The real estate market is getting younger and younger, and they’re no stranger to tech. Real estate listings with aerial images are 68% more likely to sell than those without
By using the latest UAS (Unmanned Aircraft System) technology, you’ll be showing clients your modern solutions that set you apart from the competition.
In the next section, you’ll learn about obtaining a remote pilot certificate and the laws that go along with it.
Legal Considerations and Obtaining a Drone Pilot License
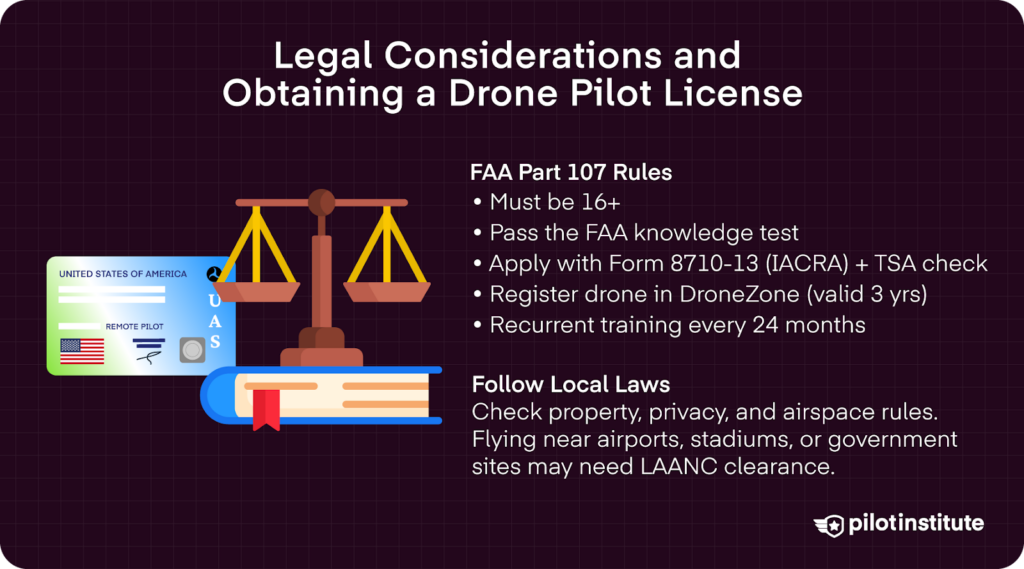
Suppose you plan to use a drone for commercial purposes, such as photographing properties. In that case, you are required by the Federal Aviation Administration (FAA) to obtain a Remote Pilot Certificate under Part 107 regulations.
Below are the steps to get certified:
- You must be at least 16 years old.
- Pass the FAA Aeronautical Knowledge Test, which covers airspace regulations, weather, drone operations, and emergency procedures.
- Complete the FAA Form 8710-13 for a remote pilot certificate using the FAA’s IACRA system. The application process includes a TSA security background check.
- Register as a drone pilot with the FAA DroneZone. Your registration is valid for three years, and the registration number you receive must be displayed on any drone you operate commercially.
- Failing to follow these requirements can lead to substantial fines and legal consequences.
- To keep your license valid, you are required to take online recurrent training every 24 months.
Compliance with State and Local Laws
In addition to federal Part 107 requirements, some states and towns have their own drone laws.
Property, privacy, and trespassing laws can differ depending on the municipality. You should always check your local regulations before flying a drone.
Understanding airspace classifications is essential, and failure to do so could result in a collision with another aircraft. Airports, stadiums, and certain government buildings are areas that could require additional clearance to fly near.
Flying in these zones may require special permissions or an LAANC authorization.
Choosing the Right Drone for Real Estate Photography
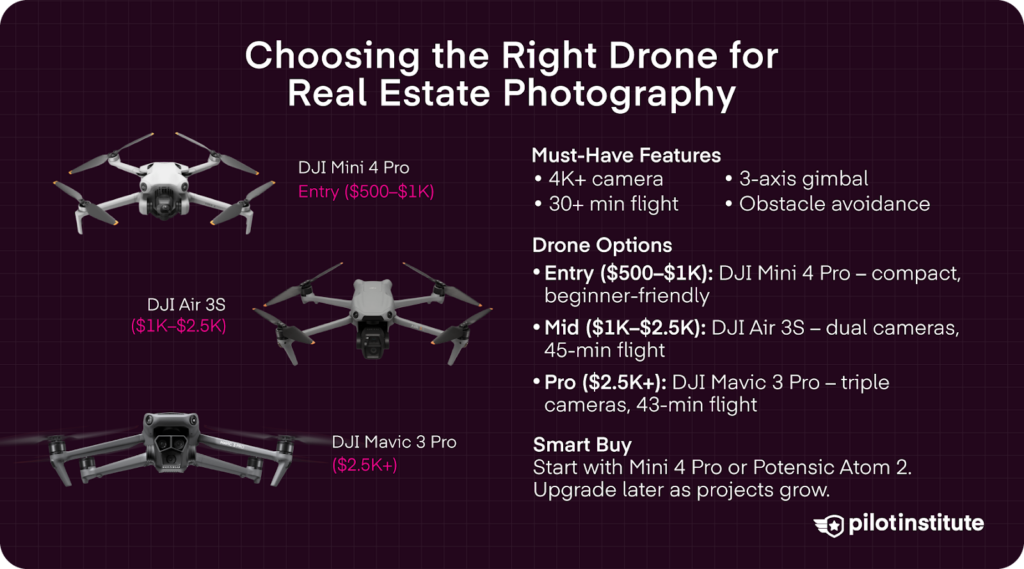
When investing in a drone for real estate, certain features are critical:
- Camera Quality: Look for 4K resolution or higher with strong low-light performance.
- Flight Time: Longer battery life allows more shots per session, but look for 30+ minutes.
- Range and Signal Strength: For most VLOS operations, any standard camera drone should have more than enough power for real estate work.
- Stability and Gimbal: A three-axis gimbal keeps footage smooth.
- Obstacle Avoidance: Improves safety around trees, buildings, and power lines.
Examples of current options:
Affiliate disclosure: As an Amazon Associate I earn from qualifying purchases.
- Entry-Level ($500–$1,000): The DJI Mini 4 Pro(paid link) is compact, sub-250g, and beginner-friendly.
- Mid-Range ($1,000–$2,500): The DJI Air 3S has dual cameras, 45-minute flight time, and an omnidirectional obstacle sensing system.
- Professional ($2,500+): The DJI Mavic 3 Pro has three cameras, an adjustable aperture, and a 43-minute flight time.
Ultimately, the drone you pick will be dependent upon your budget. Even the entry-level drone listed is a great option.
Investing Wisely
While mid-range drones are an excellent choice for most real estate professionals, beginners can often achieve great results with a more affordable option, like the previously mentioned DJI Mini 4 Pro, or the Potensic Atom 2.
Its compact size, weight, and high-quality camera make it a strong starting point without the investment required in more expensive, professional models.
Once your business gains traction and you begin taking on larger or more complex projects, you can expand your fleet.
Adding FPV aircraft to your fleet can open up creative possibilities, like smooth interior fly-throughs or cinematic passes over large properties.
I’ve found personally that small sub-250g drones with propeller guards work very well for real-estate tours that require a bit more flexibility than you can get with a traditional camera.
DJI has long been the industry leader for ease of use, customer support, and portability, which is why their drones dominate the real estate sector.
The Potensic Atom 2 has been generating attention as a capable option.
When you’re choosing a drone, don’t just focus on the specs. Consider the customer support, availability of parts, local regulations, and your particular skill level.
That way, your investment will remain viable as your real estate business or contract work takes off.
Tips for Effective Real Estate Drone Photography
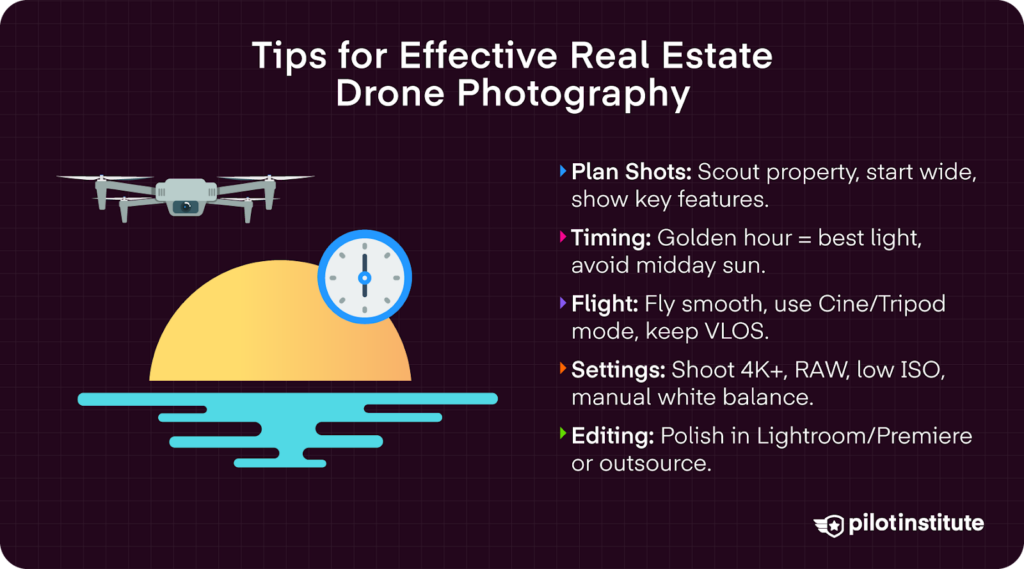
Planning Your Shots
Before you power up the drone, walk around the property to get a feel for it. Look at it like a buyer would.
What jumps out first? Is it the landscaping, the pool, or the way the house sits on the lot? Make mental notes of those features so you know what to highlight once you are in the air.
Having a shot plan makes your flight smoother and saves battery life. Start with a wide, sweeping view of the entire property and its surroundings, then move in closer to show off details like a patio, garden, sun room, etc.
Overhead shots are perfect for showing the layout, especially on larger properties.
If the home has a real “wow” factor like a pond, a waterfront dock, a mountain view, or a massive backyard, ensure it is front and center in your sequence. These are the shots that get people to stop scrolling and click on your listing.
Optimal Timing and Lighting
Natural light is your best friend in real estate photography. For exterior shots, the golden hour(s) (one hour after sunrise, one hour before sunset) create warm, soft colors that complement different textures and details on a real estate property.
You should do your best to avoid mid-day sunlight. In the middle of the day, you’ll be dealing with glares, lens flares, reflections, and flat details in your image.
Mastering Drone Flight Techniques
Smooth, intentional movement is one of the easiest ways to make your footage look professional and cinematic. Avoid quick stick inputs or sudden changes in altitude, as these can make your footage look choppy and incomplete.
When flying, it is helpful to get a “big picture” mental image of what you’re seeing through the drone’s camera. Imagine viewing the footage on a movie theater screen, how would the footage look? At that size, small mistakes are amplified exponentially. It’s a great way to view your own footage objectively.
For cinematic footage, you should use a Tripod or Cine mode, depending on the drone’s model. Typically, these shooting modes slow down your drone, allowing you to give more throttle but still keep it steady. Slow orbits around a fixed structure help establish muscle memory.
Finally, remember that the FAA requires you to always maintain a visual line of sight (VLOS).
Photo and Video Settings
Maneuvering a drone isn’t a huge accomplishment in and of itself, especially with GPS position-hold.
Once your UAV (Unmanned Aerial Vehicle) is in position, your knowledge of photography and videography will be the difference between usable footage and extraordinary footage.
Below are some tips for consistent, professional results:
- Resolution: Always record in the highest resolution available. For real estate work, 4K is the standard; higher resolutions like 5.1K or 6K give you more flexibility for cropping and reframing without losing detail.
- Photo Format: Shoot in RAW rather than JPEG whenever possible. RAW files retain more data, which makes editing adjustments like exposure and color correction much easier.
- Video Color Profiles: If your drone supports flat profiles, such as D-Log or D-Cinelike, choose one. These profiles capture a wider dynamic range, giving you more room to adjust shadows and highlights during editing.
- ISO: Keep this as low as possible (100 – 400) to reduce image noise, especially for property shots with a lot of detail and harsh light.
- Shutter Speed: To achieve natural motion blur in your video, use a speed that’s roughly double your frame rate (for example, 1/60th at 30fps).
- White Balance: Set it manually instead of leaving it on auto. This keeps your colors consistent across shots and prevents sudden shifts during filming.
If your drone supports it, consider enabling a histogram and “zebra pattern” on your display to help you manage the exposure and brightness levels.
Post-Processing and Editing
Even the best drone footage can benefit from post-processing.
For photos, Adobe Lightroom and Photoshop have long been considered the industry standard. Adobe Premiere Pro and DaVinci Resolve allow you to stabilize footage, color grade, and enhance detail.
If editing isn’t your strength, outsourcing to a professional can be a worthwhile investment. Many freelance editors specialize in real estate photography and can deliver polished results that align with your brand’s look and feel.
Hiring a Professional Drone Operator
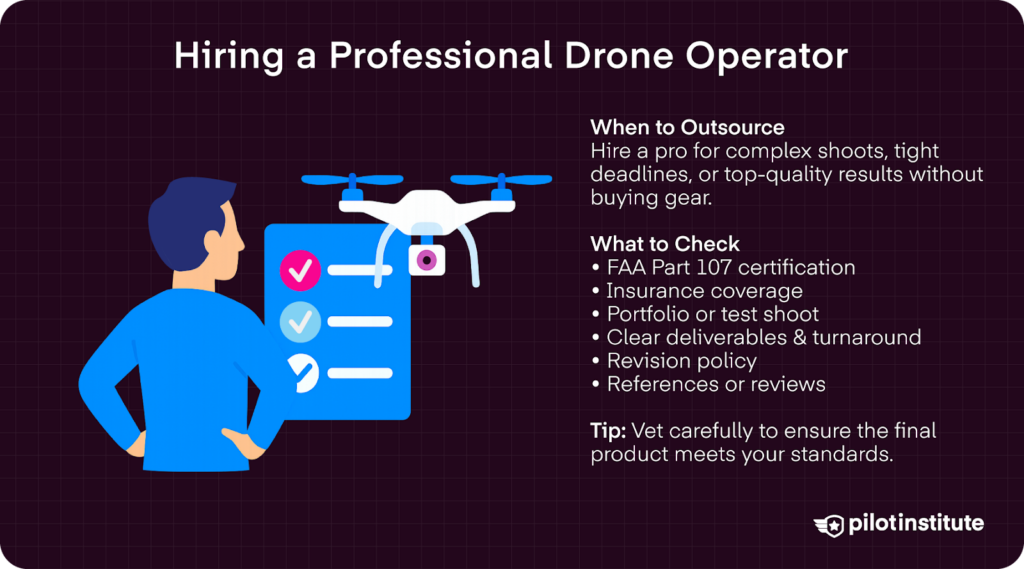
There are times when outsourcing your aerial work makes more sense than doing it yourself.
Hiring a professional can be a smart move, whether it’s a complex property, a tight deadline, or simply the desire to deliver the highest possible quality without investing in your own gear.
What to Look for in a Drone Operator
Before hiring someone, make sure they check these boxes:
- FAA Certification: Confirm they hold a current Part 107 Remote Pilot Certificate.
- Insurance Coverage: Liability insurance can protect both you and the operator in case of accidents.
- Portfolio Review: Ask to see the operator’s previous work. Ask for a test shoot if they don’t have a portfolio available.
- Clear Deliverables: Agree on the number of photos, video length, and if editing is included.
- Turnaround Time: Make sure the delivery date aligns with your listing schedule.
- Revision Policies: Know what’s included if you need adjustments, and how long to finish them.
- References: Check reviews or ask past clients about their experience.
By vetting the operator carefully, you’ll ensure the final product matches your vision and quality standards.
Implementing Drone Photography in Your Real Estate Marketing
Once you have your photos and videos, it’s time to implement them in your marketing plan.
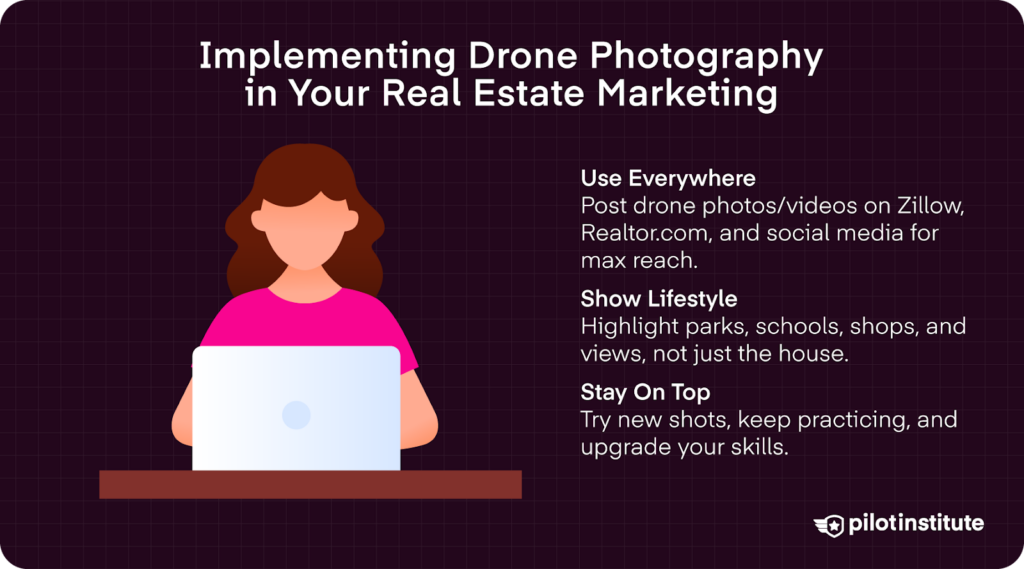
The goal is to get them in front of as many potential buyers as possible, while presenting them in a way that enhances the listing’s appeal. Platforms like Zillow, Apartments.com, and Realtor.com allow you to upload multiple photos and videos.
A smooth transition into an interior walkthrough can create a highly immersive experience for potential buyers. Social media is another powerful avenue.
Posting short aerial clips or highlight reels on TikTok, Instagram, Facebook, and YouTube can significantly increase visibility and engagement.
You can attract more buyers by incorporating drone shots across multiple channels and optimizing them for online use.
Highlighting Surrounding Areas
A property is never just about the house. The neighborhood, the views, and what’s nearby can make or break a buyer’s interest.
Drones are perfect for showing that bigger picture and giving people a real feel for the area.
If there’s a park down the street, a school within walking distance, or a shopping center nearby, capture it. Those little lifestyle details matter, especially to buyers who don’t know the area well.
A quick aerial sweep can show how close those amenities are without a single word.
Scenic locations are an even bigger win. Mountain views, a lake at the edge of the property, or a short walk to the beach are all things you should show off from the air.
Even in the middle of a city, an aerial view can make it clear that restaurants, coffee shops, and entertainment are right around the corner.
You’re not just selling a property when you include the surroundings in your marketing. You’re selling a lifestyle, and buyers love to see that lifestyle.
Staying Ahead with Technology
Drone tech and real estate marketing are both moving fast, and if you want to stay competitive, you have to keep up.
That means getting comfortable with new tools, trying out fresh techniques, and not being afraid to experiment.
Don’t just stick to the same shots every time. Play around with 360-degree “globe” panoramas, etc. The extras can help your listings stand out and give buyers something they haven’t seen before.
Keep practicing, too. The more time you spend flying, the smoother your shots will get. If you really want to sharpen your skills, look into workshops or online courses focused on drone photography for real estate.
Conclusion
Drones have completely changed the game for real estate marketing. They allow you to show properties in a way that grabs attention, tells a story, and helps buyers connect with a home before they ever set foot inside.
Whether you learn to fly and handle the work yourself or hire a licensed professional, knowing how to use a drone to your advantage can allow you to set yourself apart from the competition.
From getting your FAA Part 107 license to mastering flight techniques and editing, every step toward better drone content leads to stronger listings and faster sales.
If you have hesitated about adding drone photography to your business, now is the time to start. The market is competitive, and buyers are drawn to stand-out listings.