-
What Makes a Short Field Short?
-
Short Field Landing Considerations
-
The Aerodynamics of Short Field Landings
-
Preparing for a Short Field Landing
-
Short Field Landing Procedures (Step-By-Step)
- Approach Phase
- Roundout and Touchdown
- Rollout
-
Common Short-Field Landing Mistakes
- Unstabilized Approach
- Too Much Airspeed
- Too Little Airspeed
- High Descent Rate
- Over-Braking
- Under-Braking
- Releasing Controls on Touchdown
- Not Applying Crosswind Controls
-
Applying Short Field Landing Techniques
- Slow Flight
- Power-Off 180s and Precision Approaches
- Crosswind Landings
- Emergency Landings
-
Conclusion
Short field landings are a true test of a pilot’s skill. They are also one of the most feared maneuvers during the private pilot checkride.
Not only must you fly unnervingly slow, but you also have to pick a spot on the runway and hit it.
All this while avoiding obstacles and trying to keep your tires–and pride–intact.
Feeling overwhelmed by this challenging maneuver? You’re not alone.
Whether you’re new to short field landings or a pilot needing a refresher, this essential guide is for you.
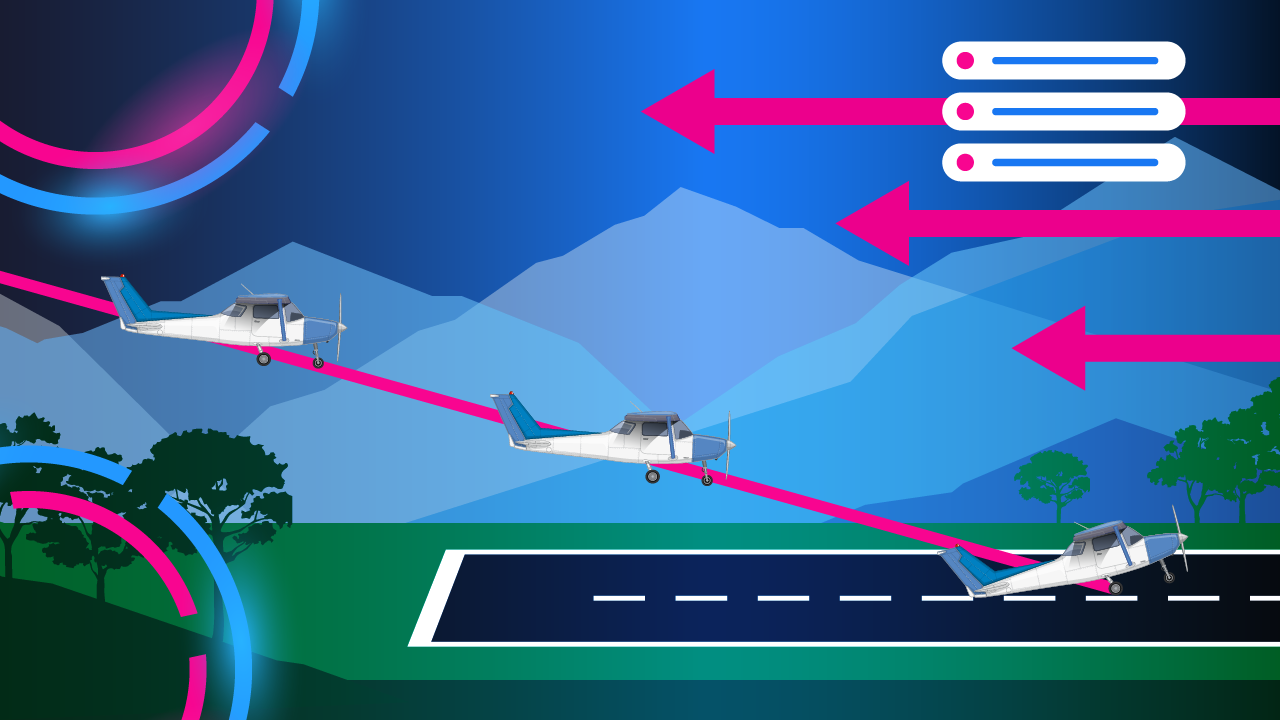
What Makes a Short Field Short?
What exactly is a short field? It’s a runway that is too short for a normal takeoff or landing but still usable with certain precautions.
During short field landings, pilots use specialized techniques to reduce stopping distance. This allows them to safely operate into and out of these tight runways.
Performing short field landings requires careful consideration. The length of the runway is not the only aspect to think about. Weather, field conditions, obstacles, and many other elements greatly affect short field operations.
Let’s take a look at the factors to consider when carrying out a short field landing.
Short Field Landing Considerations
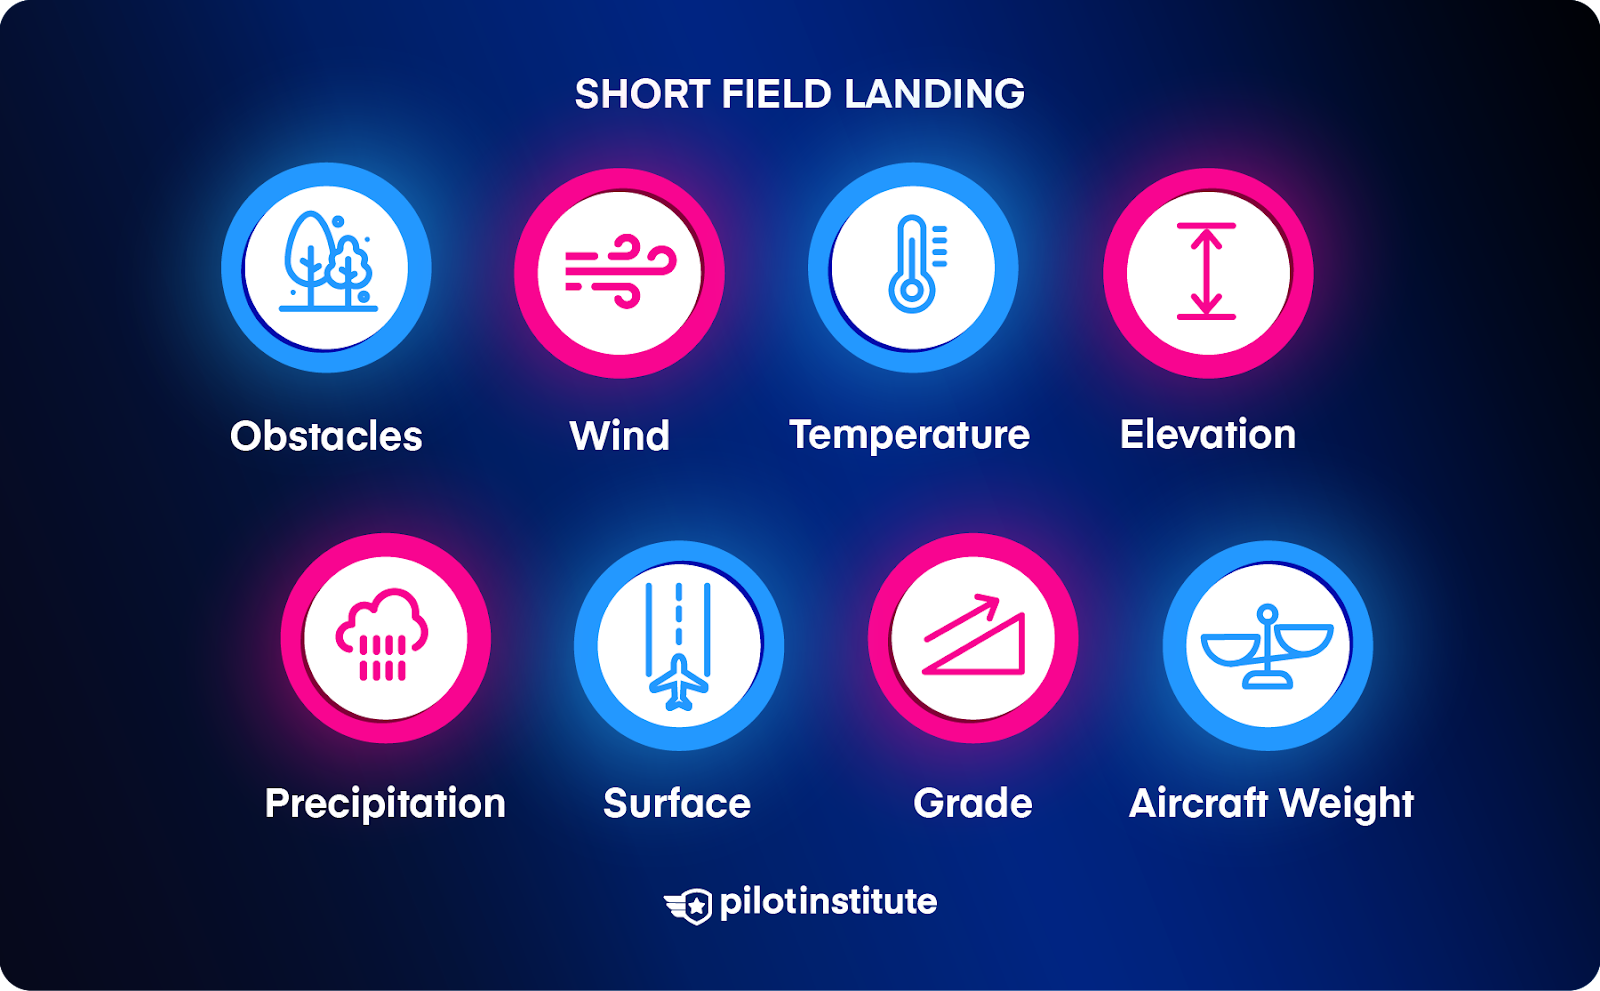
Wind
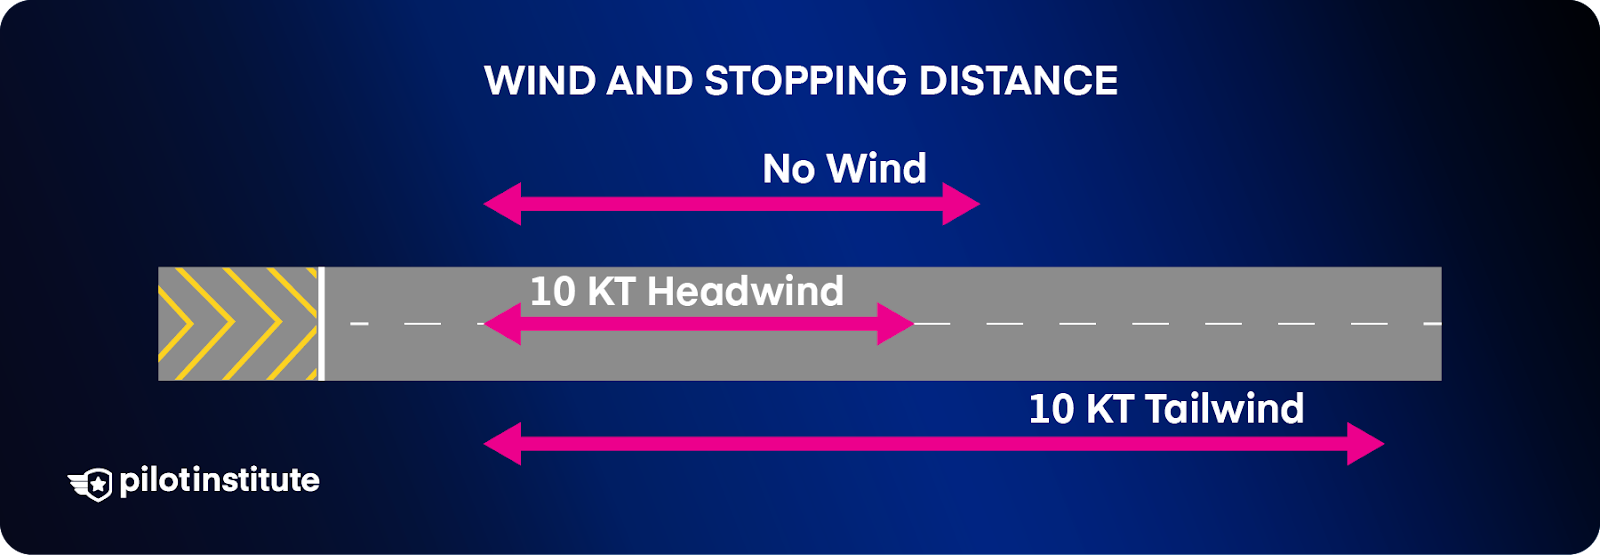
The wind is one of the biggest factors affecting landing distance.
A headwind helps reduce the landing roll. In the Cessna 172S Pilot’s Operating Handbook (POH), the landing distance decreases by 10% for every 9 knots of headwind.
Tailwinds substantially increase landing roll. For the Cessna 172, landing distance increases by 10% for every 2 knots of tailwind.
Aircraft Weight and Limitations
An aircraft’s weight affects inertia and stopping distance. The greater the mass of the aircraft, the longer the landing roll.
The POH lists landing distances for specific gross weights. Smaller aircraft may only have short field landing distances for maximum gross weight.
Temperature
An increase in temperature will increase the density altitude. A high density altitude decreases the performance of the engine and the wing.
Your aircraft will fly at a faster true airspeed at higher density altitudes. Landing distance will increase, and go-around and takeoff performance will decrease. It only takes a 10% increase in approach speed to increase the landing roll by 20%.
Elevation
As the elevation increases, air density decreases.
If the airfield is at a high altitude, aircraft performance will be worse than at sea level. The effects of a high-altitude airport are similar to flying on a hot day.
If the high-altitude airport is also experiencing high temperatures, wait until cooler hours. A go-around in such conditions might be impossible.
Obstacles
Small airports with short runways tend to have more nearby obstacles than large airports. These obstacles frequently affect the approach and missed approach paths.
Plan your approach path carefully to eliminate large pitch and power changes. Any substantial changes to speed and descent rate will destabilize the landing.
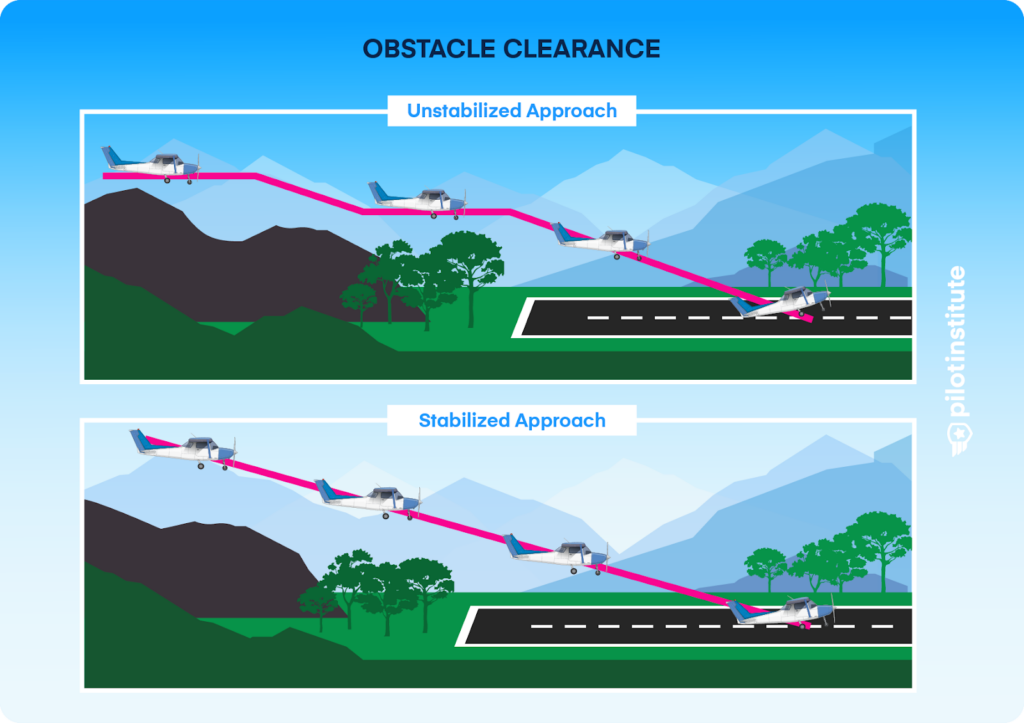
An obstacle close to the arrival end of the runway requires a steeper-than-normal approach. If it prevents you from landing close to the threshold, a short runway becomes even shorter. Plan for this reduced available landing distance in your landing calculations.
Take obstacles on the departure end of the runway into consideration as well. If you need to perform a go-around, fly at VX (best angle of climb). This will help you climb higher than the obstacles during the maneuver.
Precipitation
Rain can make a paved runway slippery and a grass runway boggy.
The published landing distances in the Cessna 172S POH are for a dry runway. Maximum braking on a dry surface is significantly better than on a wet surface.
The Cessna POH doesn’t say what to do if there is a wet runway. However, The Flight Safety Foundation offers a good rule of thumb. Increase landing distance on wet runways by a factor of 1.3 or 1.4. Your aircraft’s POH may have specific recommendations.
Surface
A paved runway always provides the best braking performance. When landing on grass or dirt strips, the tires have less friction to work with. Also, brake usage must be minimal during soft field operations to protect the nose gear.
The Cessna 172 POH states the landing distance increases by 45% on dry grass runways. This is a significant increase in ground roll. If the grass is wet, braking action will decrease even further.
Grade
The runway’s grade (slope) directly affects landing distance.
Most runways are designed to be as level as possible. However, truly short runways tend to be less evenly graded than major airports.
Landing uphill is always favorable for performance. A downslope landing will increase the ground roll as gravity works against you. The Flight Safety Foundation suggests increasing landing distance by 10% for every 1% of downhill slope.
Optical Illusions

Optical illusions can cause pilots to fly higher or lower on the approach than they should. This can greatly impact landing performance and obstacle clearance.
If a runway has a downslope, you see less of the runway ahead of you, making the aircraft feel low. If you don’t anticipate this illusion, you may approach too high and miss your landing spot.
Narrow runways make you feel like the runway is far away and you’re flying too high. Flying low to counteract this illusion can put you in danger of hitting obstacles.
Ensure you know runway slope and width before attempting a short field landing.
The Aerodynamics of Short Field Landings
Short-field landings require you to fly as slowly as possible when touching down. This sets you up for the shortest possible ground roll.
VSO is the stall speed in the landing configuration. With a short field landing, we aim to be at 1.3 x VSO (or POH recommendation) by around 500 feet AGL. This gives you a safe buffer on the stall speed and plenty of time to stabilize.
Remember, you will be at the back of the power curve, just like during slow flight. In this region of reversed command, use power to control altitude and pitch to control airspeed.
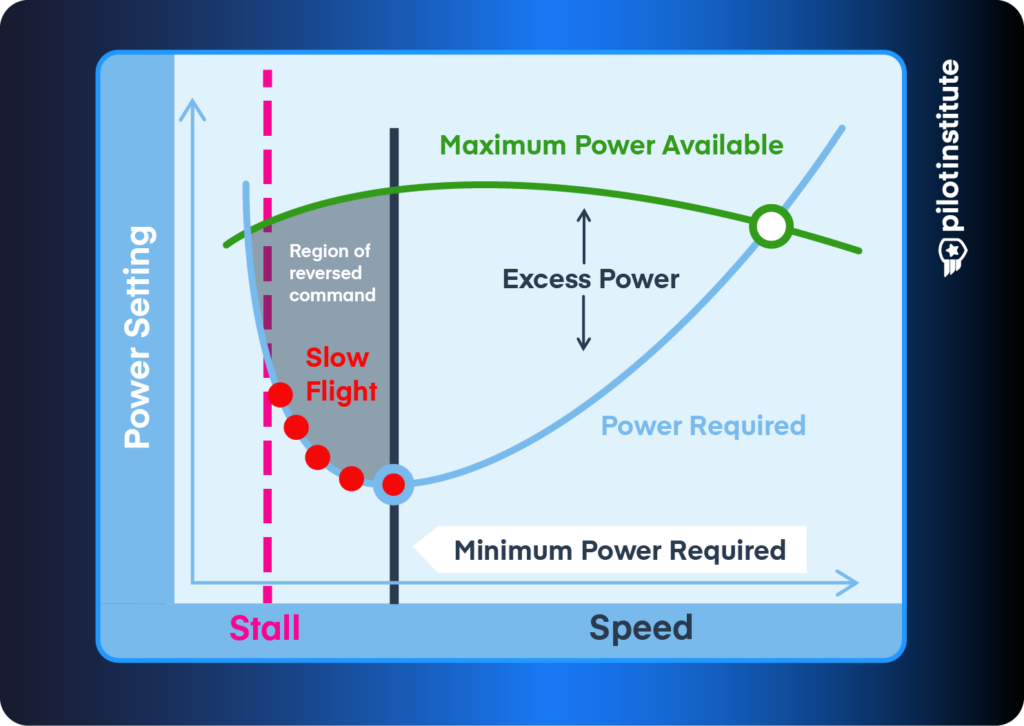
For example, pitch down to increase your airspeed if you are too slow or raise the nose if you are too fast. Add power if you’re too low or reduce it if you’re too high.
While flying slower than usual, you might notice “mushier” controls than you’re used to. This is because there is less airflow over the control surfaces. You will need more control deflection to get the aircraft to react. Practicing slow flight helps you learn to harmonize the controls at a slow speed.
Preparing for a Short Field Landing
Prepare for a short field landing by carefully considering configuration and aircraft performance.
Aircraft Configuration
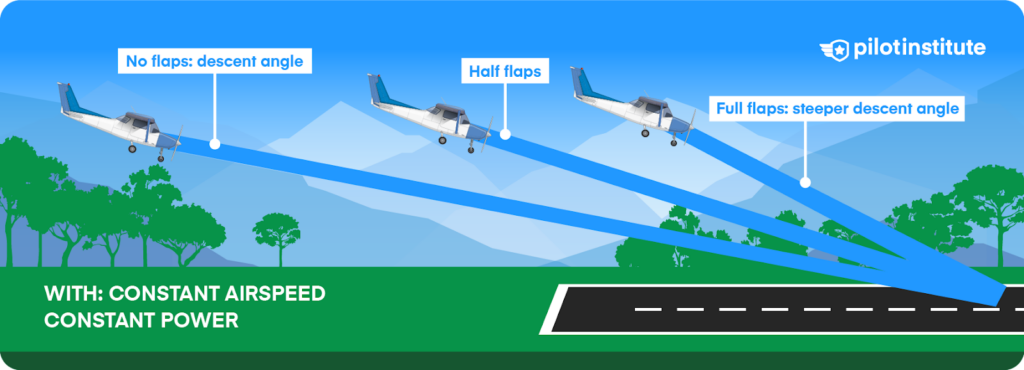
Know your approach speed and configuration for a short-field landing. Full flaps are generally used since they lower approach speed and increase drag. The drag allows for a steeper descent, which is particularly helpful when avoiding obstacles.
For the Cessna 172S, we fly a short-field approach with full flaps at 61 knots. A flaps-up approach offers more control on windy days but comes at a price. For a Cessna 172, a flaps-up landing increases the approach speed by 9 knots and the landing distance by 35%.
Landing Performance

Let’s run through a landing distance calculation example using the Cessna 172S POH. We’ll assume a paved, level, dry runway, and full flaps.
Our imaginary destination airport is at 1,500 feet MSL. The local altimeter setting is 29.65, the temperature is 25°C, and we have a 9-knot headwind. Forty-foot-tall trees loom close to the ends of the 2,000-foot-long runway.
Start by calculating the pressure altitude. Subtract the altimeter setting from 29.92, multiply it by 1,000, and add that to the field elevation.
Pressure Altitude = (29.92 inHg – 29.65 inHg) x 1,000 + 1,500 ft. = 1,770 ft.
To add a buffer, we can round 1,770 feet up to 2,000 feet. Now, we can use this pressure altitude and ambient temperature to determine landing distance.
The chart gives two values: ground roll and total feet to clear a 50-foot obstacle. The first value tells us how much runway we will need to stop after the wheels touch the runway. The second value is the total distance to overfly a 50-foot obstacle (trees, power lines, etc.), reach the runway, and stop.
The temperature at our airport (25°C) is between charted distances. There are a few ways we can calculate distances that are between published values:
- Round Up.
- Estimation.
- Interpolation.
We rounded up when determining the pressure altitude. That approach is fine since it results in a more conservative (longer) distance. Likewise, using the 30°C distances would also be acceptable.
Estimation would also work well in our example. Since 25°C sits exactly between 20°C and 30°C, we could easily find the average of the two values.
However, if the desired value is not exactly in the middle, we must use the interpolation method. Let’s see how interpolation works.
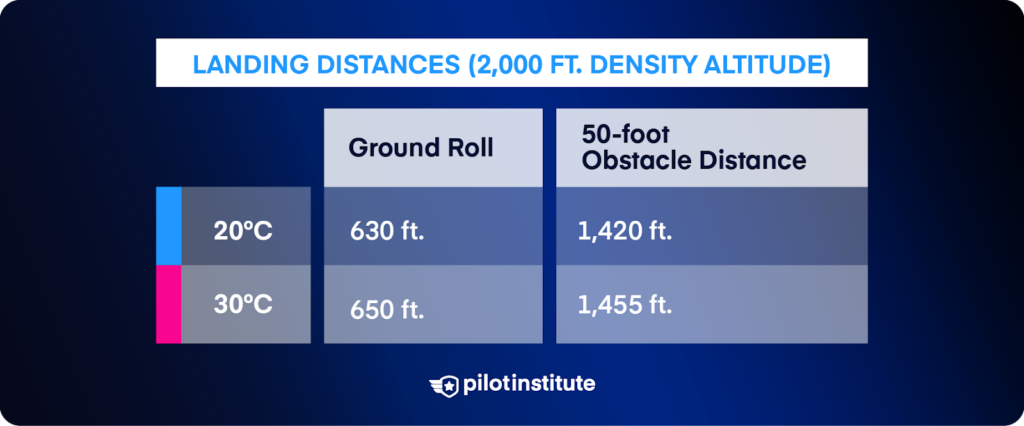
First, let’s write down the landing distances from the POH for 20°C and 30°C.
Now, find the difference between the 20°C and 30°C distances.
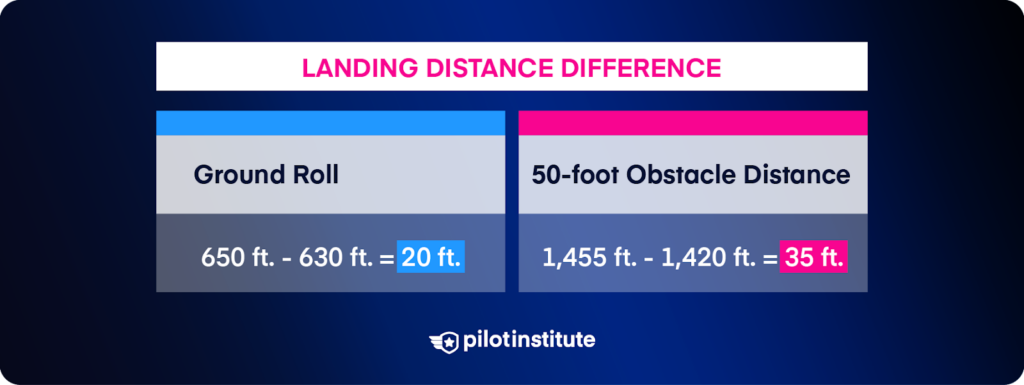
Since the chart temperatures are 10 degrees apart, divide the differences by 10.
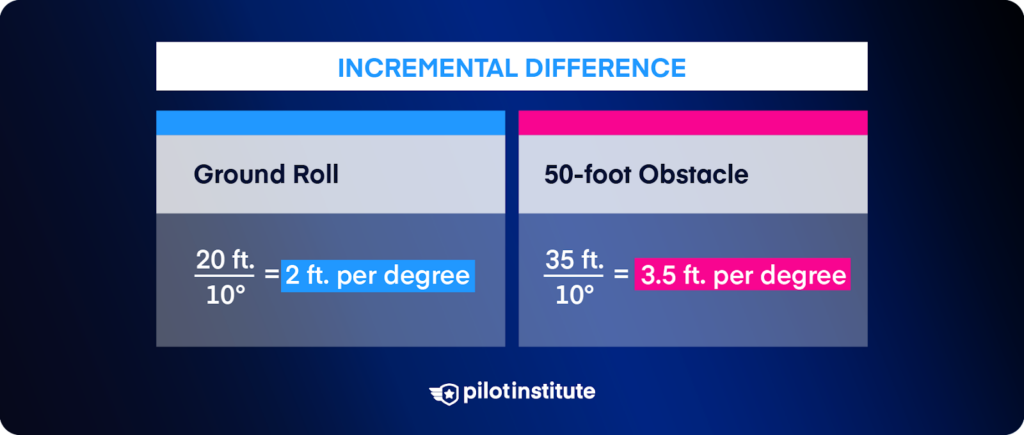
These values tell us that for every one-degree increment over 20°C (up to 30°C), ground roll increases by 2 feet, and the total distance over a 50-foot obstacle increases by 3.5 feet.
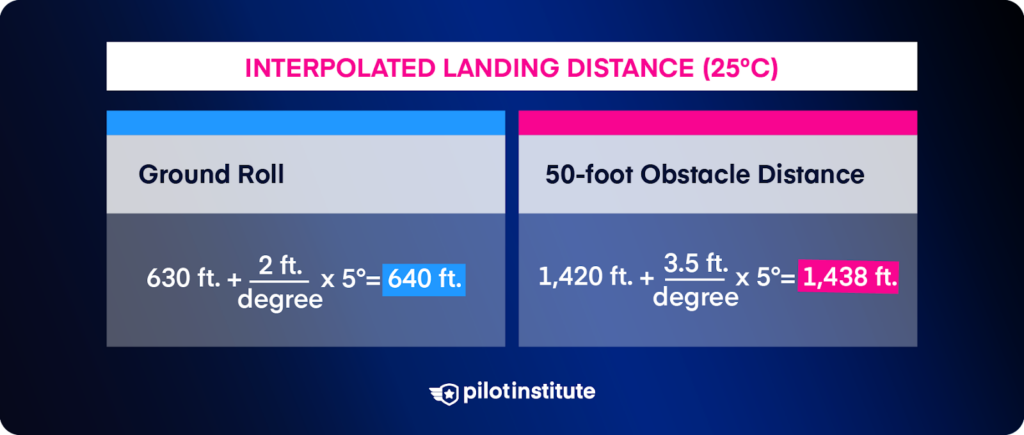
Our target temperature is 5°C warmer than the lowest value of 20°C. Multiply the incremental differences by 5 (degrees) and add them to the 20°C distances to get our 25°C distances.
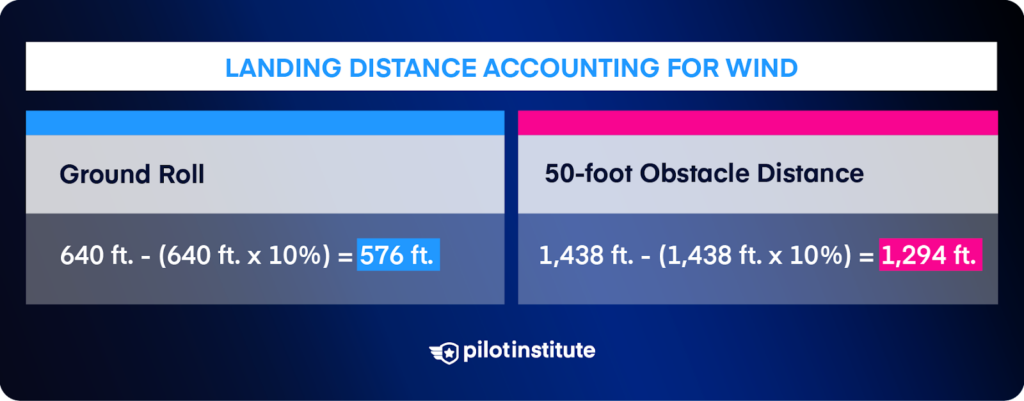
Let’s factor in the 9-knot headwind. For every 9 knots of headwind, we can decrease the distances by 10%.
Adding a substantial margin on top of the calculated distances is good practice. We need to account for things not going as perfectly as planned. We’ll add a 50% buffer to our distances.
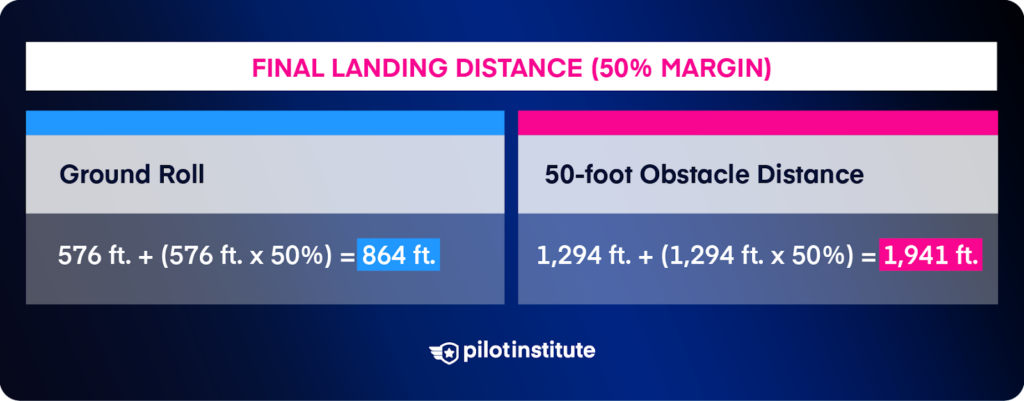
Our imaginary airport has a 2,000-foot runway. Can you safely perform the short-field landing?
Short Field Landing Procedures (Step-By-Step)
It’s finally time to put short-field theory into practice.
We’ve broken down each stage of the approach in a step-by-step guide.
Downwind Phase
- Complete the before-landing checklist.
- Determine your chosen aircraft configuration and approach speed.
- Choose an aiming point.
- The aiming point at an actual short field should be as close to the threshold as is safe.
- You can use any point in the touchdown zone during a simulated short-field landing.
- Consider any obstacles on the approach path.
- Select a designated touchdown point.
- The touchdown point is where the wheels reach the runway after the flare.
- A good touchdown point estimation is 1 to 2 runway stripes after the aiming point.
- Extend the downwind leg to give yourself a longer final (a short landing doesn’t mean a short approach).
Approach Phase
- Configure early to give yourself time. Full flaps, 1.3 VSO (or POH airspeed).
- Request a wind check or look for the windsock. Will you need a crosswind correction?
- Monitor the approach path by referencing the aiming point. Power controls the rate of descent, and pitch controls airspeed. If the aircraft is correctly trimmed, changes should be small.
- If obstacles are present, carry out a steeper approach. Anticipate how the higher descent rate will affect the roundout.
- Establish the target approach speed by around 500 feet AGL.
Roundout and Touchdown
- After you’ve cleared any obstacles and have the runway made, start reducing power.
- Airplanes with higher wing loading may need power all the way until the flare.
- Aircraft with lighter wing loading may need idle power and a nose-down pitch.
- If the approach is unstable or you will miss your touchdown point, go around.
- As you approach the aiming point, reduce power to idle if it’s not already there. Begin the roundout and flare.
- Shift your eyes down the runway as you flare.
- Touch down on the main wheels at or right above stall speed (you should hear the stall horn chirping).
- To meet practical test standards, you must touch down -0/+200 ft. (private) or -0/+100 ft. (commercial) from the designated touchdown point.
Rollout
- Lower the nosewheel carefully and apply maximum braking.
- Make sure not to lock the tires.
- Use elevator back pressure for aerodynamic braking and to keep weight off the nosewheel.
- Some aircraft models suggest retracting the flaps after touchdown. Reducing lift puts more weight on the wheels. Consult your POH.
Common Short-Field Landing Mistakes
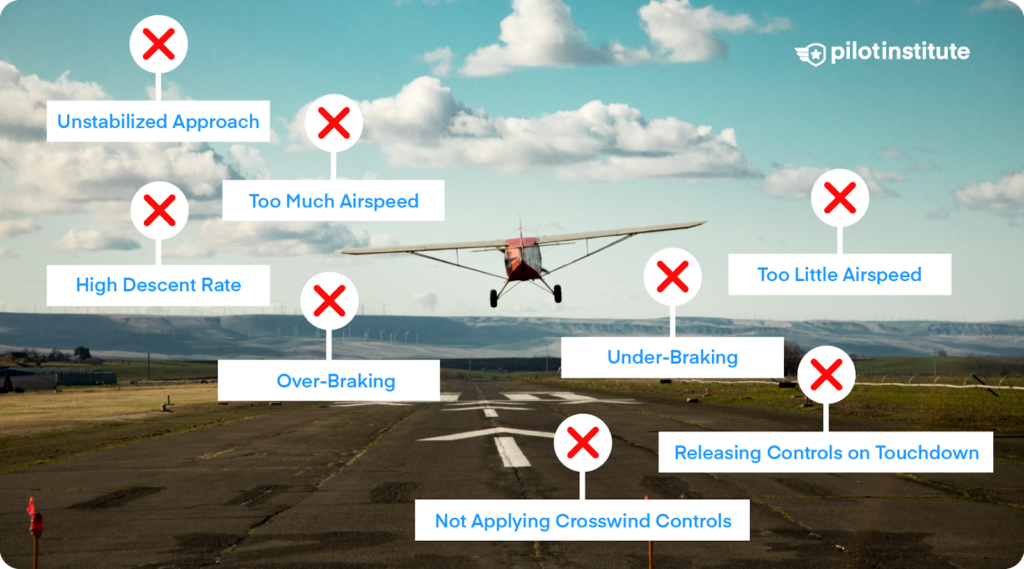
Unstabilized Approach
Unstable approaches are common when performing a short-field landing. Overcorrecting can cause deviation from the approach speed and glide path. Poor obstacle planning can cause pitch and power fluctuations.
Unstable approaches usually end with unsafe landings. If your approach becomes unstable, execute a go-around and try again.
Too Much Airspeed
Too much airspeed during the approach may cause you to balloon and float during the flare. You will overfly your touchdown point, use up more runway, and risk an excursion.
If you find yourself carrying too much airspeed, correct this early. If unable to do so, execute a go-around.
Too Little Airspeed
If you get slow, you may not have enough energy in the flare. This can cause a sudden sink and hard landing. You may even land short or, in the worst case, stall at low altitude.
To mitigate this threat, keep up a good scan and be proactive with pitch and power when you get too slow. If you are below 5 knots of your target threshold speed, execute a go-around.
High Descent Rate
A high descent rate during a short field landing makes the roundout more difficult. It also increases the chances of a hard landing. The cause is often from an unstabilized approach. Plan your descent so obstacles won’t cause large pitch and power changes.
A high descent rate can also occur when you pull the power off suddenly in the flare. To mitigate this, be smooth on the throttle when making corrections. Depending on your aircraft, you may need to keep some power in during the flare.
Over-Braking
Unnecessary overbraking can cause tire flat spots, skidding, or aquaplaning in wet conditions. To mitigate this, don’t place your feet on the brakes until after touchdown. Once the wheels are down, shift your feet up and gently squeeze the brakes until the aircraft comes to a stop.
Under-Braking
Under-braking causes you to take up more runway than expected. This may lead to a runway excursion. The published landing distances in the POH assume maximum braking.
If conducting a checkride, you might blow past the stopping point, which could result in a failure. Your examiner will want to see prompt and firm braking.
Releasing Controls on Touchdown
Many student pilots falsely assume the landing is complete when the aircraft touches down. Do not give up the controls; fly the aircraft to a stop. Make sure to lower the nosewheel smoothly onto the ground and begin braking. Use elevator back pressure to keep weight off the nosewheel.
Not Applying Crosswind Controls
Directional control becomes difficult when proper technique isn’t applied during crosswind conditions. The aircraft may drift off the runway without the correct control input. Use the rudder to keep the aircraft in line with the runway and apply aileron into the wind. You will need more aileron input as you slow down as the controls become less effective.
Applying Short Field Landing Techniques
So, we now know what a short-field landing is and how to carry one out.
But what else can we use the short-field landing technique for? You’ll be glad to know that you can apply aspects of it to other maneuvers.
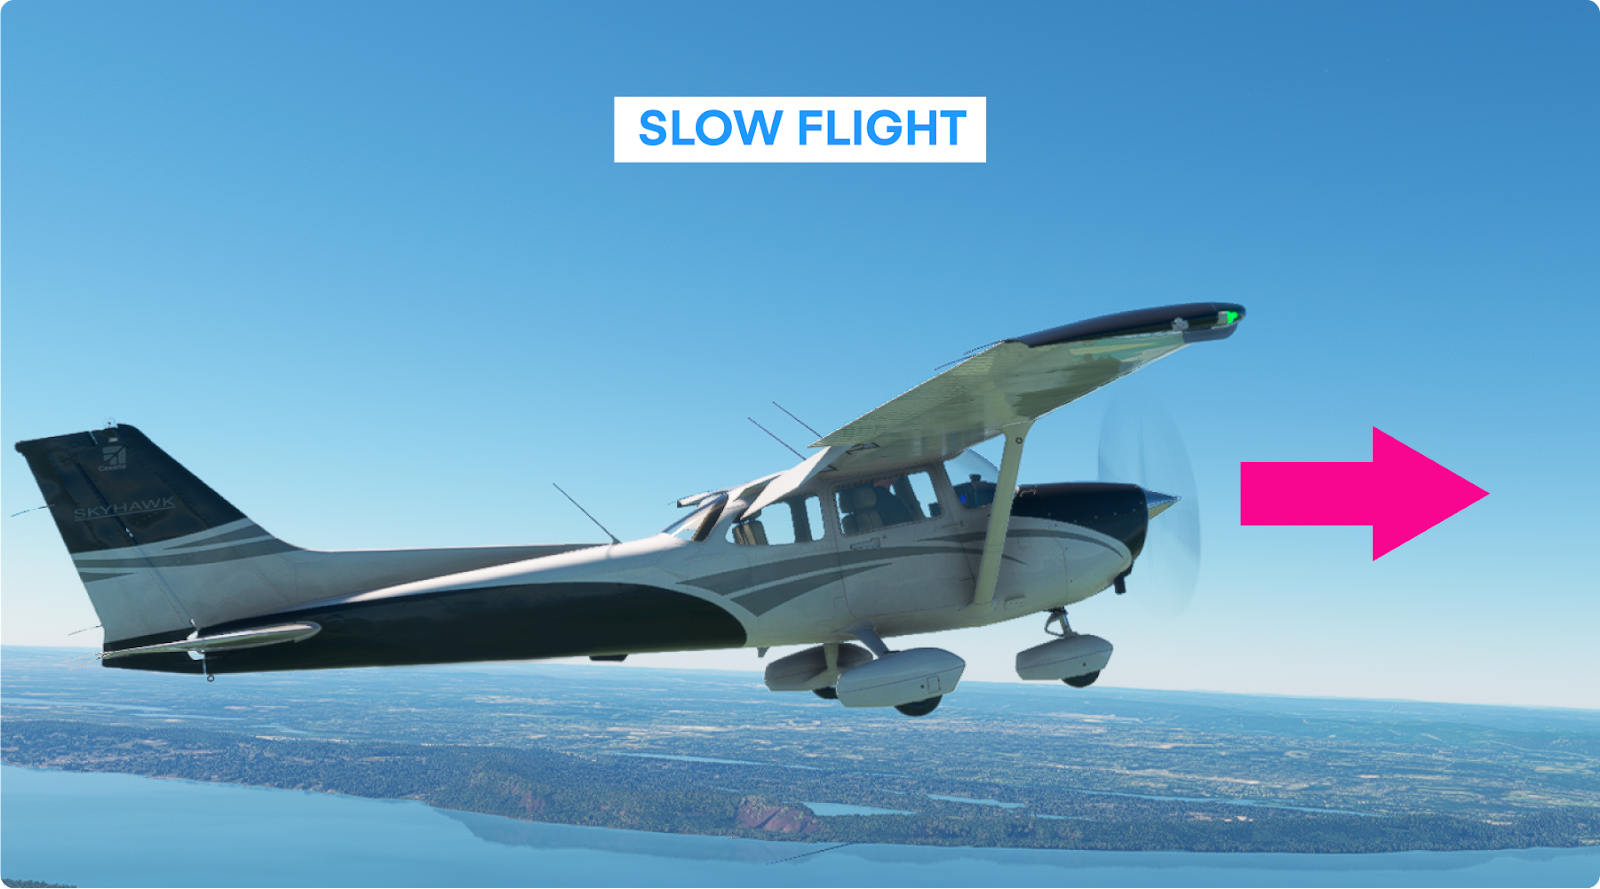
Slow Flight
This maneuver is an excellent way to practice flying at slow speeds. It builds confidence in the pitch/power relationship behind the power curve.
Power-Off 180s and Precision Approaches
Landing without power requires precise speed control and energy management during the approach. It’s a short-field landing and power-off landing combined.
Crosswind Landings
Short-field landings teach you to fly slowly and precisely. These stick and rudder skills will help you with crosswind landings. The two techniques frequently go hand-in-hand. Almost every landing is a crosswind landing, after all.
Emergency Landings
The short field technique is critical to know should you need to land off-airport in an emergency. Practice simulated emergency landings frequently to brush up on your energy management skills.
Conclusion
Students often find the short-field landing difficult to grasp. The feeling of being slow on approach so close to stall speed can be nerve-racking.
One of the best ways to practice flying with precision just above stall speed is slow flight. The skills learned in this maneuver will help your short-field landings and make you a better pilot.If you’d like to know more about slow flight, check out our step-by-step article on the maneuver.