-
Remote controller
-
Batteries
-
The aircraft
- Parts of the drone
- Installing the propellers
-
Preflight
- Find a good spot
- Landing pad
- Check for controlled airspace
- Check the weather
- Prepare the drone
- Do you need to activate your drone?
-
Flight settings
- Flight mode
- Geofencing
- Altitude and distance
- Obstacle avoidance
- Advanced safety settings
-
First flight
-
Other flight tips
-
Camera settings
- Overview
- Pro camera mode
- Video mode
-
Automated Flight Modes
- Subject tracking
- Master Shots
- Quick Shots
- Hyperlapse
- Pano
-
Final thoughts
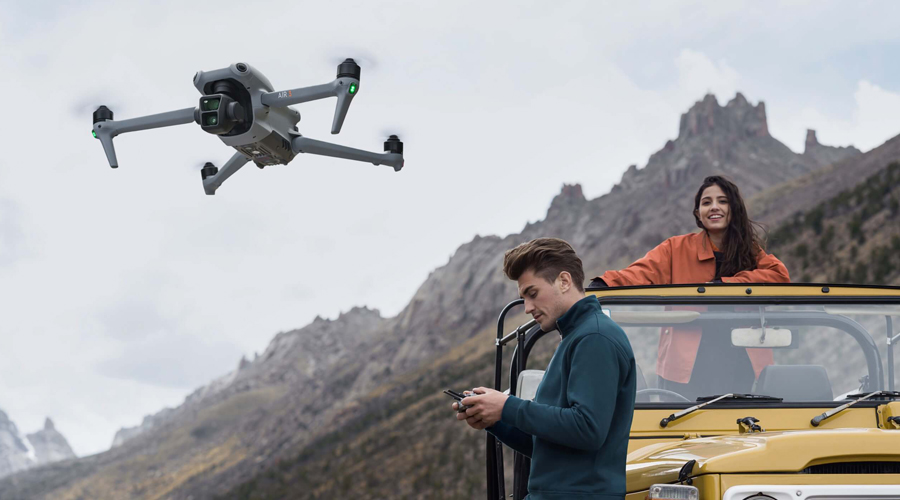
Just a few weeks ago, DJI released the long-anticipated Air 3. The successor to the hugely popular Air 2S comes with a couple of nifty tricks up its sleeve, not the least of which are the dual cameras, an extended battery life, and compatibility with the new RC2 remote controller.
There is no doubt that there will be a lot of new owners of the DJI Air 3 in the coming weeks or months. If this pertains to you, then strap in; this is the article to read when you want to get started with the Air 3 and use it to its maximum capabilities.
Remote controller
For this guide, we will be going through all the basic parts and accessories of the drone. Let’s start with something simple – the remote controller. The Air 3 comes with the new RC2 controller by default, a fairly sleek controller with a built-in screen. There is also an option to buy the Air 3 with the RC-N2 controller, which will require a secondary device to act as a screen with the partner app running.
The only major thing to note with the RC2 controller is that you can orient its antennas in any direction. Naturally, you will want to point them as close as possible to the location of the drone. Everything else about the controller is essentially the same, and you should become familiar with it easily if you have used a DJI drone before.
The flight sticks are stowed at the back of the controller, and you will have to screw them in the proper slots. At the center of the controller are three important buttons:
- The power button;
- The button to swap between Normal, Sport, and Cinematic Modes;
- And a Return-to-Home (RTH) button
On the trigger positions are buttons to take a photo and start recording a video. There are also buttons here to control the zoom of the camera and the position of the gimbal. Lastly, there are two customizable buttons at the back portion of the controller for which you can assign functions using the Settings menu.
The controller has an SD card slot at the bottom that can be used to store the screen recording as viewed on the controller. Take note that there is also an SD card on the drone itself; this is the better option if you want to record high-resolution videos from the drone camera.
Batteries
The DJI Air 3 uses a 4241-mAh Intelligent Flight Battery. The published maximum flight time for the Air 3 on a full battery is approximately 40 minutes. In real-world testing, the flight time will likely be lower depending on conditions such as wind speed, temperature, and altitude.
If you have the Fly More combo, you should have three batteries that fit into a nice charging dock that also doubles as a transport and storage container. Pressing the button at the top lights up the LED indicators for the current battery level.
The battery slips into the back of the Air 3 and should lock in place with minimal effort. Take note that you will need to unfold the propellers to make room for the battery to go in.
As with other DJI Intelligent Flight Batteries, the batteries of the Air 3 have some nice features like auto-discharging when kept in storage for too long and automatically stopping recharging when they are full.
The aircraft
Parts of the drone
Looking around the drone, you will want to take note of a couple of things:
- The drone has two camera sensors mounted on a three-axis gimbal. When the drone is powered up, this gimbal will automatically calibrate and stabilize. The gimbal is one of the more delicate parts of the drone, and you want to keep it away from dirt, sand, or excess humidity. During transportation and storage, make sure to attach the gimbal cover that comes with the drone.
- The drone has four obstacle avoidance sensors, two at the front and two at the back. The sensors are angled by about 45 degrees, allowing them to provide 360 degrees of coverage. The drone also has a sensor at the bottom that helps it maintain altitude when flying close to the ground.
- The propeller arms look just like the standard propeller arms of any ultra-portable drone. At the tip of these arms are the motors to which the propellers are attached. Also integrated into the front propeller arms are the drone’s antennas. You will want to pay attention to these during landing to make sure that they do not get damaged by landing too fast or with too much forward motion.
- At the bottom and rear parts of the drone, there is a slot to place a microSD card. This is for the storage of high-quality footage directly from the drone’s camera.
Installing the propellers
Your Air 3 should come with a few sets of propellers. There are two different kinds of propellers here distinguished by both how they look and by the presence or absence of a silver mark at the bottom side. Two of the propeller motors also bear this silver mark. As you can imagine, the silver propellers go to the silver motors.
To install the propellers, you will want to push them down on the motor and turn them either clockwise or counterclockwise. There is no way to mess this up, as you will not be able to install the propellers otherwise. Make sure that the propellers are snugly in place and do not come off easily.
Preflight
Find a good spot
If this is your first drone (or the first time you’re flying the Air 3), it would be good to do a test flight in a large and uncrowded open area with few potential obstacles. To be safe, maintain a distance of at least 50 feet from any trees or large structures. Keep an eye on any nearby mountains, parked cars, streets, highways, animals, and people.
Landing pad
A landing pad is always a good idea, whether you’re doing a test flight or not. It’s a good way to keep any dirt, sand, or dust from your drone, particularly from its gimbal. This is also a good way to have a clean, flat landing and takeoff surface if you’re flying in a spot with tall grass or uneven terrain.
Check for controlled airspace
If you’re flying in a spot where you’ve never flown a drone before, make sure that you are not in controlled airspace. There are about a dozen apps that can help with this, but for this guide, we are featuring Aloft Air Control.
As soon as you open the app, it should have a pin on the map of your actual location. This will already tell you if the spot you are in and the surrounding areas have any controlled airspace. If you do find yourself in controlled airspace, you can also use the app to secure LAANC authorization.
LAANC is a system that allows you to request airspace authorization from the FAA and receive a near-instant response. For the purpose of flight testing, make sure to request authorization as a recreational pilot. The authorization will also indicate the maximum altitude you are allowed to fly up to.
Check the weather
You will want to do your test flight on a day with nice weather – sunny, dry, not windy, and the clouds are not too low.
Prepare the drone
First things first – make sure that you have a fully charged battery, and that it has been inserted all the way into the rear portion of the drone. The battery should lock in place and should not move at all. With that in place, double tap and hold the power button at the rear of the drone until you hear a beep. The drone has now been powered up.
Place the drone down on the landing pad and grab your controller. You will want to unfold the antennas and make sure that the flight sticks are in place. To turn on the controller, just double-tap and hold the power button.
Do you need to activate your drone?
You might already have done this before going to the site of your test flight, but every new DJI drone will need to be activated. This is a simple process. You will need to sign up for a DJI account if you don’t already have one. You will then need to link the drone to your account.
Flight settings
Upon turning on the controller, you will either be greeted with the splash screen showing the Air 3, or the view of the drone’s camera. If you get the splash screen, simply click “Go Fly” and you should then be switched over to the drone view.
Flight mode
At the top left of the main screen, you should see the text “N Mode.” This simply means that you are currently flying in Normal Mode. You can easily switch to Cinematic Mode or Sport Mode using the middle button on the controller. For your test flight, it would be best to stick to either Normal Mode or Cinematic Mode.
Geofencing
Right beside the text that states the mode, you should see a statement on whether takeoff is permitted for your drone. This is a function of DJI’s built-in GeoFencing function. Hopefully, you are not in controlled airspace for your test flight, and you do not have to deal with this for now.
If you are within any of DJI’s Warning or Restricted Zones, you will need to go through an extra authorization process to get your drone to take off. The exact process may vary based on the flight restrictions in your location. Check out our detailed guide on how to unlock GEO Zones for DJI drones
Altitude and distance
Tapping on the text that says “Takeoff permitted” will bring you to another menu that shows a few important flight parameters. For now, focus on setting the RTH Altitude. This is the altitude at which the drone will fly when the RTH mode kicks in.
The rule of thumb here is to set the altitude such that the drone will clear any potential obstacles nearby. This is important if you’re near large objects such as mountains and buildings. Also, take note of the maximum allowed altitude for the airspace you’re flying in.
In this menu, you can also set the maximum altitude for the drone. This is good for when you need to keep this to within 400 feet in the meantime, or the altitude ceiling for the airspace you are in. It is then recommended to set the maximum distance to around 2000 feet, which is more than enough if you’re within the limits of visual contact.
Obstacle avoidance
Go back to the main drone view and tap on the three dots in the upper right corner of the screen. This will bring up more settings. For now, go to the Safety tab.
In this tab, you can set how the drone will behave with respect to obstacle avoidance. If the system is activated, the drone will either Brake or Bypass the obstacle. Either setting can be used. If you’re using the Bypass option, set it to Nifty so that the drone flies smoothly during obstacle avoidance.
From here you want to scroll down and set the Advanced RTH option to Optimal.
Advanced safety settings
Scroll all the way close to the bottom of the Safety section and look for Advanced Safety Settings. Click that option.
From here you can set the response of the drone should its connection with the controller be lost. The best option here would be for the drone to activate RTH mode. Hover can also be considered if you’re flying in a small space or indoors. There is really no good reason to choose the Descend option.
Below this, you will see an illustration of the flight stick maneuvers that will automatically stop the drone’s propellers. Set this option to activate in “Emergency Only.” It is quite easy to accidentally crash a drone if you set this option to activate “Anytime.”
Below that is the option to activate AirSense. This is a feature that will let you know if there are any manned aircraft flying nearby. This is useful for safety, so turn it on.
First flight
With all the basic settings in place, you are now ready to go on your first flight with the DJI Air 3.
Move back from the drone and do a quick scan of your surroundings. Check for any nearby aircraft, both visually and by sound. Also, check for any nearby people or animals. Just be aware of where they are located, as you will want to avoid having your drone fly over them.
On the top right of your controller’s screen is a number beside a satellite icon. This indicates the number of GPS satellites the drone is receiving signals from. A higher number is good and indicates good GPS reception and a more accurate location.
To start the propellers, bring the left flight stick to the bottom right corner and the right flight stick to the bottom left corner. Doing this simultaneously should start the rotation of the propellers. Right before taking off, give a loud verbal warning to the people nearby. Simply shift the left stick up (very slowly and carefully) and the drone will start to gain altitude.
The drone can also take off automatically. To do this, simply click the up arrow located on the left side of the screen. As the guide states, this will fly the drone to an altitude of 1.2 meters. The rule on warning everyone nearby also applies here.
Continue to gain altitude using the left stick until around 200 feet, or until you are well clear of any obstacles. Keep an eye on the numbers on the bottom left of the screen which will tell you the altitude of the drone.
Now is a good time to build some familiarity with your drone’s controls. Once you are at a comfortable height, push the right stick forward to fly the drone in the forward direction. To control the gimbal, simply turn the gimbal control wheel located at the left of the controller to pan the camera up or down. You can then try to view the drone forward or background again in this position.
Use the right flight stick to have the drone fly in either right or left directions. You can then also use the flight stick to have the drone rotate also in either right or left directions.
Play around with the controls to get a feel for how quickly the drone responds when you move the flight sticks. It is typically better to be very gentle with your movements to capture smooth aerial footage.
Play around with combining movements from both left and right flight sticks. For instance, pushing the right stick forward while pushing the left stick to the left will have your drone flying in a circle to the left.
Other flight tips
- At the bottom right corner of the screen is a small map that shows the location and orientation of the drone, as well as your position labeled as “H” or “Home.” This is a useful tool for regaining your bearings should you get disoriented
- While flying, always keep an eye on the drone’s battery level. At the upper right of the portion of the screen, you will see the percent of remaining battery power as well as the number of minutes before it gets depleted. Tapping the text will bring up an expanded window that counts down the time until either RTH or forced landing is activated.
- Keep in mind that the estimated time for the battery to get depleted depends greatly on weather conditions or how you fly your drone. If a drone has to fly against strong winds, it will use up much more power and will have a shorter flight time.
- The easiest way to land your drone would be to activate the RTH function to have the drone fly automatically to your position. Right when it’s on top of you, take control of the drone again and land it manually.
- It’s easiest to land the drone facing away from you. This eliminates any confusion between your right and left directions. Check that there are no nearby people or animals before reducing altitude. From this position, slowly decrease the altitude of the drone while trying to navigate it to land on your landing pad. As it gets closer to the ground, the drone will go into auto-landing mode using the downward-facing sensor.
- Consider flying with a visual observer. Aside from having extra eyes on the drone, flying with someone is a good way to keep you from getting distracted should someone approach you. Drones do attract a lot of attention if you’re flying in a public place.
Camera settings
Once you’re comfortable with flying, it’s time to play around with the camera settings to make your shots look as good as possible. There is a lot that you can do here and it helps plenty if you have photography experience.
Overview
Most of the camera settings can be accessed using the buttons on the far-right end of the controller screen. Right in the middle of this section is a large white circle which is the shutter button.
Click the small white rectangle at the top to bring up a small window. Under “Photo” are Single, AEB, Burst, and Timed modes. Most of these are self-explanatory, but AEB standards for Auto-Exposure Bracketing, a useful mode for capturing the same shot at different exposure levels.
Exit out of this menu by clicking the main screen. Right beside the shutter button and to the left is a slider that goes from 1x to 3x. This corresponds to the two cameras of the drone. Also below this is the button that activates “MF” or “Manual Focus.”
Pro camera mode
At the bottom corner of the screen, you will see an icon that either says “Auto” or “Pro.” As you might have guessed, this toggles between Auto and Pro camera modes. The Auto mode is not particularly recommended if you want to take good drone shots, so it’s worth taking the time to learn the Pro settings.
Going to Pro mode will bring up a cluster of parameters that you can adjust. Clicking the cluster on the right will bring up another menu where you can adjust values for ISO and Shutter Speed – play around with these to make sure that you are not shooting in Auto mode.
Exit from this menu and click on the left cluster of parameters, which will bring up another menu. Here, you can see the format in which the images are being saved, as well as the aspect ratio and resolution of the images. At the very top of the menu is the White Balance, which controls the color temperature of your images. Play around with this slider and observes how extremely low and high values create blue or orange hues, respectively.
If you need more detailed help on how to set up the camera of your Air 3, then you can sign up for our fairly inexpensive Drone Flying 101 course.
Video mode
To start recording videos, go back to the main menu we pointed out first and select the Video option. The white shutter button should now become red, indicating that pressing it will start recording the video.
Under Video mode, you will notice unique options on the left side – Normal, Night, and Slow Motion. These should be self-explanatory.
The camera settings we have discussed in Photo mode also apply in Video mode. A notable difference is the option to switch between Color Profiles. This can be accessed by clicking on the left cluster of image parameters. If you’re not familiar with these settings, the safest bet would be to keep the Color Profile at Normal and the Coding Format at H.265.
As for resolution and framerate settings, you really cannot go wrong with recording at 4K and 60 fps. These are pretty much standard settings even for professional aerial footage.
Automated Flight Modes
The DJI Air 3 comes with a wide selection of Automated Flight Modes. This will help you record some pretty cool shots with flight maneuvers that would have been quite difficult to pull off manually.
Subject tracking
One of the cooler features of the Air 3 and many other DJI drones is their ability to automatically track and follow moving objects. To do this, simply choose the subject on your controller’s screen and drag a rectangle to cover that subject with your finger. This will automatically activate one of several subject tracking modes.
Doing this action will bring up a small menu at the bottom of the screen showing three modes – ActiveTrack, Spotlight, and Point of Interest. In Spotlight mode, the drone will stay in place while keeping the camera trained on the moving object. In POI mode, the drone will simply rotate around the subject while keeping the subject in focus. The drone can move if necessary in POI mode, and can even be flown manually.
ActiveTrack, as the name implies, will have the drone actively follow the chosen moving subject. You can even decide whether the drone will stay behind the subject, at the front, or at the side. This can create some wickedly cool action shots, especially for fast-moving subjects.
With the drone flying essentially automatically, its obstacle avoidance system is kept activated to keep it from crashing into objects. The drone can navigate through objects to keep your desired subject in the camera frame.
Master Shots
MasterShots is a great way to capture several cool shots quickly and with almost no effort. All you need to do is to select a subject and the drone will automatically take a bunch of pre-programmed shots and flight maneuvers.
Activating MasterShots might take a few minutes. At any point, you can pause or stop the process should there be any nearby obstacles or similar emergencies. When it’s done, the drone will fly back to its original position.
From the controller, you can make a quick edit of your MasterShots video complete with transitions and background music. This is great for making clips out of your drone shots that you can quickly show off on social media.
Quick Shots
Quick Shot is a mode that simply breaks down all the flight maneuvers that you might have already seen in MasterShots mode. Again, all you need to do is to pick a subject, select a Quick Shot mode, and keep your eye on your drone as it flies around automatically.
Quick Shots are fun to play around with and have been a staple in DJI drones through the years. The appeal of any of these Quick Shot modes is a matter of preference.
Hyperlapse
Hyperlapse is a mode that allows you to create time-lapse videos using your drone. You can set the drone to move along a fixed path or pre-determined waypoints while taking a series of photos that will be composed into a video. This takes a bit of practice to get right, and not all scenarios are suitable for Hyperlapse videos. This is another mode that is fun to play around but will take a bit more patience than the others.
Pano
Panoramic shots are quite common so this does not require much explanation. The implementation of this mode in the Air 3 is a little more complicated though, because there are many ways to make panoramic shots with a drone.
Your options will include shooting a full 360-degree sphere, a 180-degree half-circle, a very wide-angle shot that is actually a composite of nine images, or a vertical panorama. This is great for capturing shots of exceptionally large subjects or very expansive sceneries.
The Automated Flight Modes of the DJI Air 3 offer ways to create impressive and dynamic shots without having to be an expert drone pilot. Practicing and playing around with these modes and combining the effects is a great way to build up your skills and portfolio of drone shots.
Final thoughts
With the new Air 3 out now, we expect it to be the drone of choice for many new drone pilots. It’s easy to understand why – the Air 3 is not too expensive, accessible to newcomers, and is a perfectly capable drone with an impressive camera and an excellent set of features.
If you want to learn more about flying the Air 3, check out a free Air 3 Deep Dive course that we will be offering for free on our Drone Courses page!