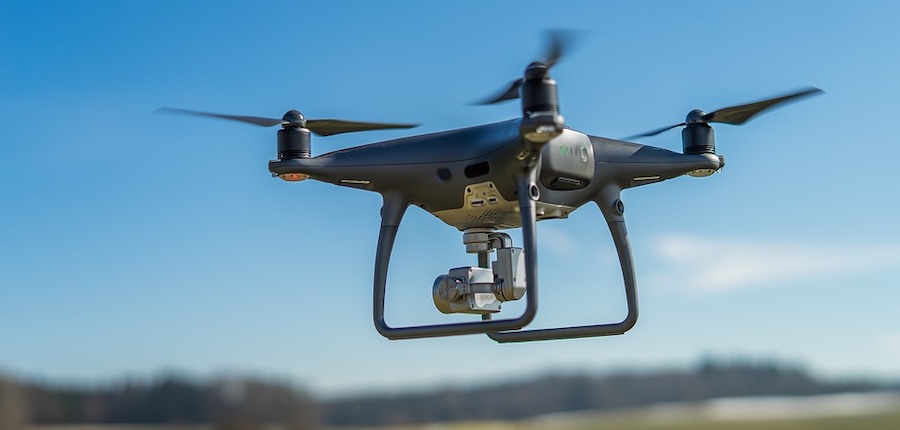
DJI announced the Inspire 1 in November 2014. A hefty drone weighing 6.5 pounds and offering up to 15 minutes of battery life, it gave remote pilots the ability to rotate the camera a full 360º in flight, and tilt 125º, along with the ability to swap out cameras and lenses. This was a vast departure from the typical consumer-grade drones equipped with fixed focal lengths and, comparatively, limited camera maneuverability.
It wasn’t long until its successor, the Inspire 2, was released in September 2016. This time around, an additional FPV camera, ideal for dual-operating setups, obstacle avoidance sensors, and a superior 5.2K video framerate, compared to the Inspire 1’s 4K video, was included. DJI made some much-needed improvements to its professional-grade drone aimed at cinematographers.
Six and a half years on, DJI has unleashed a truly ambitious offering with the Inspire 3. This drone builds upon the past few years of DJI’s innovative measures found in other models – particularly the Mavic 3 series. Made primarily of carbon fiber, the body is slimmer, sleeker, and more aerodynamic. The O3+ transmission system gives it a significantly longer range. The compatible 45-megapixel Zenmuse X9-8K Air camera is a natural progression from the 24-megapixel X7 camera that works with the Inspire 2.
In spite of these significant upgrades, it’s hard to ignore the fact that the Inspire 3 is considerably pricier than its predecessors. For professional photographers, cinematographers, or well-off hobbyists, the question begs itself: is the Inspire 3 a must-have tool in the arsenal? For those who already own an Inspire, is it worth the upgrade? Let’s find out.
How they compare
| Inspire 3 | Inspire 2 | |
| Starting Price | $16,499 | $5,299 – $7,599 |
| Gimbal Camera | Full-frame sensor, Dual- Native EI 800/4000 or EI 200- 4600 | Super 35 or M43 Sensor, EI 100 -1600 (X7 camera) |
| Maximum Video Specs | 8K/75p ProRes RAW 8K/25p CinemaDNG | 6K/30p ProRes RAW, 6K/30p CinemaDNG |
| Maximum Gimbal Tilt | +100º (+80º obstruction- free tilt at 50mm, 75º at 35mm, 70º at 24mm, 65º at 18mm) | +40º |
| FPV Camera | Type 1/1.8 CMOS sensor 161º FOV | Type 1/7.5 CMOS sensor 84º FOV |
| Positioning Accuracy | Centimeter level (RTK on) | Meter level (RTK not supported) |
| Sensing System | 9 sensors with 6 directions of obstacle sensing, customizable avoidance range | Tri-directional obstacle sensing |
| Flight Time | Up to 28 minutes | Up to 23 minutes |
| Intelligent Flight Modes | Waypoint Pro: Repeatable Routes, Waypoint Pro: 3D Dolly, Spotlight Pro | TapFly, ActiveTrack, Spotlight |
| Video Trasmission and Maximum Range | O3 Pro at approx. 15km | Lightbridge at approx. 7km |
| Storage | PROSSD 1TB (included) | CINESSD 120/240/480/960GB (sold separately) |
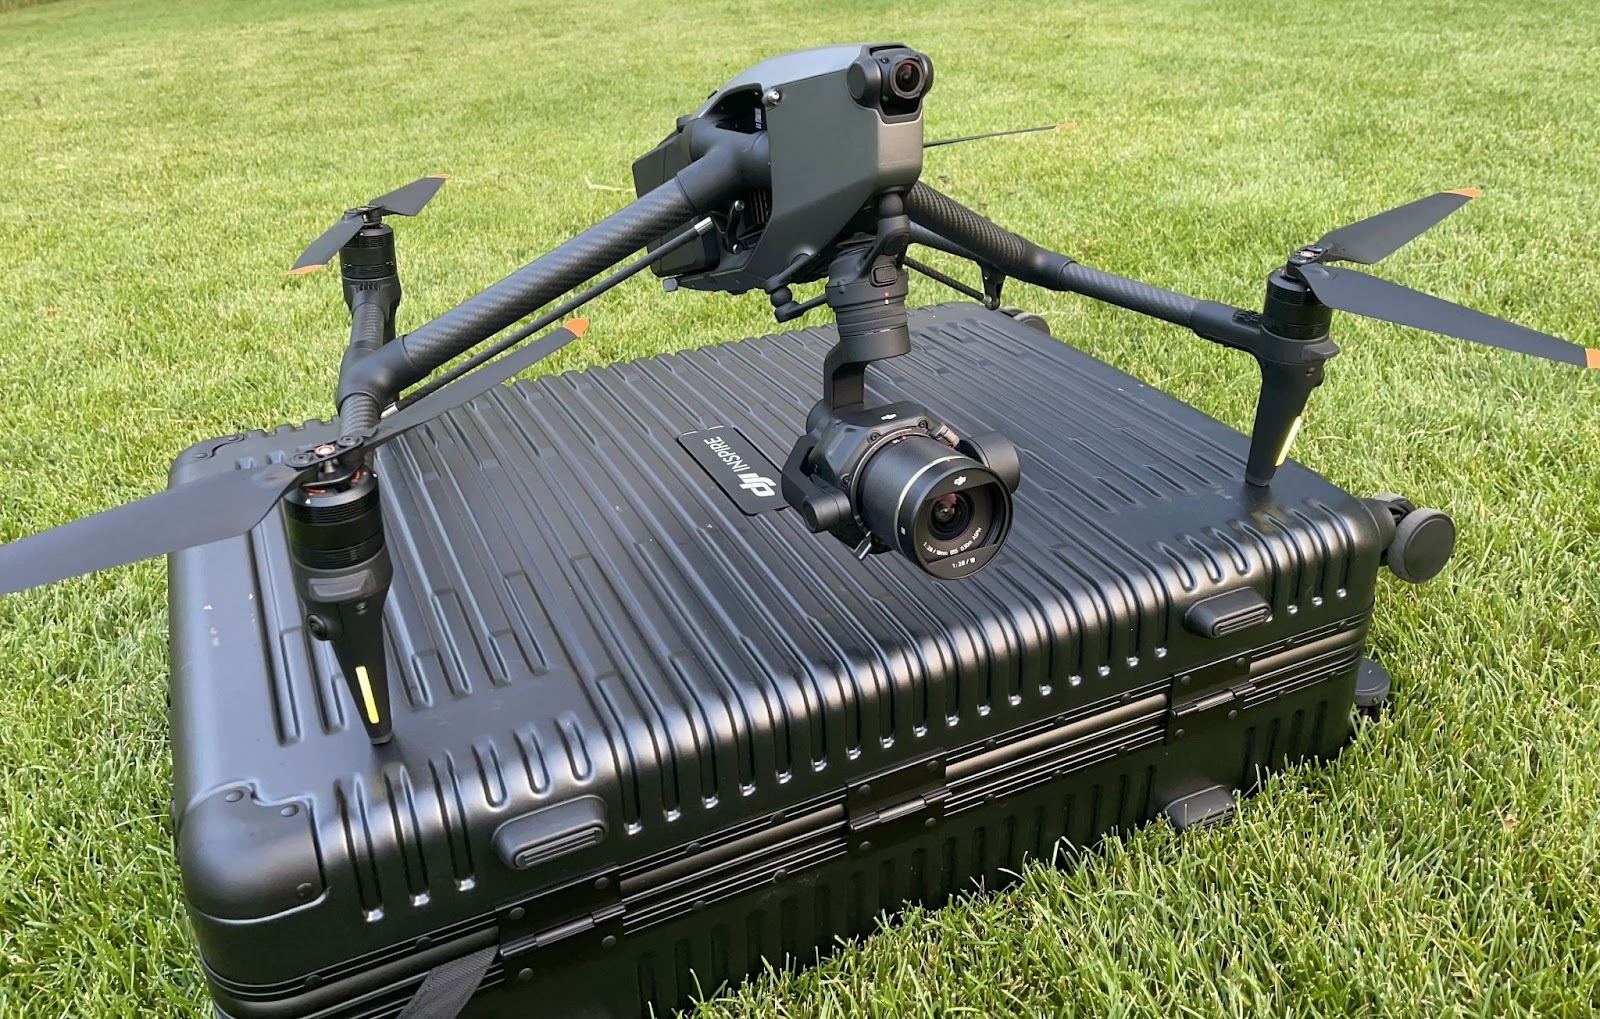
The Inspire 3 aircraft and remote

From left to right: DJI sent me a dual-operator setup, consisting of two DJI RC Plus remote controllers. The FPV pilot and the person controlling the camera can see each other’s feeds. Picture 2: I recommend setting the Inspire 3 up on a folding table. Picture 3: the RTK kit is easy to set up.
At 500.5 x 709.8 x 176mm in travel mode, the Inspire 3 is longer, with a wider diagonal span from rotor to rotor, than the Inspire 2 at 427 x 425 x 317mm. One thing to note is that the Inspire 2 does not fold or collapse down into a flat and transportable shape. Traveling with it can be a bit more of a challenge as the carrying case is larger and boxier.
DJI designed a tall and slim case for the Inspire 3, complete with 360º rotatable wheels that make the entire kit easier to transport. It won’t fit in an airplane’s overhead compartment, but it mimics the look and feel of your typical rolling suitcase.
Constructed primarily out of carbon fiber and featuring foldable quick-release propellers, the Inspire 3 is still a bit heavier than its predecessor with the camera, batteries, and propellers attached to the body. The maximum takeoff weight for the 3, with everything on board is 4310g while the two is slightly less at 4250g.
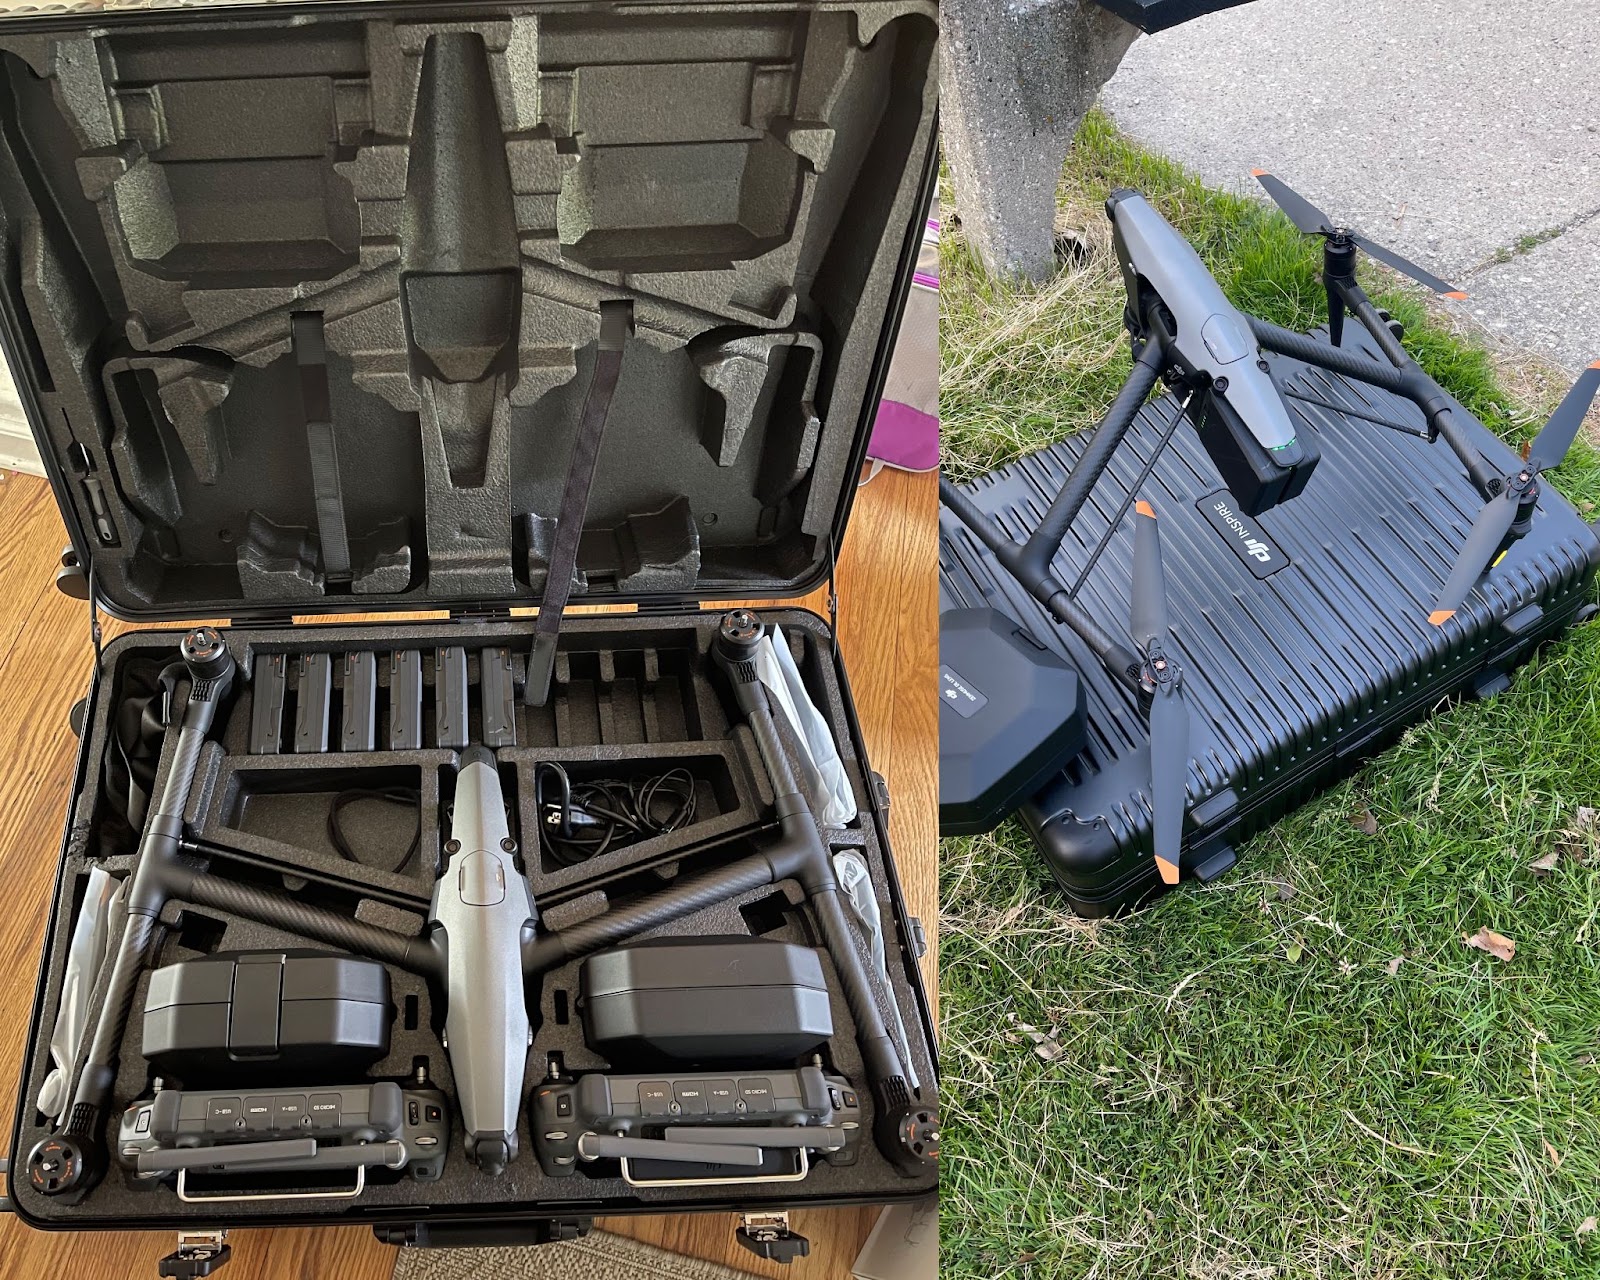
Everything you need can be stored inside the trolley. This case has room for 2 RC Plus remotes, 2 PROSSD 1TB drives, 10 TB-51 Intelligent Flight batteries, 2 battery charging stations, plus the camera and lens carrying cases. The Inspire 3 also fits on top if you need that to set up.
Nevertheless, it feels more agile in flight. White the maximum speed still tops off at around 58 mph, the dive speed has increased from 9 m/s to 10 m/s, while vertical ascend/descend speed has increased from 6 m/s to 8 m/s. It can handle wind speeds of 12 m/s during take-off and 14 m/s while in flight. The Inspire 3 is the first in its series to offer 9 sensors for omnidirectional obstacle sensing and avoidance. You can also deactivate some sensors while keeping others on for a more customizable flight experience.
One disappointment lies in the fact that the Inspire 3’s TB-51 batteries, which are hot-swappable, give you up to 28 minutes of flight time with the X9-8K Air camera attached. This is only a slight improvement over the up to 27 minutes with the X4S or up to 23 minutes using the X7 camera on the Inspire 2. I say ‘up to’ because, in reality, you can shave at least 3-4 minutes off that flight time if you want to operate in a safe and responsible manner. Even DJI’s specs say maximum flight time is 26 minutes with the landing gear raised, which is how you’d want to fly it – especially if you’re rotating the camera and want unobstructed views.
DJI created a compact and foldable TB51 Intelligent hub capable of charging up to 8 batteries at a time. Lights on top will flash green for the batteries currently charging up and orange to indicate they’re properly secured in the charger and are in the queue to get juiced. In ‘fast mode’ DJI claims you can charge 2 batteries up to 90% in 35 minutes and 8 batteries to the full 100% in 160 minutes, or 2 hours and 40 minutes. I received 6 batteries, which are also included when you purchase the standard package, and found they charged up in close to 2 hours.
A 65-watt USB-C port is featured on the side to charge up the remote. I wish there were two of these ports as I imagine most Inspire 3 customers are going to operate in dual mode and charge those remotes up simultaneously. DJI includes a 900 Mbps USB-C to USB-C data cable to charge the remote quickly and speed up the transfer of files off the external 1TB PROSSD drive.

The DJI RC Plus remote has the same size and type of screen as the RC Pro. It is larger and heavier to accommodate more customizable buttons on the front side, several ports including one for HDMI output, and a slot to swap out batteries for extended remote life.
The Inspire 3 is compatible with the DJI RC Plus remote controller, which retails for $1,600. Introduced with the enterprise-grade M30 drone, it features a 7-inch screen with 1200 nits of brightness. Most importantly, the remote is tailor-made for dual operation. If you purchase the standard Inspire 3 package, one of these remotes is already included. DJI also gave me two DJI RC Plus Strap and Bracket Kits, one for each remote, and they took a bit of pressure off the remote. It’s not a necessity so much as a luxury.
The RC Plus remote is equipped with DJI’s O3+ transmission system. This gives you 1080p/60p video streaming at a range up to 15 km (9.3 miles) while operating with one controller, and up to 12 km (7.5 miles) in dual-control mode. A 4K/30p live feed at a reduced max distance of 5km is available for UHD monitoring and live streaming. The RC Plus can control the Inspire 3 for about 3.3 hours per charge. You can hot-swap out batteries on the remote to extend its operating time. I found the joysticks ergonomically friendly, making it easy to maneuver both the drone and its camera seamlessly.
The cameras
The Inspire 3 is equipped with an FPV camera attached to a 2-axis gimbal. It has a Type 1/1.8 CMOS sensor with a 161º FOV, roughly twice the size of the Inspire 2 FPV’s 84º FOV. Below that is a port that is compatible with the Zenmuse X9-8K Air 45-megapixel full-frame camera. I wish this easy-to-install and uninstall option was available for Sony’s Airpeak drone.
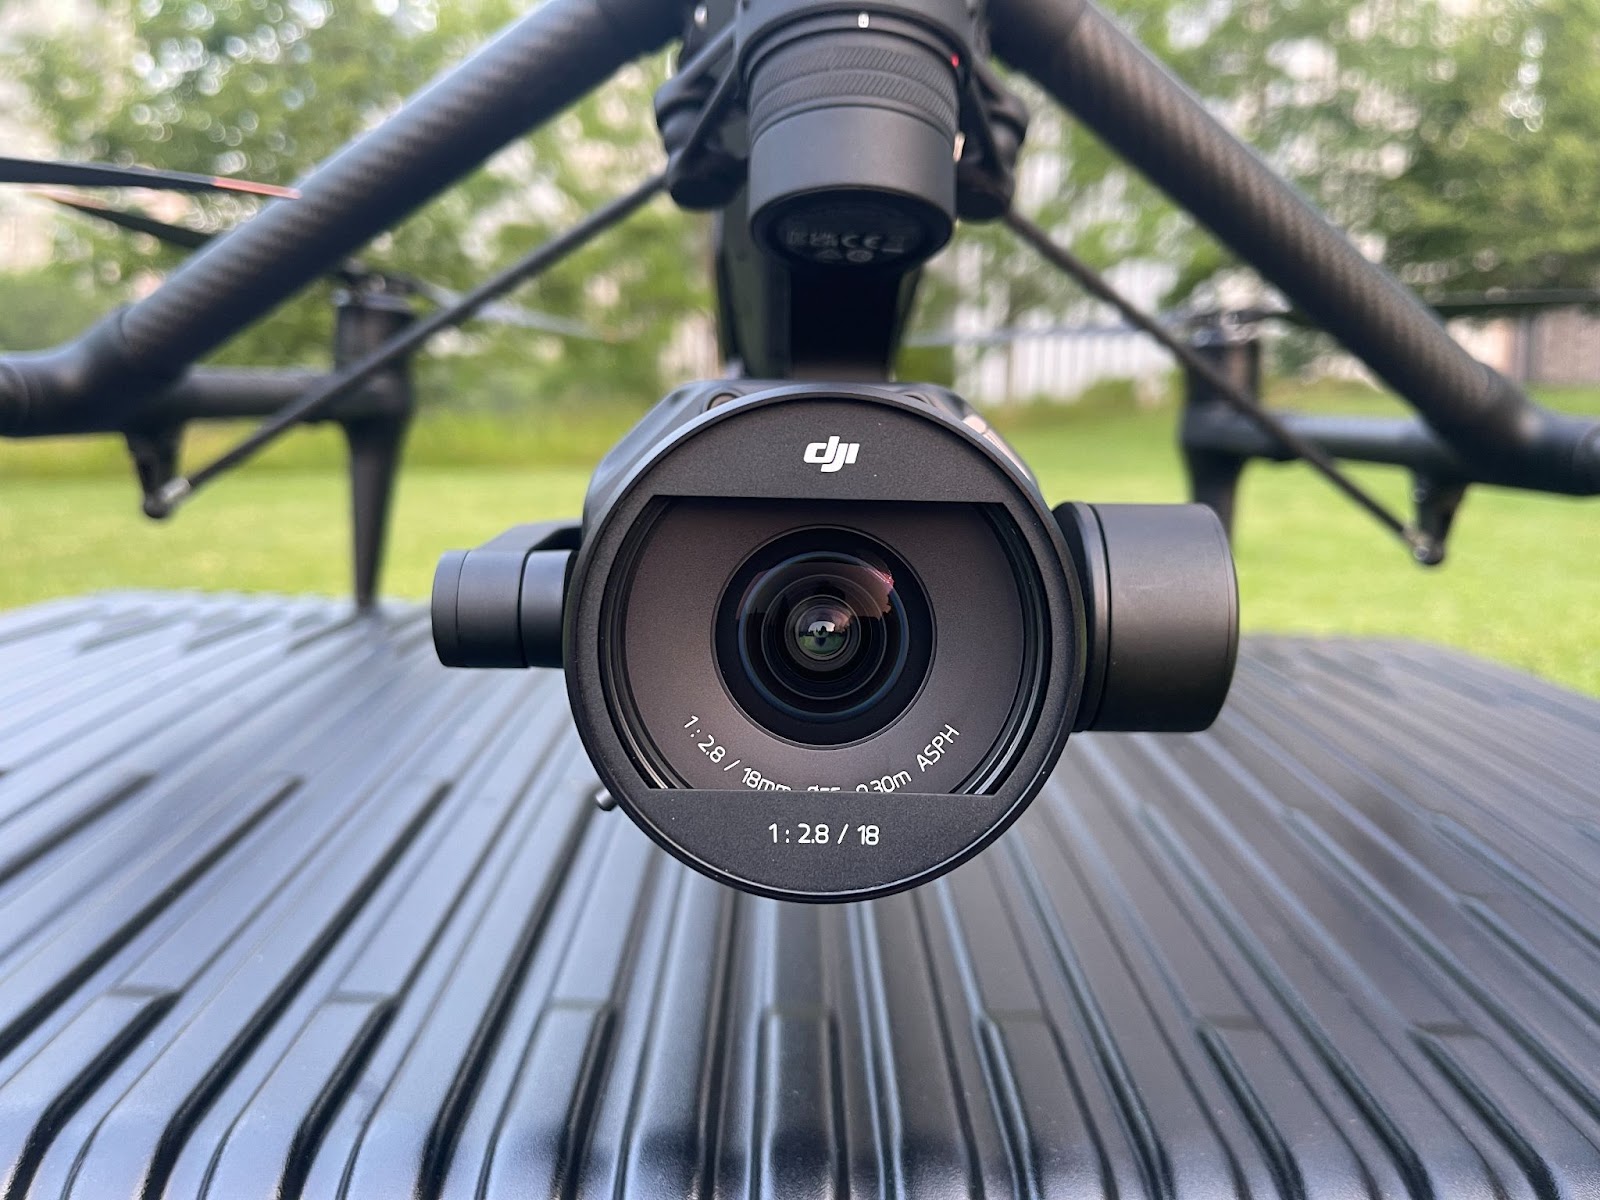
DJI introduced its wide-angle 18mm F2.8 lens with the Inspire 3.
The X9-8K Air, not to be confused with the regular Zenmuse X9 camera, currently supports DJI’s new 18mm F2.8 ultra-wide ASP DL-mount ASPH lens along with the DL 24 mm F2.8 LS ASPH, DL 35 mm F2.8 LS ASPH, and 50 mm F2.8 LS ASPH lenses. The camera is connected to a 3-axis gimbal and can be attached to a port on the front of the Inspire 3’s body.
As of this writing, only the ‘Single’ photo mode is supported. That means Auto Exposure Bracketing, Burst mode, Timed Shots, and the ability to capture any type of Hyperlapse are missing. I imagine DJI will rectify this issue in a future firmware update. Still, it’s curious that these imperative features would be absent at launch. 45MP (44.7) images can be captured at an ISO of up to 25600 with a maximum 8-second shutter speed.
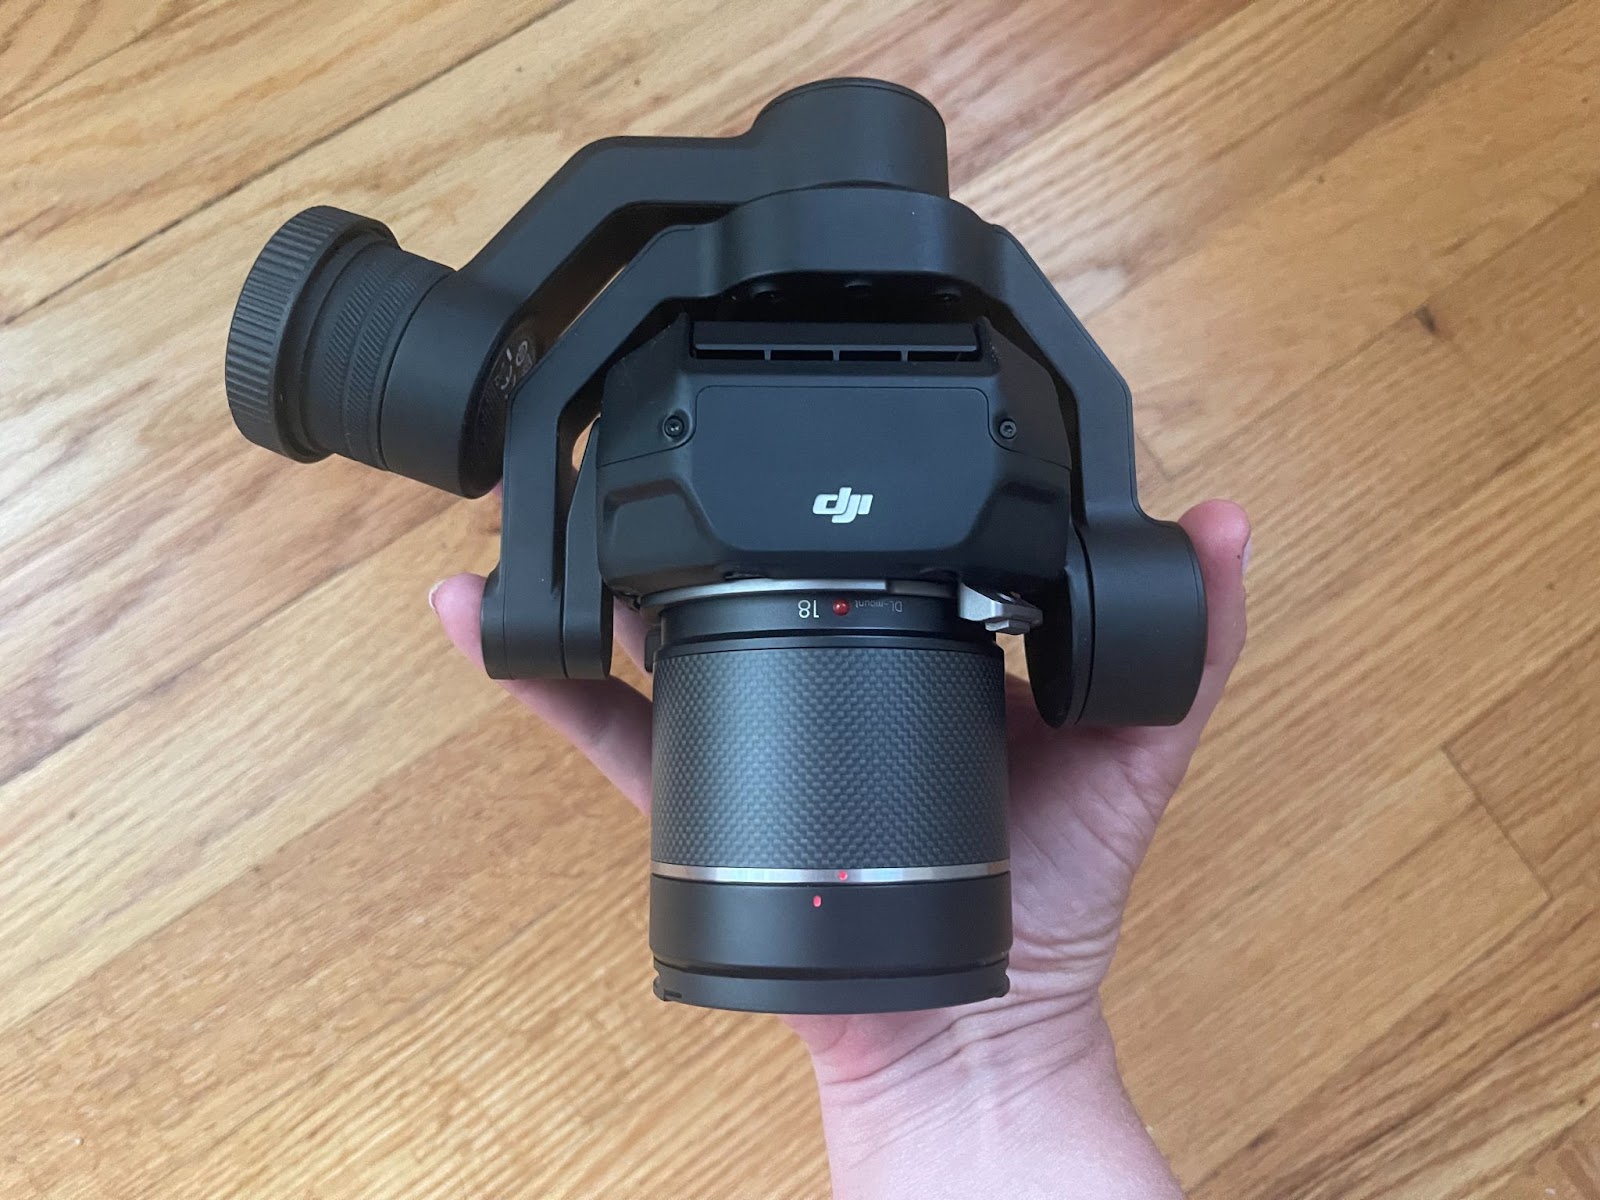
The X9-8K Air camera can fit in the palm of your hand. It automatically attaches to the Inspire 3 drone with a few twists.
Video clips can be recorded at a resolution up to 8K (8192 x 4320, giving a 2:1 aspect ratio). DJI’s most recent image processing system, CineCore 3.0, enables internal recording of footage up to 8K/75p with Apple’s ProRes RAW codec and up to 8K/25p with CinemaDNG. In Slow and Quick mode (S&Q), the X9-8K Air camera supports up to 4K/120p uncropped internal recording in ProRes RAW for fluid slow-motion or fast-motion sequences. Both of these codecs are sold separately for an additional licensing fee of close to $1,000.
The Inspire 3’s camera features Dual Native ISO technology. For film production at the standard 24p framerate, filmmakers can utilize ISO 800/4000, at a dynamic range of more than 14 stops, which is optimized to eliminate noise or artifacts. For frame rates above 30p, ISO 320/1600 with 13+ stops of dynamic range is available. The Pilot 2 app will highlight these as a reminder, depending on which frame rate you’re shooting in.
The DJI Pilot 2 app and Intelligent Flight modes
The Pilot 2 app, which was first introduced for sophisticated enterprise-grade drones such as the Matrice 300 RTK, is essentially a more detailed version of DJI’s Fly app. Anyone whose flown a consumer-grade DJI drone in the past few years is familiar with Fly’s clean, pared-down interface and easy-to-access main functions. Pilot 2 has an additional drop-down navigation menu to access more advanced features. Interestingly, if any manned aircraft appear close by, Pilot 2 will show you the exact location and coordinates of said aircraft instead of merely alerting you.
Waypoint Pro and Spotlight Pro can be accessed from the left-hand side of the home screen. Spotlight Pro, which pops up for the person operating the camera in dual mode, allows you to select a subject for the drone to follow, regardless of which direction you fly. It definitely takes some practice, not to mention communication, to get this right if two pilots are involved. At a skateboard park, it highlighted every active person in the frame. Even if someone disappeared behind a tree, the drone relocated the main subject once it was in view again.

The DJI Pilot 2 app mimics the look and feel of DJI’s Fly app. Left-center is an additional vertical drop-down menu that opens up additional and more advanced features.
Waypoint Pro is slightly more advanced than the traditional Waypoints feature that can be accessed through DJI’s prosumer and consumer drones such as the Mavic 3 series. It still functions in the same manner, on a basic level. You fly your drone to each point, set the camera’s angle and direction, and then move on to the next. Each route can be saved for repeatable missions in the future.
The person operating the drone flies to each location while the dual operator in control of the camera sets the pitch and angle. Waypoints can be set with the C1 button while the C2 button can delete them. I found myself accidentally deleting a few waypoints by unintentionally hitting the C2 button and had to go back to the previous point. 3D Dolly is also available as an option for mimicking shots which typically require a cable cam, crane or, you guessed it, dolly on film sets.
DJI sent me their RTK kit to test out. The RTK was a breeze to set up, even with the tripod. After pressing the main power button 5 times, and activating it on the drone with one tap of a button in the Pilot 2 app, it was ready to go. I feel this is preferable to attaching something to your drone, which only weighs it down and decreases overall flight time.

DJI’s RTK kit is easy to set up and connect with the Inspire 3. This is, in my opinion, a better experience. Attaching an RTK unit onto a drone adds extra weight which compromises flight time.
This is where I admit that I, along with some of the other co-pilots I flew with, didn’t have enough experience with the 3D Dolly feature and it was tough to figure out how to use it to its fullest ability. Instead, I tested the centimeter-level accuracy by verifying that the drone took off and landed in the exact same spot. The RTK is valuable for repeat shots, something that is obviously common on television and film sets.
What’s it like?
The Inspire 3 arrived in a tall, slim case. Everything, down to the charger, was stored neatly and efficiently. Setting it up may have felt a bit daunting at first, as all the batteries needed to cycle through a firmware update on their first use, as well as the remotes, but once I got over my feeling of overwhelm, it felt like second nature.
One thing to keep in mind is that the Inspire 3 is conspicuous. It is quite large and very noticeable. I’ve never had so many people stop and ask me about the drone, what type it was, how much it cost – which I obviously refrained from answering outright for obvious reasons – and how high it could fly (over 3,000 feet). Even one misinformed cop told me that the drone was too big to operate in a park.

The Inspire 3 feels like it floats in the air, much like the Mavic 3. What this means is you don’t feel like you’re flying a brick.
I bought a small folding table to set it up as it’s easier to attach and detach the gimbal with its camera. With five presses of the power button, the drone will either rise up in preparation for flight or fold back down into a flat ‘travel mode’ shape. The failsafe features are quite impressive too. If one battery isn’t fully inserted, you will be notified on the app and won’t be able to take off. Same if the camera or even a lens isn’t fully secure.
It was tough at first to insert and lock each lens, but once the learning curve is mastered, it’s doable. The propellers twist and snap into place the same way they would on a DJI Air 2S, for example. However, I had to remove them when packing the drone back into its case as they would not conveniently fit the mold and the case wouldn’t close.
The Inspire 2 has a 90-decibel noise rating. That’s a mere 9 more decibels than the significantly smaller and more compact DJI Air 3. It’s longer and leaner than the Inspire 2, even in spite of being slightly heavier. It flies smoothly and didn’t feel large or burdensome in the sky. What makes all the difference is DJI’s O3+ transmission system. With a few Visual Observers on hand, we tested the limits and weren’t disappointed with its range. It was almost like flying a larger Mavic 3 drone.

The Inspire 3, left, is slimmer, sleeker and follows DJI’s trend of more aerodynamic design. The Inspire 2 is pictured on the right.
DJI says if one controller loses connection or fails, the other will automatically switch to allow a safe landing. That never happened, though. The live feed was crystal clear both during the day and night. My only real complaint is that the FPV camera, which operates in Auto mode, was overexposed most of the time. When I was trying to land in a parking lot at night, it was tough to detect our location, and I wound up using the Return to Home feature.
Even in higher winds, the pictures and video clips captured were crisp and clear when I uploaded them to my laptop. The drone was steady in flight regardless of weather conditions or maneuvers. Everyone who flew it alongside me was duly impressed with its overall performance.
Final thoughts and who it’s for
While I thoroughly enjoyed operating the Inspire 3 and was pleased with DJI’s innovative implementations, there are a few disappointments I’d be remiss in not pointing out. As mentioned earlier, the Inspire 3 was released 6.5 years after its predecessor. You would think in that time period that DJI could come up with a battery capable of keeping it in the air longer than a maximum of 28 minutes. That’s not much of an improvement and if we’re being honest, it’s more like 24 minutes, at best, of flight time before you need to land.
When some other remote pilots and I were capturing a drone light show, we had to fly it back and switch out the batteries in the middle of the performance and miss some key moments. I sometimes film yacht races or boating events. The Mavic 3 series, with up to 46 minutes of battery life, is my go-to just for those extra 18 minutes in the air. It is a huge deal. I know this flight time would be difficult, if not impossible, to pull off on a larger drone such as the Inspire 3 at the moment. But I was hoping for well over 30 minutes time with two TB51 batteries inserted, at the very least.
Another surprise was the lack of Auto Exposure Bracketing (AEB), Timed Shots, and Burst mode. Hyperlapse mode was also absent, which is a shame since the Inspire 3 holds steady and captures crisp, clear imagery. I also initially mistook the X9-8K Air camera for the Zenmuse 9. The latter is already compatible with DJI’s Ronin 4D 4-axis camera and can house many existing lenses from DJI, along with Sony’s E-Mount, and Leica’s M-mount lenses.
Maybe it’s a matter of logistics, but it would have made the Inspire 3 that much more appealing to have all these options, especially for zooming in and out. As it is, there isn’t a zoom lens on the market that works with the X9-8K Air, though DJI says it’s coming soon. Also, notably missing on this camera is the internal ND filters that can be found on the Zenmuse 9. At the moment, you are limited to fixed focal lengths between 18mm and 50mm and must purchase an ND filter set separately.

The X9-8K Air camera excels at keeping noise and artifacts out of low-light shots.
Now, all this being said, the sharpness and detail of the imagery, along with the performance in low-light and nighttime environments, is unparalleled. There simply isn’t any comparison. As much as I laud DJI for releasing longer focal lengths on its recent Mavic 3 Pro series, you simply cannot compare the output with an 8K, full-frame camera.
In reality, most people can’t justify this top-of-the-line offering. The Inspire 3, in spite of a few missing features, is the best drone on the market for those professional filmmakers or photographers who are looking for something more sophisticated than a Mavic 3 Pro but aren’t quite ready to commit to a RED Brain with Helium, or Monstro, 8K camera and the accompanying large rig needed to carry it. The cost of those cameras, alone, can easily eclipse an Inspire 3 setup, body, dual remotes, and all.
When you add it up, the cost of a complete Inspire 3 offering is about the same as a nice-enough car. Besides the $16,500 to get the basics including the drone body, 6 Intelligent Flight batteries, an X9-8K Air Camera, PROSSD 1TB drive, and a trolley case, you may consider getting the DJI Care Pro package, starting at $2,099 for 1 year and $3,899 for 2 in case of damage or flyaways. Hull insurance is another consideration. I checked Skywatch for a quote on this and at a most basic $1 million liability plus hull policy for 1 year, the cost is close to $2400. This is the minimum.
The RTK kit, with the tripod, costs $3,900 and an additional RC Plus remote, for dual-operation, is $1,600. Each lens costs between $1,199 to $1,299, while the ND lens filter set is $349. All in all, the ideal DJI Inspire 3 customer either has a great deal of disposable income or, more importantly, works on television or film productions and can command a substantial fee for their services. I could picture a well-known photographer like Gray Malin using one of these for his work.
Anyone purchasing an Inspire 3 will likely need a few months to learn how to operate this drone to its fullest potential. I’ve had this review unit in my possession for a few weeks and have had the privilege to co-pilot with some of the best drone pilots in the Midwest. Even so, I feel like I haven’t really tapped the full potential of this machine. It really is a wonder to fly and I’m hoping DJI adds in those missing features, plus comes out with more compatible lenses, in a timely manner.
When DJI released the Mavic 3, initially, in November 2021, it was also missing some important features. As I recall, it took about six months for them to fully implement much-needed updates. I’m hoping that’s not the case here, as the Inspire 3 is much more of an investment. But, for most film production uses, it really is unbeatable.
A special ‘thank you’ goes out to Richard Kates and Dylan Kaeigh Culter of Dullblade Cutworks for lending me their 35mm and 50mm lenses for testing. I also want to thank Rich Wickersty, Darren High, Antoine Tissier, Vis Hal, Diane Casetti, and Karl Blessing for co-piloting with me and sharing your insights.
| What we like | What we don’t |
| Excellent transmission range and maneuverability | Incredibly expensive |
| Camera performs well, especially in low-light scenarios | Missing features at launch, limited focal lengths for lenses |
| Drone is easy to set up, disassemble and transport | Still has a relatively short battery life |