-
Key Takeaways
-
What is Trim on an Aircraft?
-
How Aircraft Trim Works
- Trim and Attitude
- Trim and Airspeed
- Trim and Power
-
Why is Trim Important?
-
Elevator Trim Explained
- Application of Elevator Trim
- Takeoff Trim Settings
-
Rudder and Aileron Trim
-
The Autopilot and Trim
- Autopilot Trim Failure/Runaway Trim
-
Practical Tips for Mastering the Trim
- Use the “Hands-Off” Test
- Beware of Go-Arounds
-
Conclusion
Do you struggle to maintain altitude during cruise? Are you exhausted after a flight because you constantly wrestle with the controls?
The bad news? You’re probably using trim incorrectly.
The good news? We’re here to help.
In this article, we’ll explain what aircraft trim is and how to use it – so that you can fly smoother and safer.
Key Takeaways
- Aircraft trim is an adjustable surface that applies a force on a control surface (like the elevator) to keep it in position. This relieves the pilot from needing to apply the force themselves using the yoke.
- The ailerons, elevator, and rudder can all have trim, but elevator trim is the most common.
- Aircraft trim reduces pilot workload because they don’t have to constantly apply a force on the controls.
What is Trim on an Aircraft?
Aircraft trim is an adjustable surface that applies a force on a control surface (like the elevator) to keep it in position.
It works by redirecting airflow – just like the control surface itself.
The force created by the redirected airflow forces the control surface into a specific position.
This means the pilot doesn’t have to constantly apply a force on the yoke to keep the control surface in position.
The trim system can be as complex as a movable trim coupled to an autopilot or as simple as a flat sheet of metal bent in place to one side.
In either case, the basic idea is the same. Redirect airflow to place the control surface in position and keep the airplane in the desired attitude.
How Aircraft Trim Works
Ailerons, elevator, and rudder can all have trim, but elevator trim is the most common.
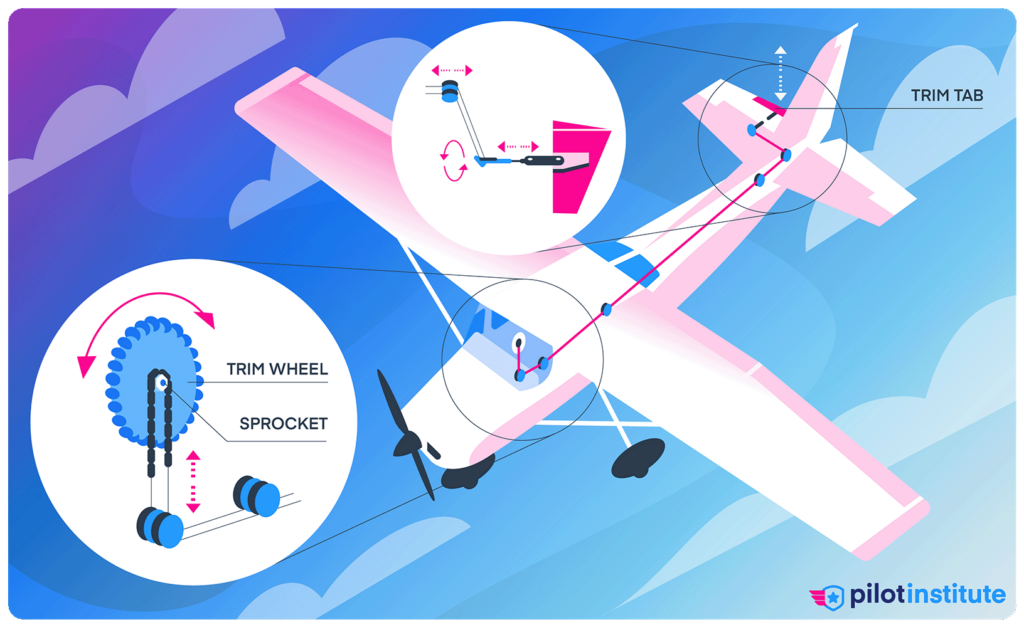
The most common type of trim system is the trim tab. It’s a small, adjustable surface connected to the trailing edge of a larger control surface.
Trim tabs operate using cables and pulleys attached to a mechanical wheel or crank that the pilot has to turn manually.
Some aircraft have an electric trim motor controlled by an electric trim switch on the yoke or control stick (we’ll only refer to the yoke from now on).
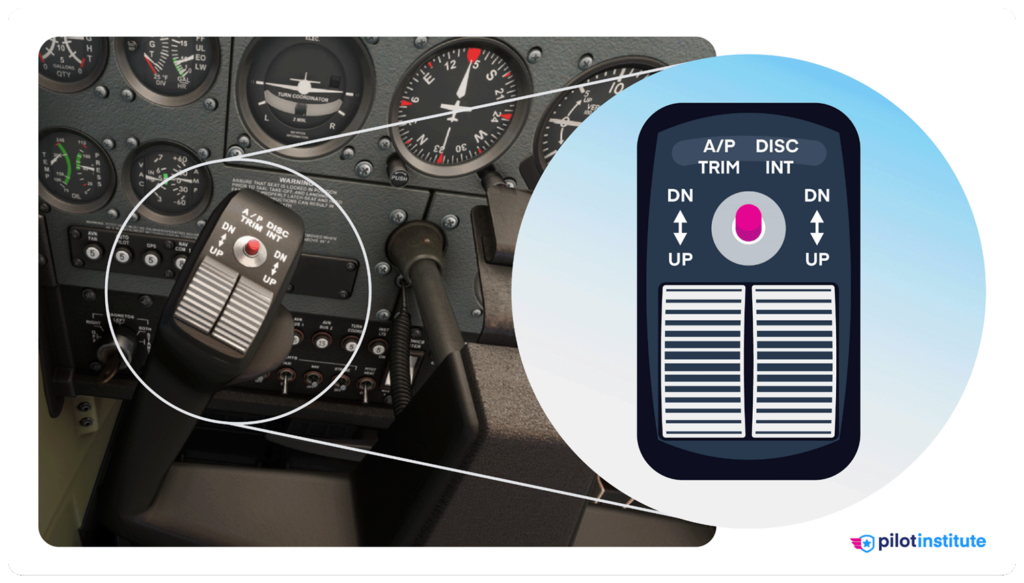
This allows the pilot to push a switch to move the trim tab instead of manually rotating a trim wheel, for example.
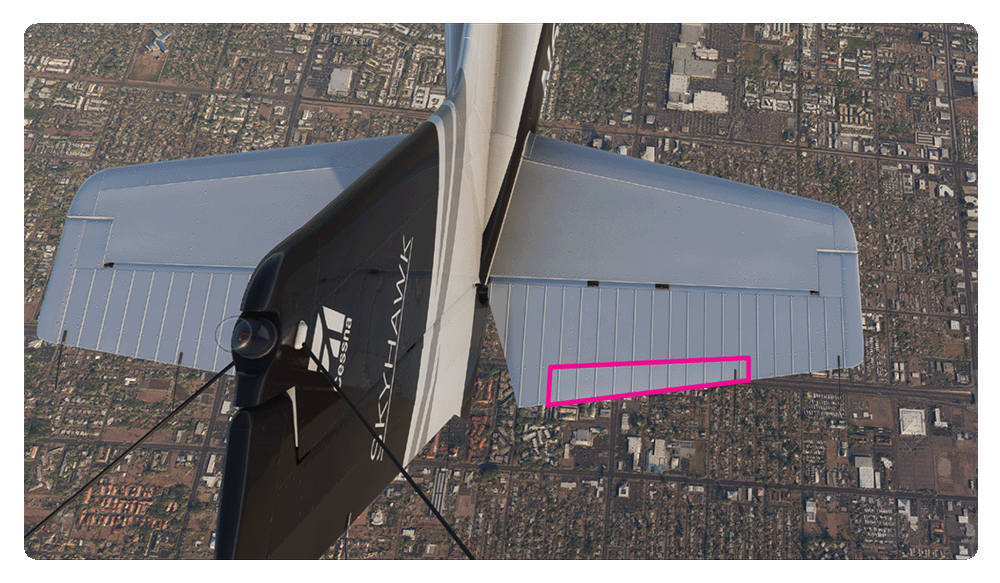
Let’s use the elevator trim tab in a Cessna 172 as an example to show how aircraft trim works.
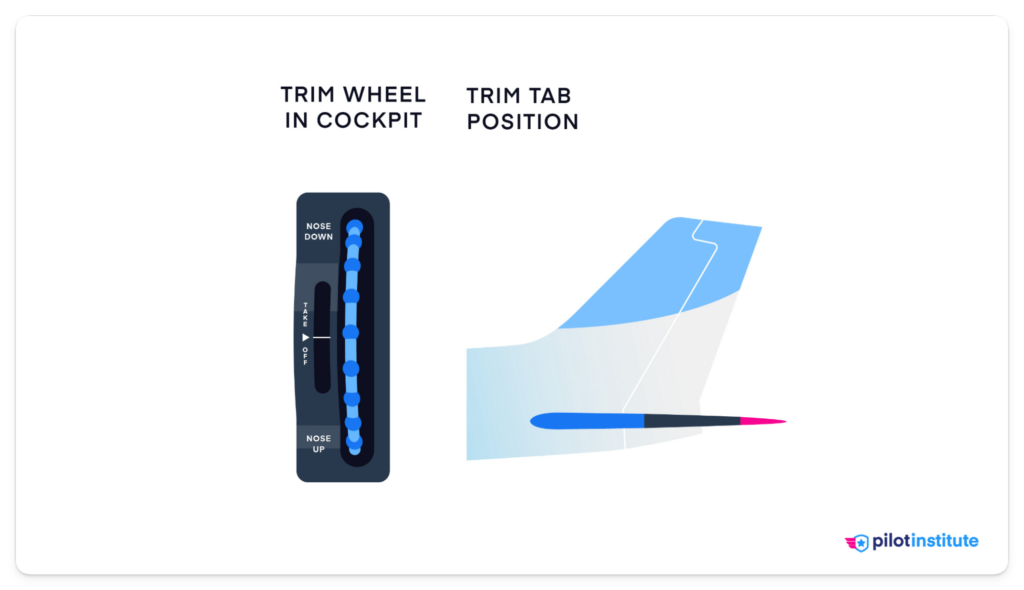
First, the pilot moves the trim wheel in the cockpit. In this example, the pilot moves the trim wheel “up” when viewed from the cockpit.
The elevator trim tab then moves upward.
As the trim tab is now exposed to airflow on the upper surface, the force of the airflow causes the elevator to move down.
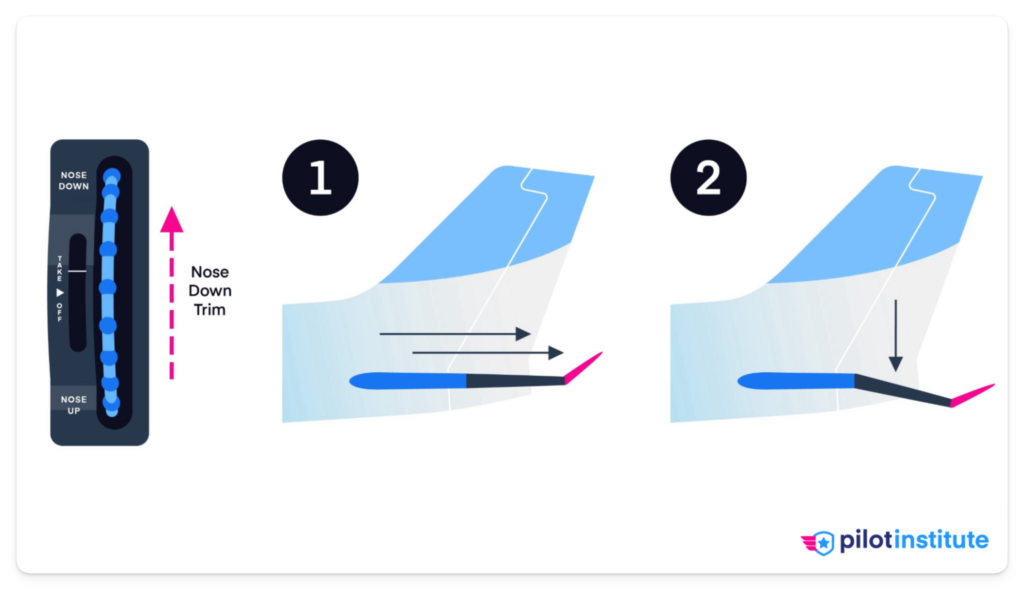
And what change in pitch does a downward movement of the elevator create?
A nose-down pitch.
So, in this example, the pilot has trimmed “nose-down.”
The key point here is that the pilot isn’t using the trim to “move” the elevator. They are keeping the elevator in position by applying a force on the yoke, and then they adjust the trim so that it applies the force instead.
This means that they need to adjust the trim to find the point where they no longer need to push or pull the yoke.
The trim can only keep the elevator in one position. To keep the elevator in a different position, the pilot must readjust the trim.
This means that the pilot must readjust the trim anytime they make any of these four changes:
- A change in attitude.
- A change in airspeed.
- A change in power setting.
- A change in configuration (e.g., flaps and gear).
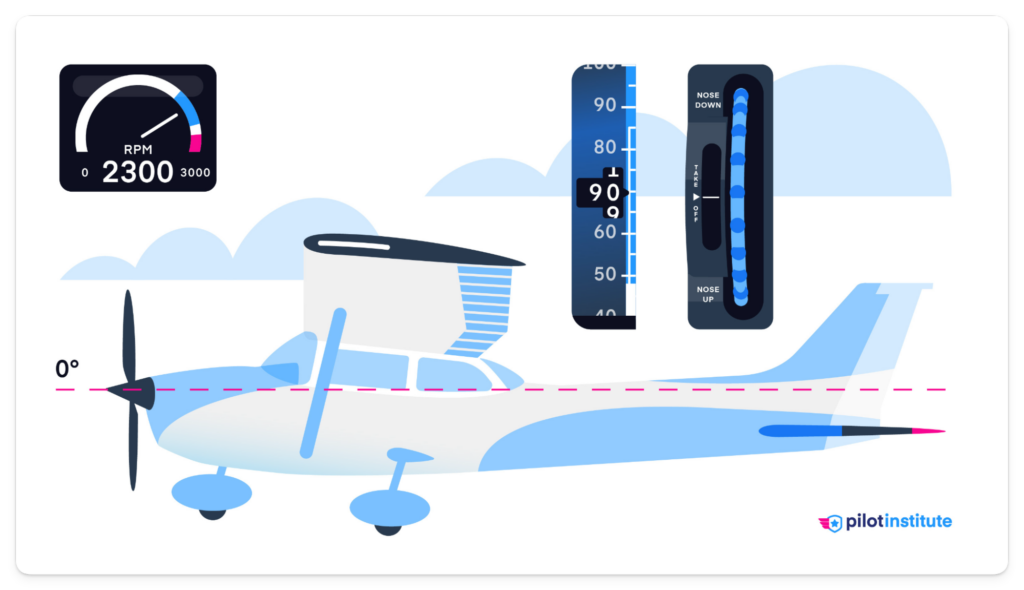
Let’s use the elevator trim in the C172 as an example again.
Let’s say the pilot keeps the nose on the horizon with a power setting of 2300 RPM.
The pilot has adjusted the trim wheel so that they do not need to apply any pressure to the yoke to maintain this nose-on-the-horizon attitude.
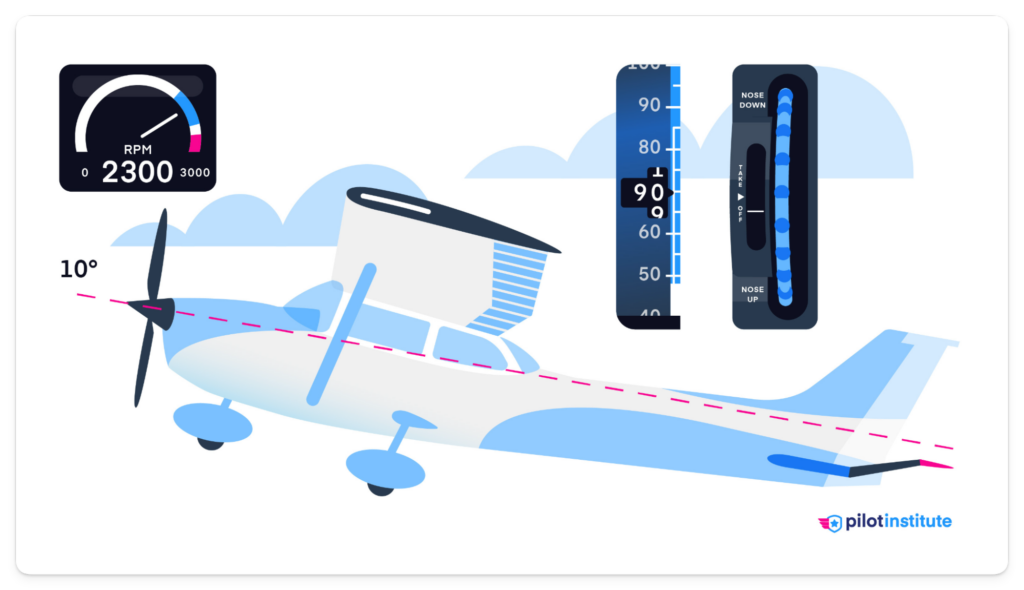
Trim and Attitude
Now let’s say, for some reason, the pilot needs to pitch up to 10 degrees.
The elevator position required to maintain this nose-up pitch is different from the nose-on-the-horizon elevator position – even at the same airspeed and power setting.
To keep the elevator in the new position, the pilot must adjust the trim.
Remember, if you increase or decrease pitch, you will experience a change in airspeed if you don’t modify the power. Both pitch and airspeed variations require a change in trim setting.
Let’s go back to the nose-on-the-horizon attitude with a power setting of 2300 RPM.
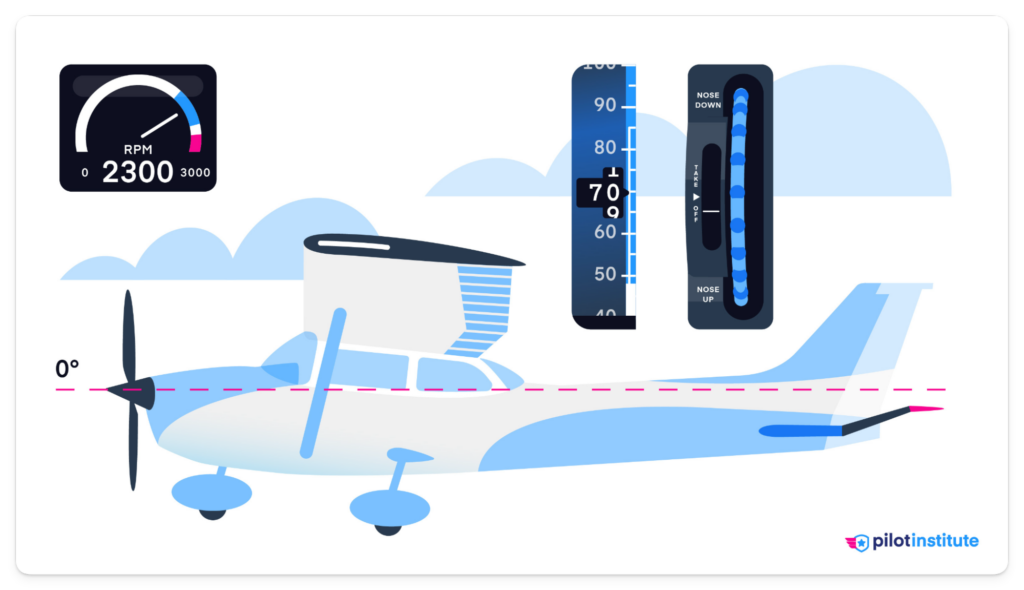
Trim and Airspeed
Now, for some reason, the pilot needs to decrease airspeed.
If they decrease airspeed, the control effectiveness of the elevator changes. This is because the amount of airflow going over the elevator has decreased.
So, like before, the pilot needs to change the elevator position and re-trim.
Let’s go back to the cruise attitude at 2300 RPM one last time.
Trim and Power
Now, for some reason, the pilot needs to decrease power.
If they reduce power, the thrust-drag couple changes, which changes the pitch force.
This, again, means that the elevator position needs to change to maintain level flight.
In most single-engine aircraft, the accelerated airflow over the elevator from the propeller also decreases.
So, the pilot applies a force on the yoke to change the position of the elevator. They then readjust the trim until they no longer need to apply a force to the yoke.

A similar effect occurs when changing the aircraft’s configuration.
When extending flaps, for example, the aircraft’s lift and drag characteristics change. This also requires a different elevator position and change in trim.
Why is Trim Important?
Trim is important because it reduces the pilot’s workload.
A lower workload means less fatigue and better overall situational awareness and performance.
How does trim reduce workload?
Trim eliminates the need to constantly adjust the flight controls to maintain the correct attitude.
When an aircraft is properly trimmed, the pilot can focus on other instruments. They don’t have to worry about the attitude changing if they accidentally reduce or increase pressure on the yoke.
This frees up their time and effort for other flying tasks, which increases safety.
Elevator Trim Explained
If an aircraft has a trim system installed, it is usually on the elevator.
Elevator trim reduces forces on the yoke related to pitch.
We use the elevator trim during practically all phases of flight.
Application of Elevator Trim
Let’s use the climbing phase of flight to demonstrate good use of elevator trim.
After takeoff, we often climb at Vy for an extended period until reaching cruise altitude.
If you need to constantly pull back on the yoke to maintain the climb at Vy, letting go will cause the aircraft to pitch down.
Using elevator trim correctly involves using nose-up trim, which relieves the need to pull back on the yoke.
With proper trim, the aircraft in a climb needs little to no control pressures from the pilot for pitch.
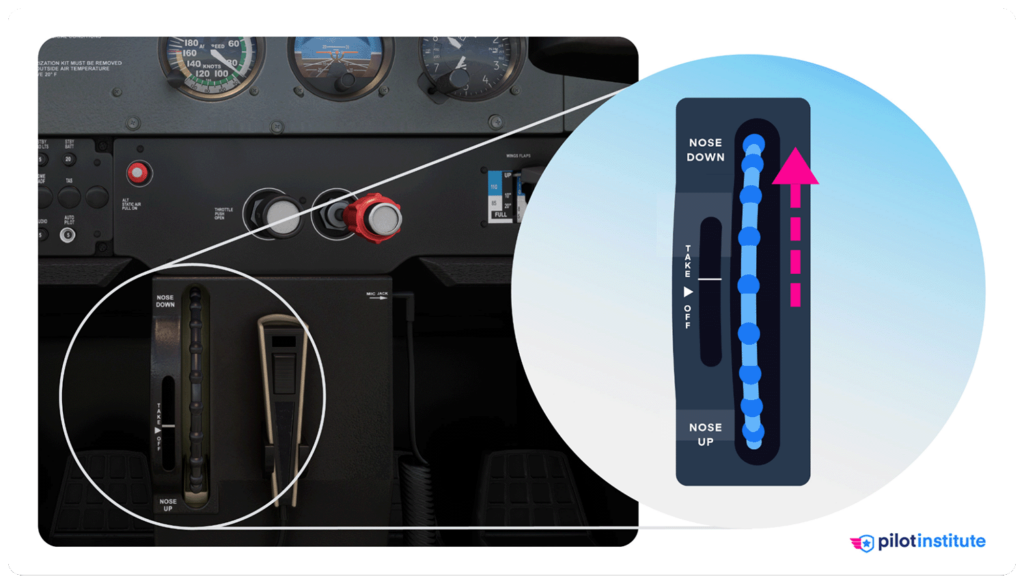
Takeoff Trim Settings
The takeoff trim setting is a range or point where the pilot should set the elevator trim before takeoff.
In most general aviation airplanes, this is the neutral (middle) position.
This neutral setting ensures that the trim tab doesn’t potentially move the control surface outside of its neutral position.
Setting the trim incorrectly before takeoff is potentially dangerous.
If the trim is set too far nose down, the pilot will find the control column heavy and have difficulty rotating during takeoff.
If the trim is set too far nose up, the aircraft might rotate early and pitch up excessively, causing a potential stall.
When set in the takeoff position, the trim tab is in line with the elevator in the neutral position.
The takeoff trim setting should also be neutral for the aileron and rudder trim.
Rudder and Aileron Trim
Rudder trim reduces forces on the rudder pedals related to yaw.
Many general aviation aircraft have ground-adjustable trim tabs on the rudder. These fixed tabs are bent to one side and apply a force on the rudder in flight.
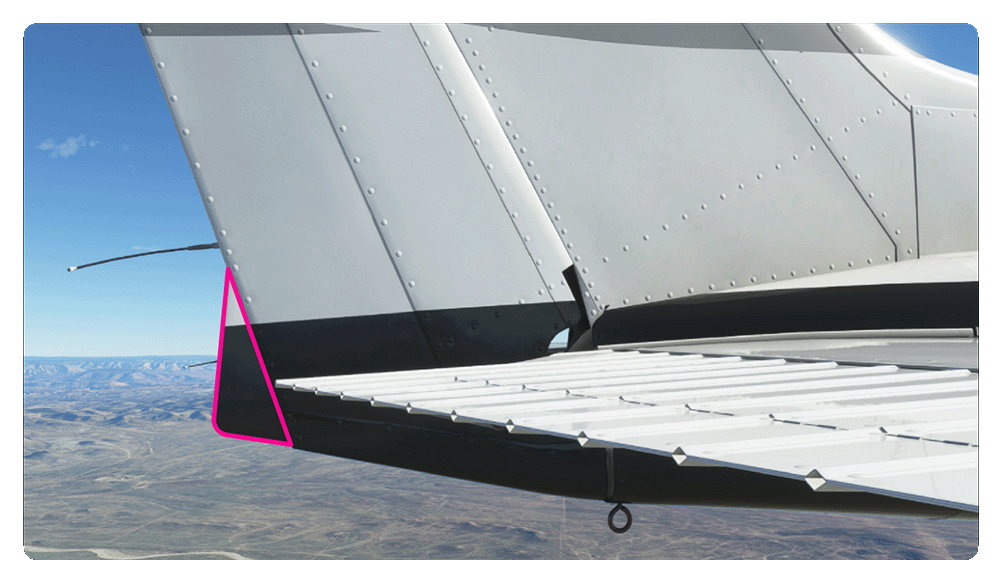
Since the pilot cannot adjust the tab during flight, it is only in the correct position for one yaw attitude, power setting, and airspeed. The pilot or engineer will usually set the ground adjustable trim for cruise conditions.
Aileron trim reduces forces on the yoke related to roll.
Aileron trim is very useful when the fuel in the left and right fuel tanks is not equal. This unbalanced load between the two wings causes the aircraft to bank towards the side with more fuel.
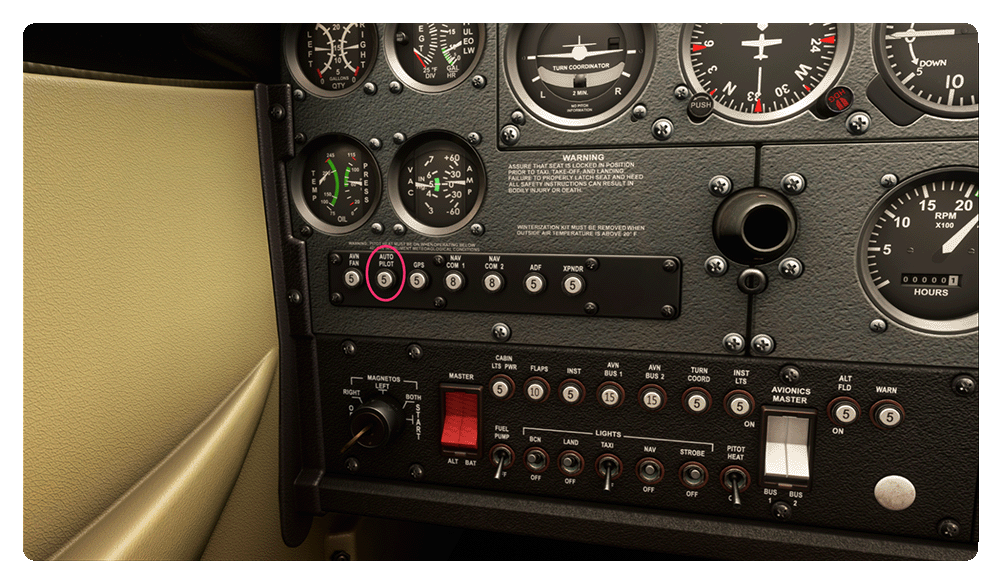
The Autopilot and Trim
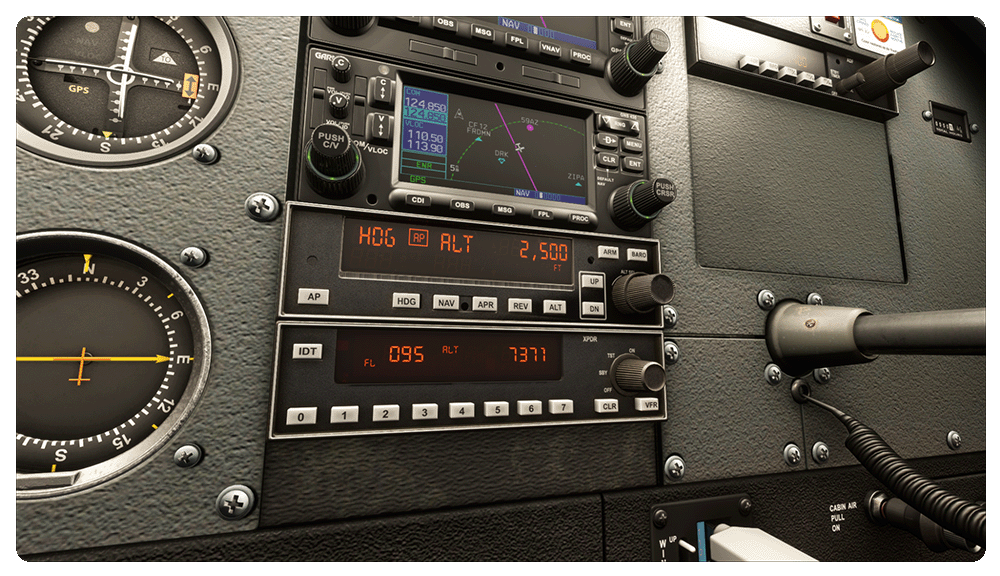
If you are flying an aircraft equipped with an autopilot system, there is no need to manually adjust the trim when the autopilot is engaged.
This is because the autopilot system will take over command of the trim systems on the aircraft.
When engaged, the autopilot system controls the control surfaces using electric servo motors. These servo motors control the entire control surface, such as the elevator, aileron, or rudder.
When the autopilot detects a constant use of servo motors to maintain attitude, it utilizes the trim system.
Let’s use an example.
During cruise flight, the aircraft flies straight and level.
Then, the autopilot detects that it is using a constant pitch-down input to maintain the selected altitude.
So, the autopilot commands the nose-down elevator trim to alleviate the servo forces.
The major benefit of this is that you can theoretically disconnect the autopilot at any time and the aircraft will be in trim.
In addition, just like a pilot using trim, the autopilot doesn’t have to use a constant force either. This makes the autopilot very efficient.
Pretty neat, right?
Autopilot Trim Failure/Runaway Trim
While autopilot trim systems are a great asset in the cockpit, they can also cause deadly failures.
Runaway trim situations occur when the trim moves without pilot input.
If left unnoticed, the aircraft may pitch up or down and cause a massive loss of airspeed or altitude.
If you feel a sudden, uncommanded pitch movement or if the trim wheel starts spinning rapidly without your input, that’s a red flag.
The key is to act quickly and decisively.
Immediately disengage the autopilot. This returns control to you, allowing for manual trim adjustments.
You may also need to pull the circuit breaker for the trim motor or autopilot.
Once you regain control, you can manually adjust the trim.
Practical Tips for Mastering the Trim
While using the trim might take some practice, you need to make it second nature.
Here are a few tips to get you started.
Use the “Hands-Off” Test
Here’s a simple way of checking whether you have set the trim correctly. We call it the “Hands-Off” test.
- First, ensure stable flight at your desired altitude and airspeed.
- Gradually adjust the trim to minimize yoke pressure.
- Briefly release the yoke while keeping your hand close to the yoke. If the aircraft stays level, your trim is set correctly.
- If there’s a change in attitude, readjust the trim and retest.
This technique is a great way to remove the guesswork when adjusting trim.
Keep in mind that this technique may not work properly in turbulent conditions. When releasing the yoke in turbulent conditions, the aircraft may change attitude due to turbulence, not an incorrect trim setting.
Beware of Go-Arounds
During final approach, the trim position is usually not at the takeoff trim position.
Generally, when the aircraft is trimmed correctly on final approach, it will have a nose-up trim setting (compared to neutral).
During a go-around, applying full power can surprise you with an abrupt pitch-up and heavy controls when pushing on the yoke.
Be aware of this and anticipate the need to push forward on the yoke. Retrim quickly, but only after you have established a safe climb attitude.
Conclusion
Trim is difficult to understand without practical application.
Many students only fully understand the trim after using it for a while.
If you’re still confused, don’t worry.
Use this article as a start to the conversation with your flight instructor on how best to use trim systems installed on your aircraft.
There are many things that influence a trim setting, but one of the most important is the Center of Gravity (CG). Have a look at this article to learn the difference between forward and aft CG.