The airport traffic pattern is a means of safely directing aircraft in and out of an airport. While the airport traffic pattern is standardized, every traffic pattern is established based on conditions specific to each airport, such as terrain or noise abatement requirements.
Information pertaining to each airport’s traffic pattern is found in the Chart Supplement U.S., and you will find further information in the Aeronautical Information Manual (AIM).
Executing correct traffic pattern procedures is crucial to the safety of the airport environment, and pilots must keep these skills current.
Flying the pattern correctly is one of the most important habits a pilot can build. This article covers how it works, how to enter and exit, and what to watch for along the way.
Key Takeaways
- The traffic pattern organizes aircraft safely around an airport.
- The standard pattern has five legs: upwind, crosswind, downwind, base, and final.
- Most small aircraft fly the pattern at 1,000 feet above airport elevation.
- Aircraft on final approach have the right-of-way.
Keep It on
Your Phone

Study anywhere with easy-to-skim pages and exam-style reminders.
- Bite-sized sections.
- Simple mnemonics.
- Add your notes.
- Clickable FAR links.
Traffic Pattern Overview
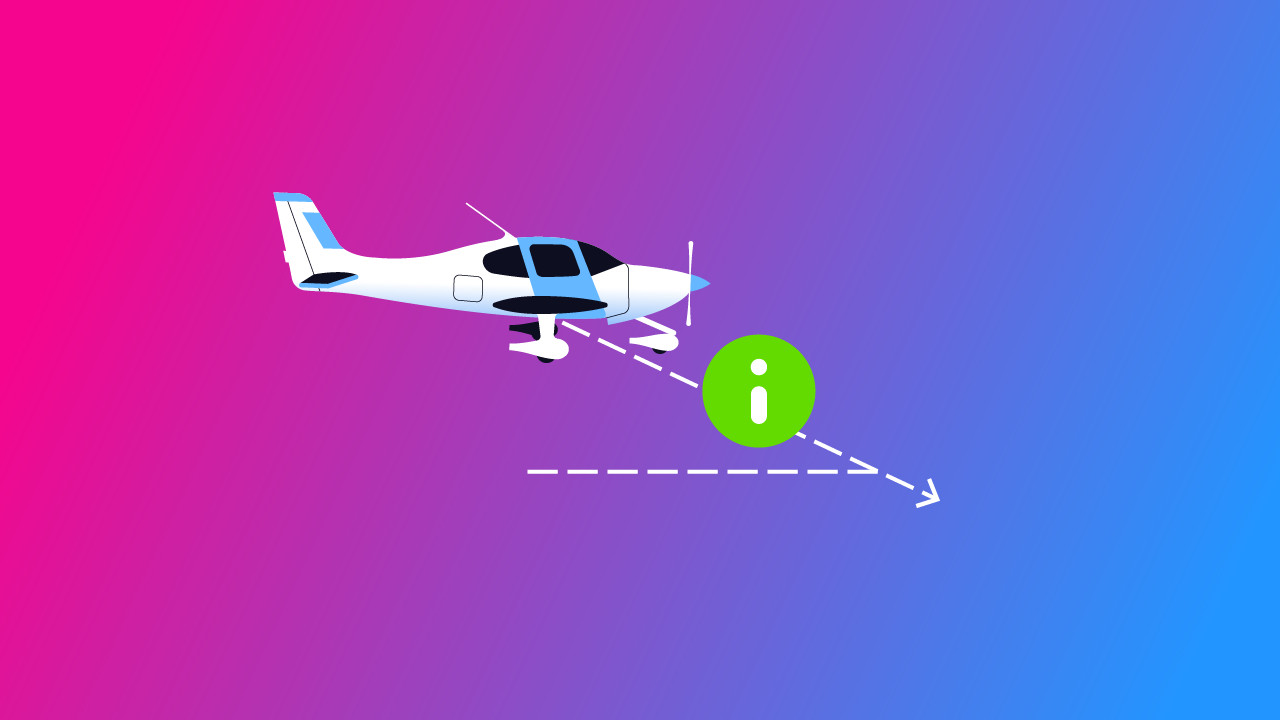
The concept of a traffic pattern stems from the inability of aircraft to remain stationary in the air. An aircraft can only change its flight path and speed.
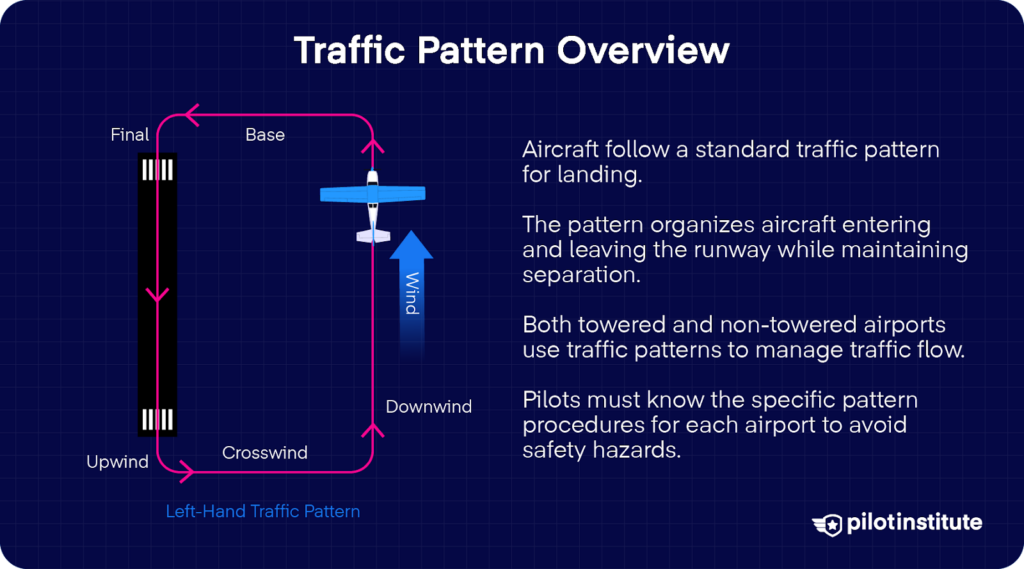
The traffic pattern procedures optimize aircraft movement onto and out of the runway while maintaining a high degree of safety if the procedures are adhered to.
Even at towered airports, the traffic pattern is often used to assist controllers in maintaining an orderly and safe traffic flow.
At non-towered airfields, all aircraft adhere to standard procedures and maintain visual separation, assisted by radio communication – a crucial aspect of the traffic pattern.
Aviators must be aware of the specifics concerning the traffic pattern of the airport they are operating at. If a pilot is unaware of operational deviations from the standard pattern, a potential safety hazard will be created.
The Standard Traffic Pattern
While you are not expected to know the intricacies of every airport’s traffic pattern, you require knowledge of the standard traffic pattern and how to approach and depart correctly.
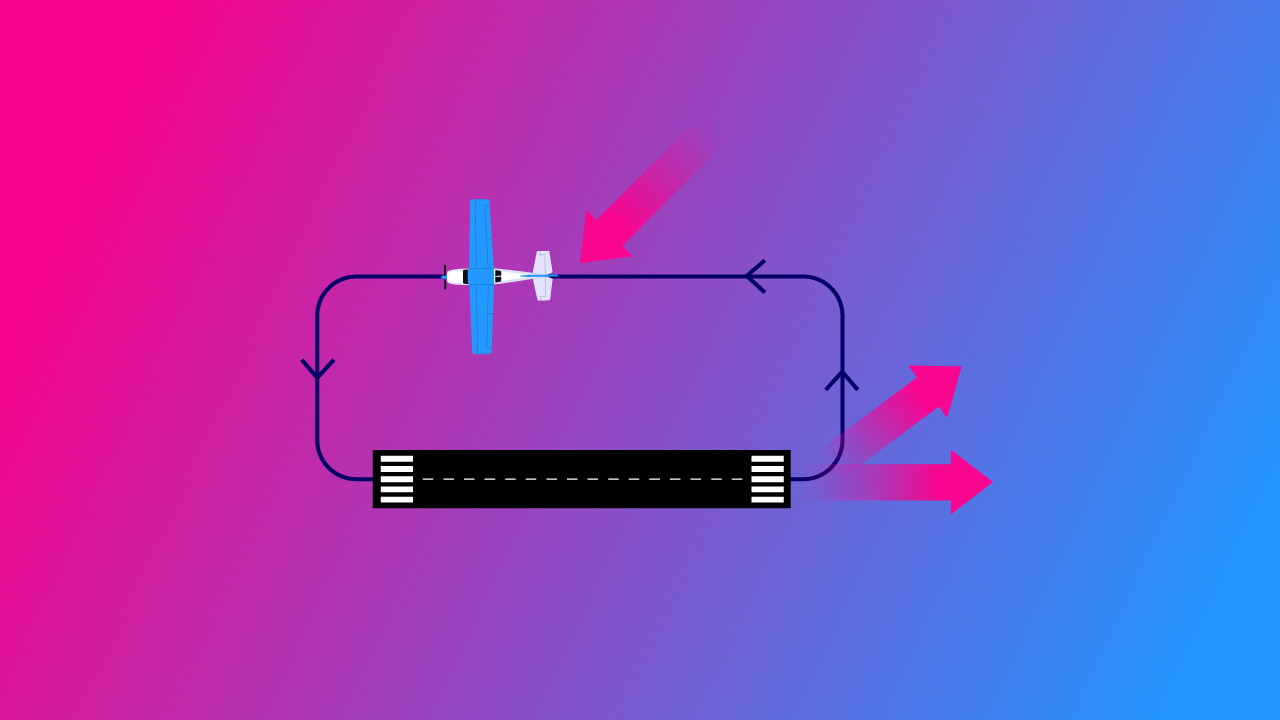
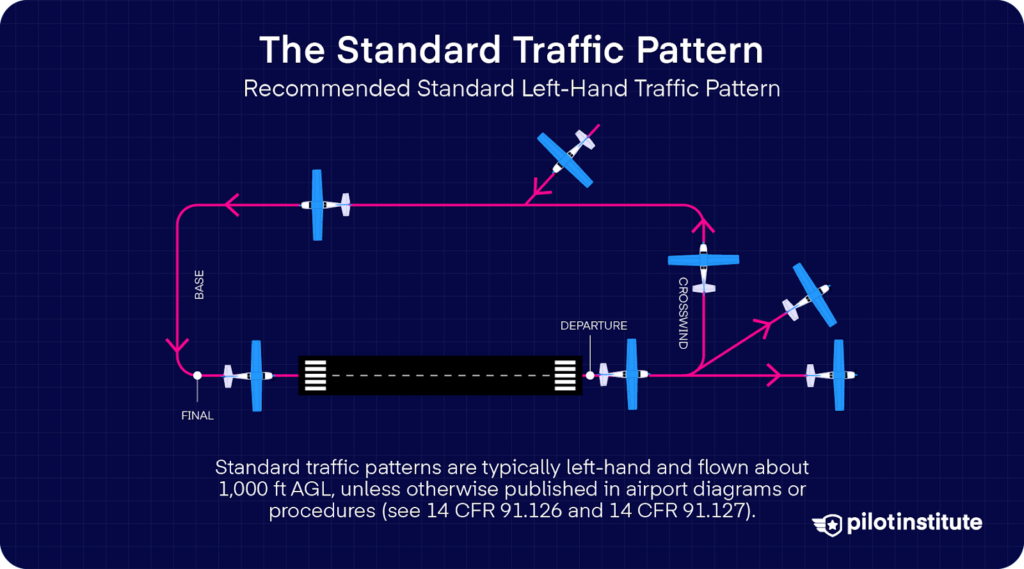
The standard traffic pattern is to the left; unless visual markings and published documentation indicate otherwise, all turns in the pattern will be made to the left.
The standard traffic pattern is a rectangular shape with five legs: the departure (upwind) leg, crosswind leg, downwind leg, base leg, and final approach.
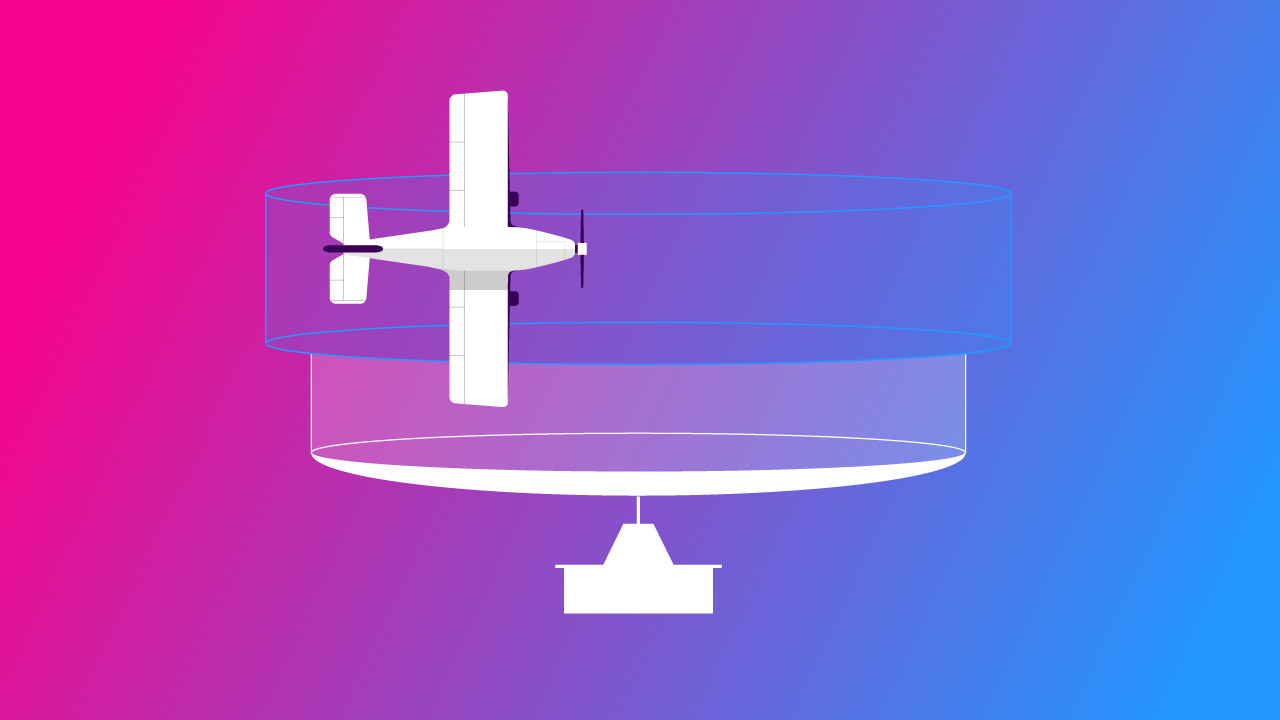
The standard traffic pattern altitude is 1,000 feet above airport elevation, with turbine aircraft maintaining 1,500 feet above airport elevation.
Under 14 CFR 91.117(b), aircraft operating at or below 2,500 feet AGL within 4 nautical miles of a Class C or Class D airport are limited to 200 knots.
At non-towered airports in Class E or G airspace, the FAA recommends keeping it under 200 knots in the pattern, but that’s guidance from the AIM and AC 90-66C, not a regulation.
In practice, most training aircraft fly the pattern well below that speed anyway.
You must obtain clearance from Air Traffic Control (ATC) at a towered airport to perform a touch-and-go landing.
If ATC clears you for “the option,” you can perform a touch-and-go, stop-and-go (where you stop on the runway and then depart immediately, usually used for short field landing training), a low approach, full-stop landing, or go-around.
Joining a Non-Towered Traffic Pattern
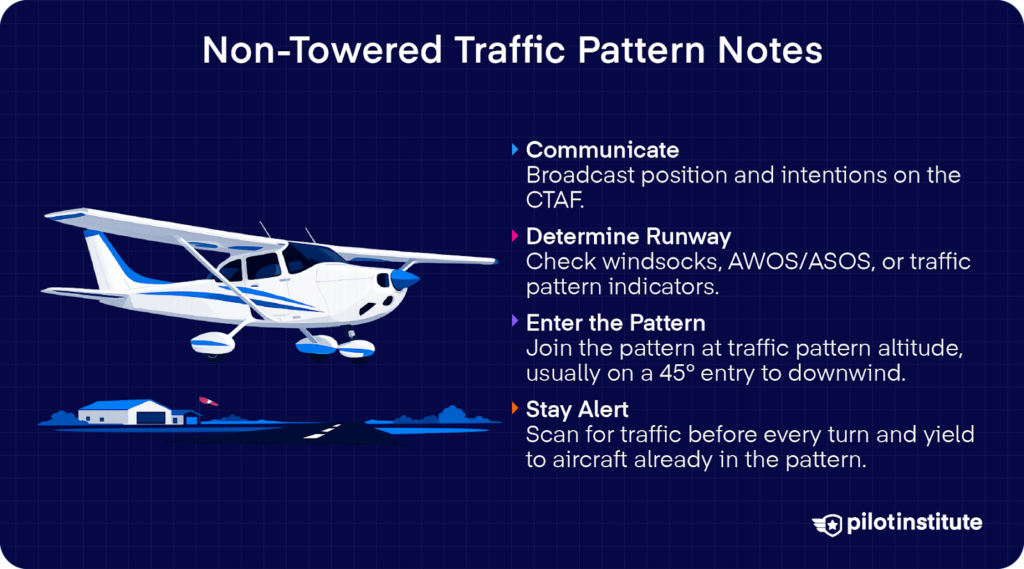
When entering the traffic pattern of a non-towered airport, pilots must broadcast their intentions on the appropriate frequency and obtain situational awareness through communication with other aircraft in the traffic pattern.
If there are no aircraft in the traffic pattern, pilots must use wind indicators such as windsocks on the ground or automated weather broadcasts to determine the runway in use.
Airports will usually have L-shaped traffic pattern indicators, which provide a visual indication of the correct pattern to be flown, on the outside of a segmented circle containing a windsock. The short stem of the “L” shows the direction in which turns in the pattern must be made.
Before entering the pattern, the traffic pattern altitude should be known, and an accurate altimeter setting obtained. The traffic pattern should be entered at the traffic pattern altitude, as climbing or descending into the traffic pattern creates a collision hazard.
The traffic pattern is typically entered at a 45-degree angle to the downwind leg, aimed at the middle point of the runway.
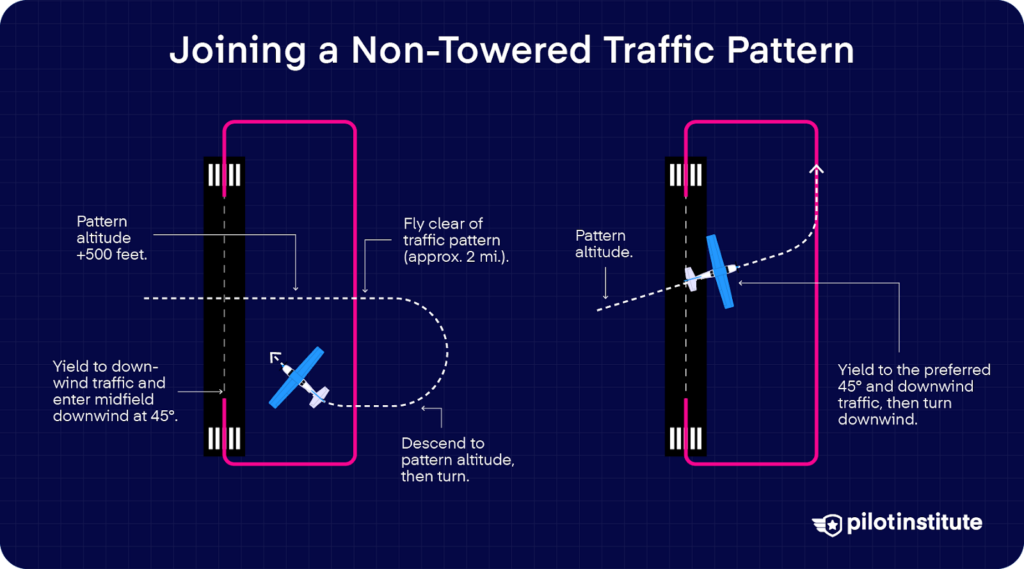
If you’re arriving from the non-pattern side of the airport, AC 90-66C describes two options.
Preferred method (midfield overhead entry): Cross over the airport at least 500 feet above the traffic pattern altitude (typically 1,500 feet AGL). Fly to a point well clear of the pattern, roughly 2 miles from the airport.
Descend to pattern altitude, then make a standard 45-degree entry to the downwind leg. If large or turbine aircraft use the airport, cross at 2,000 feet AGL to stay above their 1,500-foot pattern.
Alternate method (midfield crosswind entry): Cross midfield at pattern altitude, scan carefully for traffic, and turn to join the downwind leg directly. This method should not be used when the pattern is congested. Pilots using this entry must yield to aircraft on the 45-degree entry and aircraft already established on the downwind.
If you’re doing takeoff and landing practice, continue straight ahead after takeoff. Once you are beyond the departure end of the runway and within 300 feet of pattern altitude, turn onto the crosswind leg.
When 45-degrees from the departure threshold, turn onto the downwind leg. If you are still climbing during the turn, remember to compensate for the difference in turning radius compared to a level, faster turn.
Before making any turns in the traffic pattern, perform a lookout to the aircraft’s left, front, and right. Pay particular attention to the active areas of the pattern when completing the lookout before commencing with a turn.
From Downwind to Landing
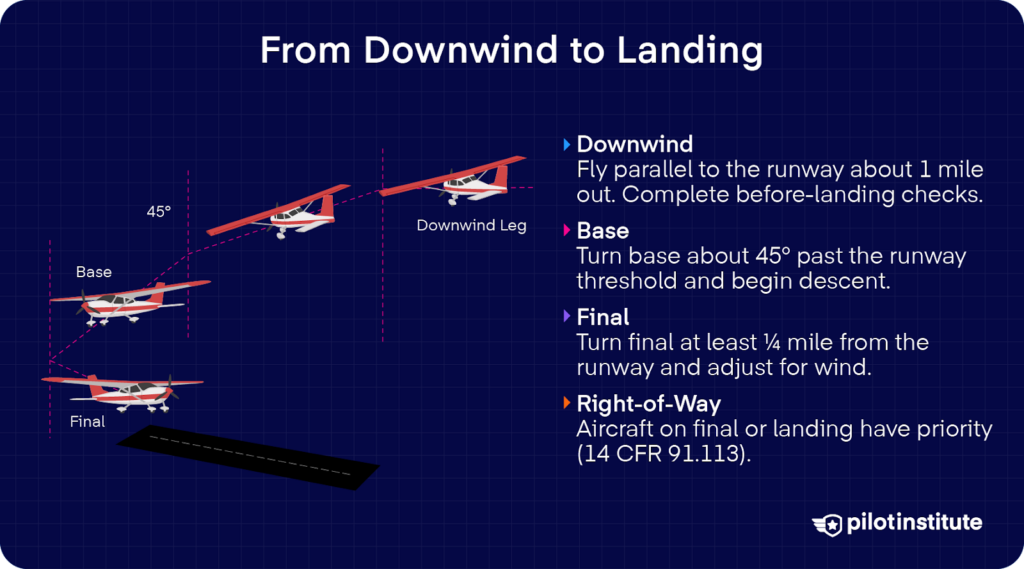
When established on the downwind leg, aim to fly parallel and approximately 1 mile from the runway. It is crucial to maintain the right track on downwind and compensate for any wind that may cause the aircraft to drift toward or away from the runway.
On the downwind leg, complete your before-landing checks and configure the aircraft for the descent.
When you reach a point about 45 degrees from the landing threshold, begin your turn onto the base leg and start the descent to intercept the visual glide path for your runway. Some pilots begin the descent earlier, on the downwind leg, when abeam the landing threshold. Either technique works.
On the base leg, maintain a track perpendicular to the final approach path. Continue the descent and turn onto final when appropriate. Complete the turn to final at least 1/4 mile from the runway.
When turning from the base onto the final approach, remember to compensate for headwinds, which will push you away from the final approach path, and tailwinds, which will push you towards the final approach path.
On final approach, under 14 CFR 91.113(g), aircraft that are on final or landing have the right-of-way over other aircraft in flight or operating on the surface.
You may not use this rule to force an aircraft that has already landed and is still on the runway to vacate faster than it can safely.
When two or more aircraft are approaching the same airport to land, the aircraft at the lower altitude has the right-of-way, but it may not cut in front of another aircraft that is already established on final or overtake that aircraft on short final.
Apply these rules with good judgment and be ready to adjust for other traffic.
The Go-Around and Exiting the Pattern
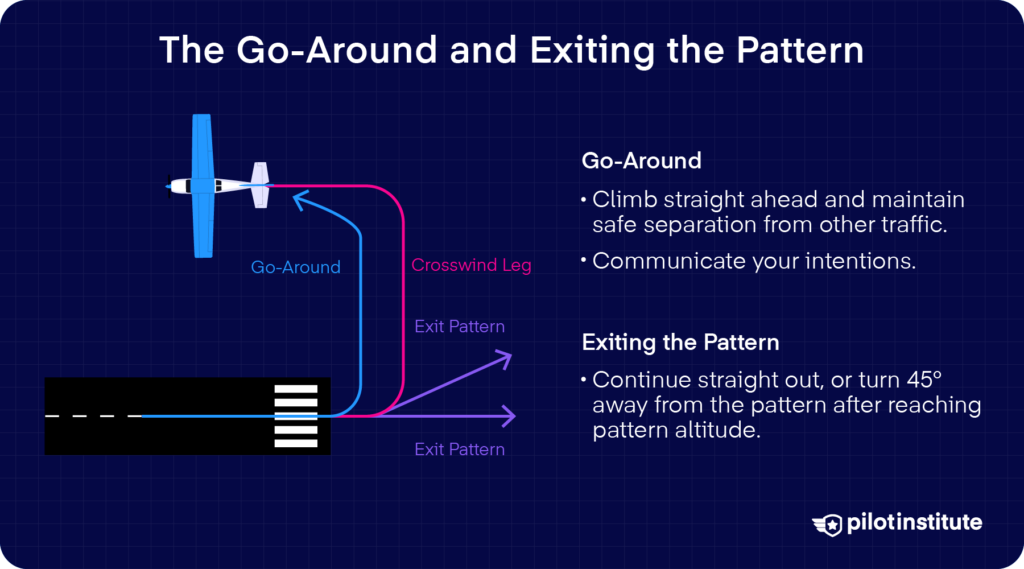
When initiating a go-around on the final approach, continue the climb to a safe altitude while climbing straight ahead.
If traffic is departing ahead or already airborne, it is crucial that you keep the traffic in sight during the climb and position the aircraft as necessary to maintain separation. Once again, communication is key to the safe and efficient operation of the traffic pattern.
When departing with no intention of joining the traffic pattern, continue straight ahead and exit the pattern, or turn 45-degrees left (when using a left pattern) or right (when using a right pattern) after reaching pattern altitude and exit the traffic pattern.
Frequently Asked Questions
- What is the standard traffic pattern altitude?
1,000 feet AGL for propeller-driven aircraft. Large and turbine-powered aircraft should enter at 1,500 feet AGL, or 500 feet above the published pattern altitude. Check the Chart Supplement U.S. for airport-specific altitudes. (Source: AIM 4-3-3, AC 90-66C)
- Are all traffic patterns left-hand?
By default, yes. All turns are to the left unless visual markings or published documentation indicate otherwise. Right-hand patterns are marked with “RP” followed by the runway number on sectional charts. (Source:14 CFR 91.126, AIM 4-3-3)
- How do I enter the traffic pattern from the opposite side?
AC 90-66C describes two options. The preferred method: overfly the airport at least 500 feet above pattern altitude, fly about 2 miles clear, descend to pattern altitude, and make a 45-degree entry to the downwind.
The alternate method: cross midfield at pattern altitude and turn directly onto the downwind. Only use the alternate method when the pattern isn’t congested, and yield to 45-degree entry traffic. (Source: AC 90-66C, Sec. 11.3 and Appendix A).
- Is there a speed limit in the traffic pattern?
At Class C or Class D airports, 14 CFR 91.117(b) limits you to 200 knots within 4 NM of the primary airport at or below 2,500 feet AGL. At non-towered airports, 200 knots is an FAA recommendation, not a regulation. (Source: 14 CFR 91.117, AC 90-66C)
- Does the FAA regulate how I enter the traffic pattern?
No. The FAA regulates pattern flow (left turns unless indicated otherwise), not the specific entry method. The 45-degree entry to the downwind midpoint is a recommendation, not a legal requirement.
The FAA does not recommend executing a straight-in approach for landing when there are other aircraft in the traffic pattern, and the FAA discourages VFR straight-in approaches to landings due to increased risk of a midair collision. (Source: AC 90-66C, Sec. 8.2.1)
- Who has the right-of-way on final approach?
Aircraft on final approach or landing have the right-of-way over other aircraft in flight or on the surface. When two aircraft are both approaching, the lower one has right-of-way, but it cannot cut in front of or overtake an aircraft already established on final. (Source:14 CFR 91.113(g))
- When should I start my turn from downwind to base?
At approximately a 45-degree angle from the approach end of the runway. Begin your descent at this point or earlier (abeam the threshold on downwind). Complete the turn to final at least 1/4 mile from the runway. (Source: AIM 4-3-3)
- What do I do if I need to go around?
Apply full power and climb straight ahead. Keep any departing or airborne traffic in sight and maintain separation. Announce your go-around on the CTAF. Once at a safe altitude, rejoin the pattern on the crosswind or downwind leg. (Source: AIM 4-3-3)
Conclusions
Most mid-air collisions occur during daylight hours under good visibility at or near uncontrolled airports below 1,000ft. No one is immune to mid-air collisions and incidents. Stay alert and be responsible!