-
What Are Lazy Eights?
-
Aerodynamic Principles
-
Preparing for the Maneuver
-
Lazy Eights Procedures (Step-By-Step)
- Initial Actions
- Straight and Level to 45° Reference Point
- 45° Reference Point to 90° Reference Point
- 90° Reference Point to 135° Reference Point
- 135° Reference Point to 180° Reference Point
- Final Actions
-
Common Lazy Eights Mistakes
-
Commercial Pilot ACS Standards
-
Conclusion
Lazy eights sound like the least challenging commercial checkride maneuver to learn. It’s just S-turns with climbs and descents, right?
Despite the easygoing name, many pilots find lazy eights harder than they thought. Meeting test standards is an uphill battle without a solid grasp of the maneuver.
Thankfully, lazy eights don’t have to be such a struggle.
In this article, we’ll teach you all you need to know to perform excellent lazy eights from lesson one.
What Are Lazy Eights?
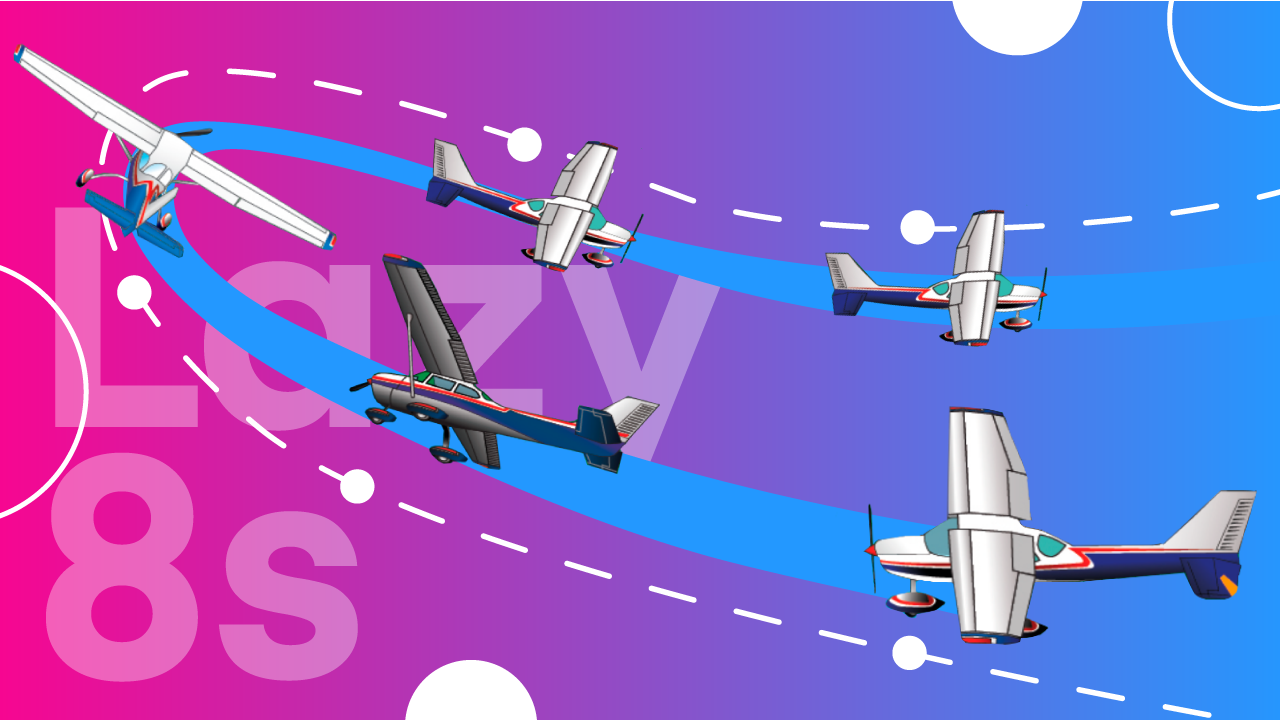
Lazy eights consist of two symmetrical and alternating 180° climbing and descending turns.
If completed correctly, you will have flown in a pattern that looks like a “lazy” eight. This is where the name comes from.
Of course, a good flight instructor will also mention that “lazy” is how you should fly the maneuver. Letting the aircraft do most of the work for you is the key to success.
Lazy eights teach us to fly with the finesse expected of a professional aviator. The maneuver requires control coordination and precision over various speeds and attitudes. There’s a reason why it’s been a commercial pilot practical test staple for decades.
If you’re about to begin your commercial pilot journey, you’ve come to the right place! Let’s get started.
Aerodynamic Principles
Before we dive into flying lazy eights, let’s review some aerodynamic principles that affect the maneuver.
Overbanking Tendency
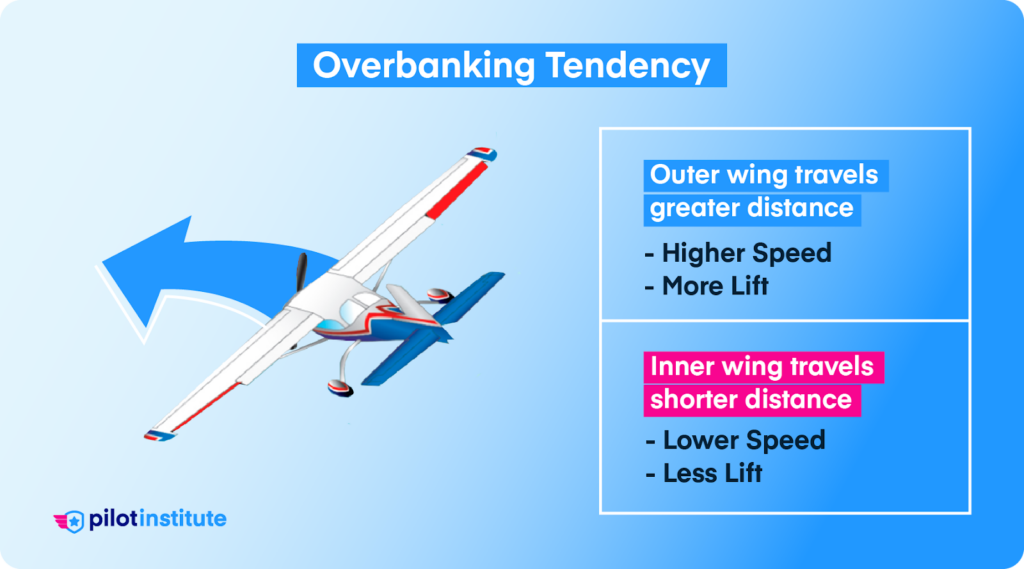
Picture an aircraft performing a basic 360-degree turn. If you could see the inner and outer wings’ paths, they would resemble two concentric circles. The outer wing’s circle has a larger circumference than the inner wing. This means the outer wing “travels” a greater distance during the turn.
Since both wings complete the turn in the same amount of time, the outermost wing must travel faster. The higher speed creates extra lift, causing the airplane to bank further into the turn. We correct for the overbanking tendency with aileron opposite the turn.
We don’t usually notice the tendency to overbank in shallow to medium bank angles. However, the aircraft tends to overbank at a low airspeed or when the bank angle is steep. We encounter both such conditions during the lazy eight.
The bank will increase without further input as the aircraft pitches up and slows down. The pilot’s job is to prevent the airplane from banking too quickly or too far.
Adverse Yaw
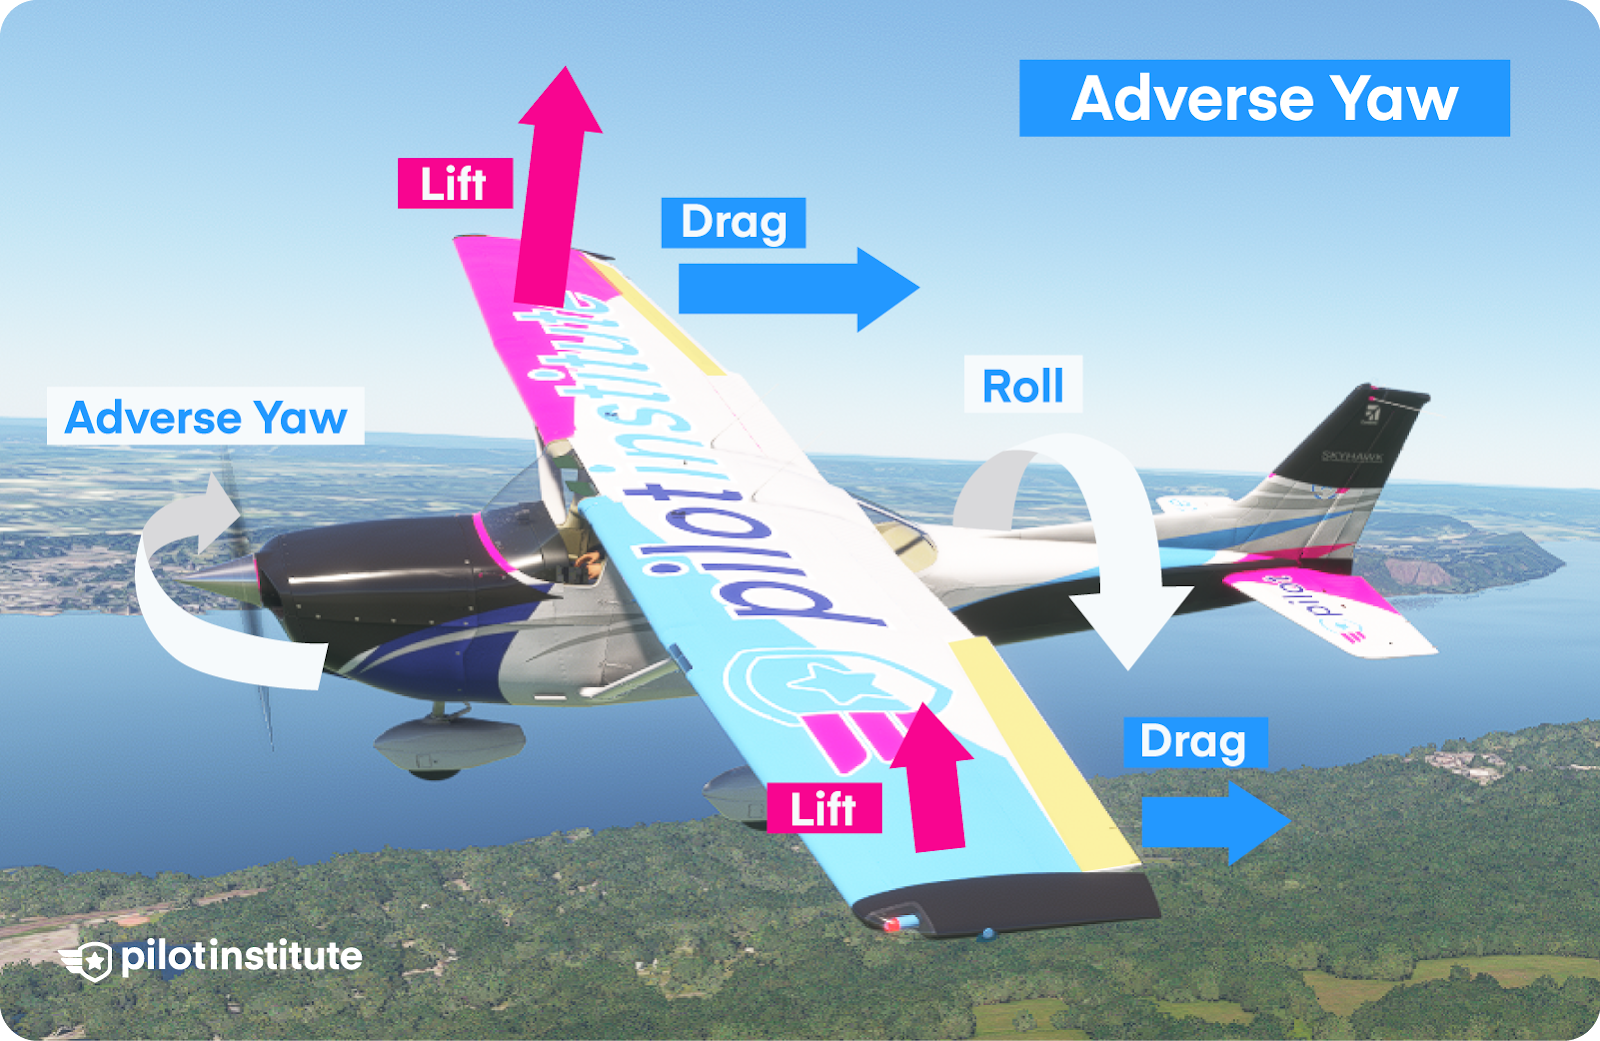
Adverse yaw is an aircraft’s tendency to yaw opposite the direction of a roll. Let’s look at why this happens.
Let’s say we command the aircraft to roll to the left. The aileron on the right wing deflects down, increasing the camber and creating more lift. The left wing’s aileron deflects up, decreasing lift. The lift imbalance causes the roll.
As the aircraft rolls, the angle at which the oncoming air hits the wing changes. Rolling tilts the left wing’s lift vector forward and the right wing’s lift vector backward. The imbalance causes the aircraft to yaw to the right.
While the tilting lift vectors are an important source of adverse yaw, drag also plays a part.
Any time a wing creates lift, it creates induced drag. In our example, the right wing has more lift, and thus more drag, than the left wing as the airplane rolls. This drag imbalance amplifies the adverse yaw.
We counteract adverse yaw by applying rudder in the direction of the turn. The amount of rudder required depends on roll rate and airspeed.
Adverse yaw is tricky to manage during the lazy eight maneuver. Airspeed and attitude change constantly, and we must change rudder input along with them.
Left-Turning Tendencies
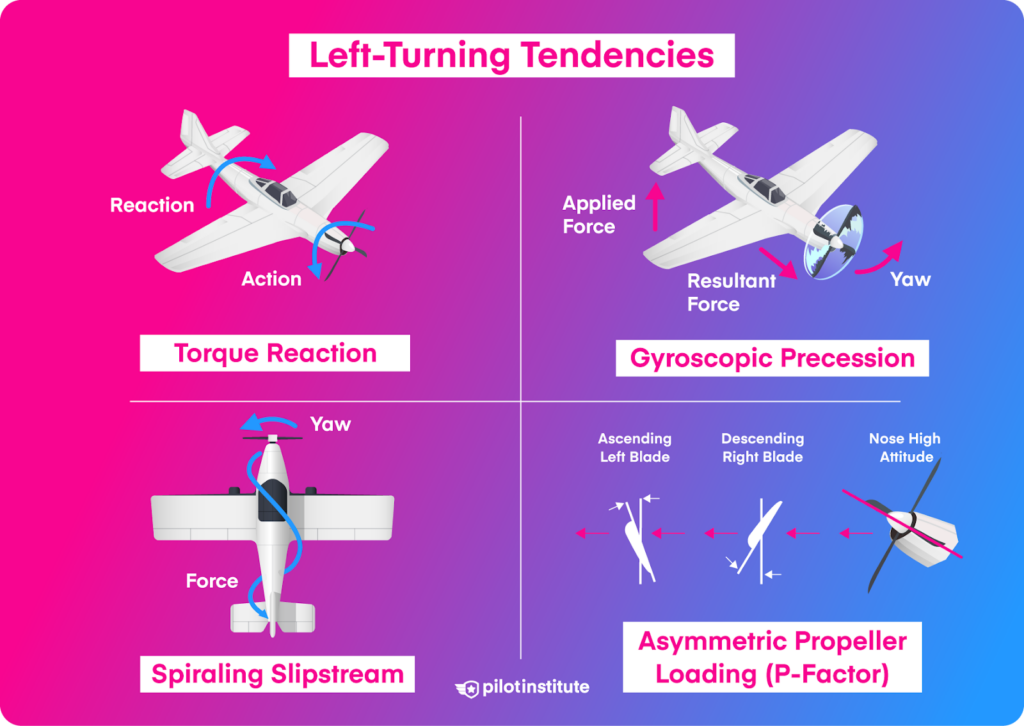
In propeller aircraft, left-turning tendencies cause the aircraft to unintentionally yaw and roll to the left.
Several different aerodynamic phenomena cause left-turning tendencies. However, they have one thing in common: the left-turning force is stronger at low airspeeds.
You will notice this leftward pull during lazy eights, particularly at the top of the turns. At this position, the aircraft is at a high angle of attack and a low airspeed. Left-turning tendencies (especially P-Factor) are much more noticeable in this condition.
We apply right rudder to counteract the left-turning tendencies. Adverse yaw reduces left-turning tendencies in left turns but increases them in right turns. Because of this, turning to the right will require more right rudder than turning to the left.
Preparing for the Maneuver
Before attempting the lazy eight, make sure you know the essentials of the maneuver.
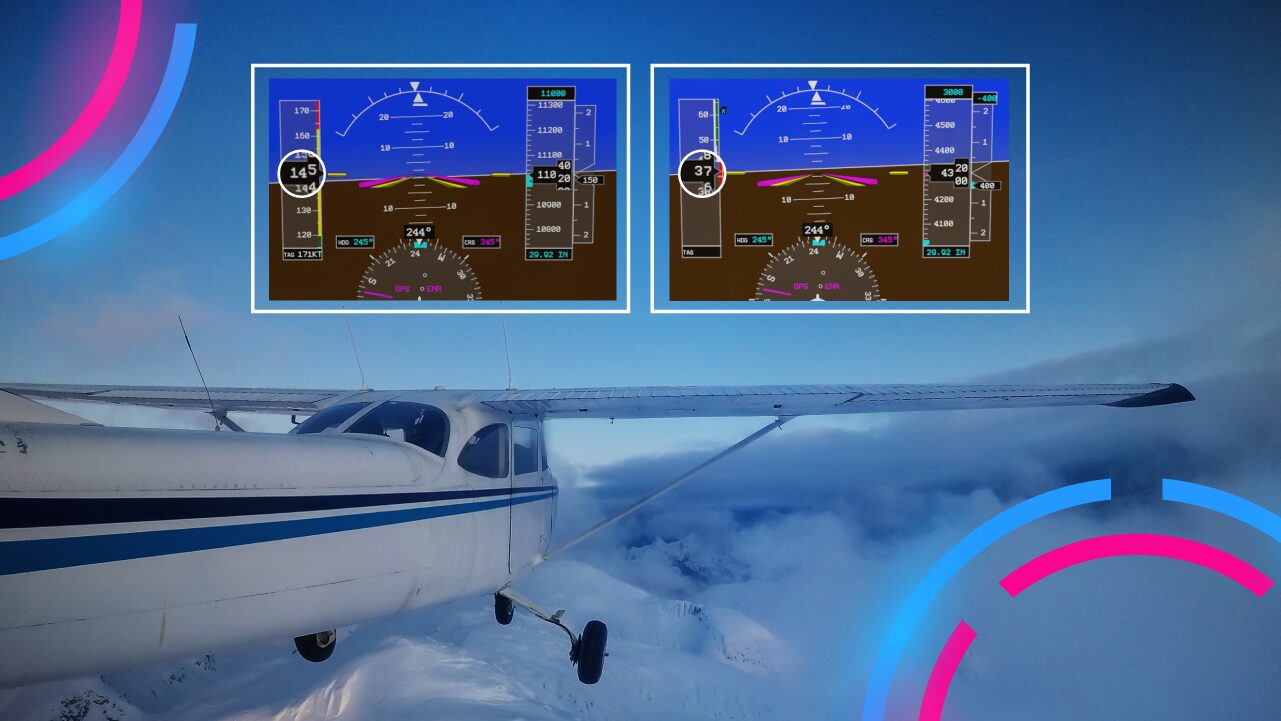
Altitude and Airspeed
You must select a minimum altitude for safety. For a dual flight, the minimum altitude is 1,500ft AGL (above ground level). If practicing these maneuvers solo, raise the minimum altitude to 2,000ft AGL.
Ensure you know the appropriate airspeed for the maneuver. Lazy eights are typically flown at cruise power settings below maneuvering speed. Refer to your Aircraft Flight Manual for the recommended speed and power setting.
For a Cessna 172, the recommended indicated airspeed for the maneuver is 105 knots. Set the power before entering the maneuver. Leave it alone until the maneuver is complete.
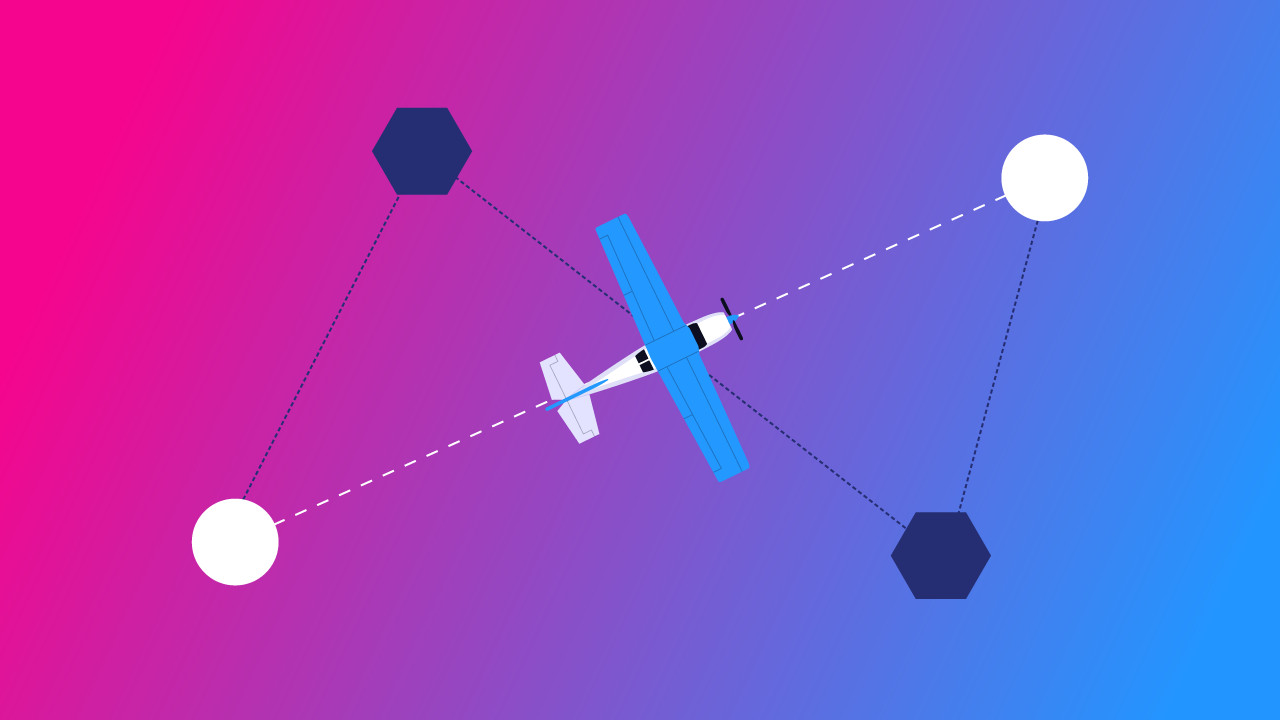
Visual Reference Points
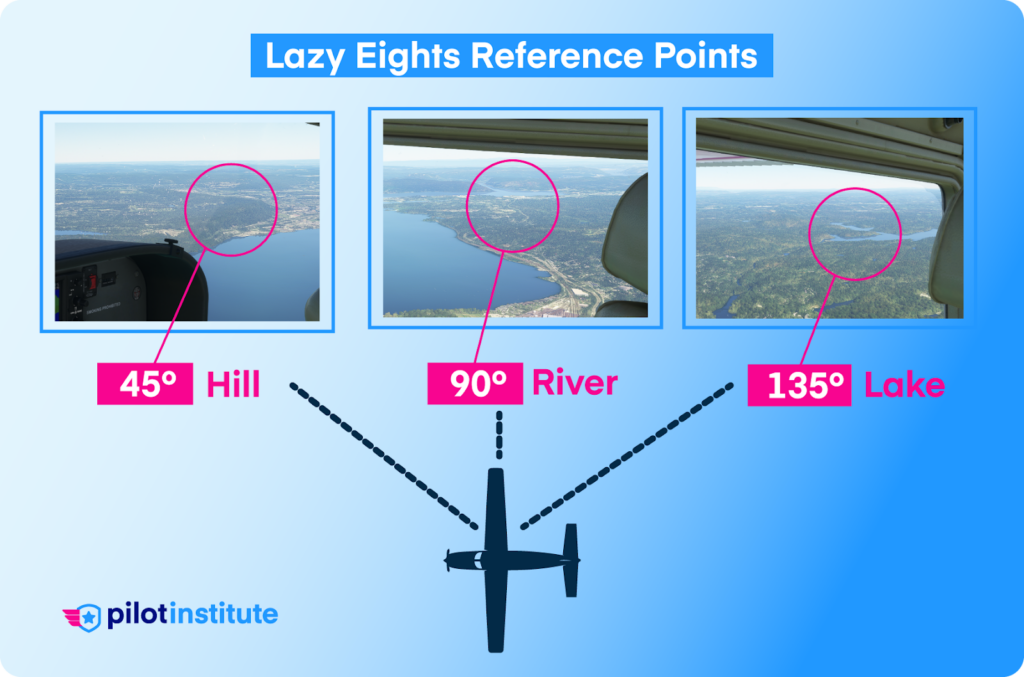
The lazy eight requires you to have your eyes outside. Selecting visual reference points helps you hit your key positions without focusing inside.
Select ground references at the 45°, 90°, and 135° positions relative to your direction of flight. Choose points on the side of the aircraft in the direction of the first turn. They should be far enough away that their positions remain fixed in relation to the airplane.
Your examiner may let you decide which direction to start the maneuver. However, they may request that you start with a left or right turn.
If possible, start the lazy eight by turning into the wind. Although the lazy eight isn’t a ground reference maneuver, it’s best to avoid the wind blowing you far away.
Choosing a reference for the 180° position is tricky since it’s behind you. Note your starting heading and use it as a reference for the reciprocal heading. But remember, don’t over-rely on your heading indicator. Using the reference points as much as possible will result in much smoother lazy eights.
After completing the first half of the eight, use your reference points again in the other direction.
Scan for Traffic
First, establish yourself at a safe altitude. Carry out at least two 90° clearing turns to scan for traffic in the area.
Carry out a radio call. Broadcast your location, altitude, and intentions to the local traffic frequency. This will allow any aircraft in the area to know your whereabouts.
Lazy Eights Procedures (Step-By-Step)
Now that we’re established in our training area, let’s go over performing a lazy eight step-by-step.
Initial Actions
- Carry out any pre-maneuver checklists.
- Determine the wind’s direction. Select a heading that allows you to start the maneuver by turning into the wind.
- Note (or bug) the heading.
- Set yourself up in straight and level flight at the appropriate airspeed. Trim the aircraft.
Straight and Level to 45° Reference Point
- Initiate a climbing turn toward the 45° reference point.
- Start with a small bank of about 5° and gently pull back gently on the yoke.
- As the aircraft pitches up, the airspeed drops. This causes the airplane’s bank to increase due to the overbanking tendency.
- Keep the overbanking tendency in check with aileron opposite the turn.
- Maintain coordination as adverse yaw and left-turning tendencies change with airspeed and bank.
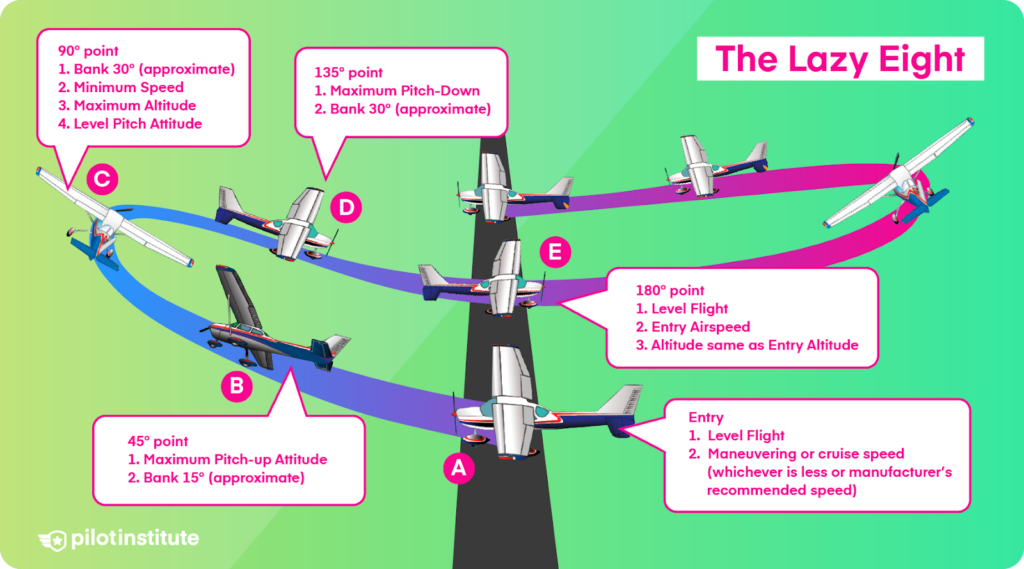
- At the 45° reference point, you want to be at a 15° bank angle. You should also reach the max pitch-up attitude (about 10° nose up).
45° Reference Point to 90° Reference Point
- From the 45° reference point, allow the bank angle to increase and the pitch to decrease.
- Keep back pressure on the yoke to prevent the nose from dropping too quickly.
- When you reach the 90° reference point, you should be at the max bank angle (30°). The aircraft pitch should be level with the horizon.
- At this point, you should be flying at the slowest speed (5-10 knots above stall speed).
- Right turns will need substantial rudder input to counteract the increased adverse yaw and left-turning tendencies.
90° Reference Point to 135° Reference Point
- From the 90° reference point, allow the pitch to decrease smoothly.
- Be prepared for the increased rate of turn at low airspeed and 30° of bank.
- As the nose gently slices through the horizon, start decreasing the bank angle.
- When you reach the 135° reference point, you should be at the max pitch-down attitude (7° to 10° pitch down). The bank angle should be about 15°.
135° Reference Point to 180° Reference Point
- From the 135° reference point, continue reducing the bank angle. At the same time, slowly start raising the nose.
- Glance at your altimeter. Adjust your rate of pitch and bank so you reach the 180° point at the starting altitude.
- At the 180°reference point, you should be straight and level. Your airspeed and altitude will be the same as when you entered the maneuver.
Final Actions
- If continuing the maneuver, begin a climbing turn in the opposite direction. Repeat the above steps.
- Once complete, retrim the aircraft for cruise flight. Complete any post-maneuver checklists.
Common Lazy Eights Mistakes
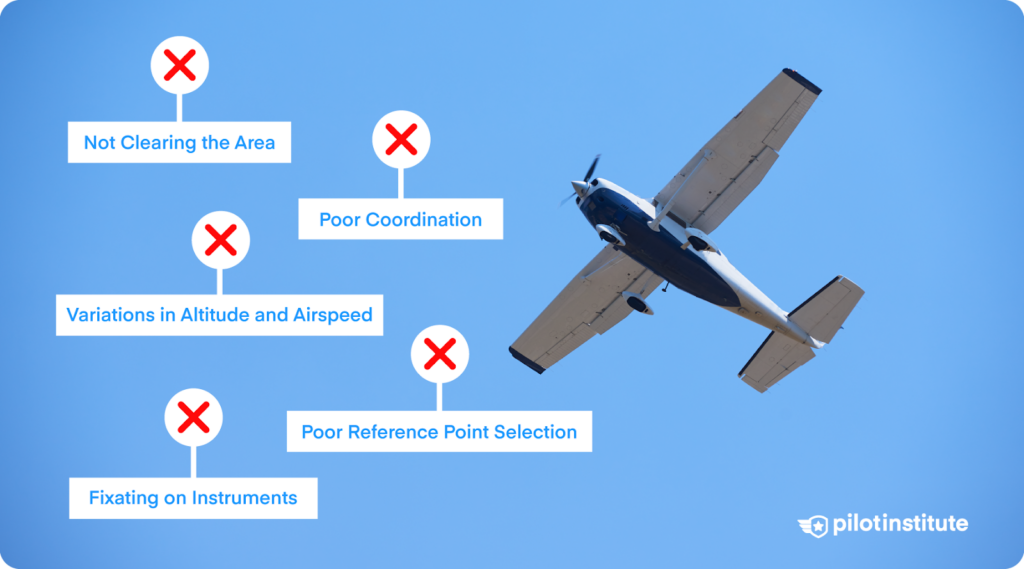
There’s a lot to think about when performing lazy eights. Everyone makes mistakes along the way. It’s a part of learning. However, knowing some common mistakes beforehand will help you minimize them.
Not Clearing the Area
Safety is fundamental when performing maneuvers. Carrying out clearing turns ensures there’s no conflicting traffic in the training area. Failure to do so may jeopardize the safety of the aircraft and result in a practical test failure.
Poor Reference Point Selection
Using obvious reference points is essential when performing lazy eights. Choosing reference points that are ambiguous, hard to see, or too close will set you up to fail.
Select prominent, unmistakable features for your reference points. Points too close to the aircraft will not stay “fixed” as you maneuver the aircraft.
Variations in Altitude and Airspeed
When exiting the lazy eight, you should be at the same altitude and speed as you entered the maneuver. A common mistake is ending the maneuver at a different altitude. If the altitude is out of tolerance, this could mean a test failure.
If you are deviating from the target airspeed or altitude, make proactive changes. However, don’t spend too much time scanning instruments. Keeping your eyes outside as much as possible will always result in better lazy eights. It’s an amazing feeling to hit your target altitude without having glanced at the altimeter.
Poor Coordination
Coordination is challenging because the aerodynamic forces are constantly changing during lazy eights. To address coordination problems, understand how the forces shift during the maneuver.
Too often, pilots carry out maneuvers without considering the details of each segment. Failure to do so causes poor pattern symmetry, unbalanced flight, and over-controlling. This will lead you to “chase the aircraft.”
Break down the maneuver into sections. Brief yourself on the required control inputs needed in each section. And, of course, go out there and practice, practice, practice.
Fixating on Instruments
You can easily become fixated on your instruments when performing lazy eights. But we have to remember that this is a maneuver where we must look outside. This is so we can look for reference points and keep clear of other traffic.
Get into the habit of scanning your instruments only briefly. A good scan increases situational awareness. But don’t miss out on the best attitude indicator: the Earth’s horizon!
Commercial Pilot ACS Standards

So, we’ve covered how to complete a lazy eight and avoid common errors.
But let’s go over the important part for many aspiring commercial pilots. What standards does the commercial checkride require?
To successfully meet the required criteria, the pilot must:
- Clear the area.
- Perform the maneuver no lower than 1,500ft AGL.
- Establish the entry configuration, power, and airspeed.
- Maintain coordinated flight throughout the maneuver.
- Have an angle of bank of approximately 30° at the steepest point (90° reference point).
- Have a constantly changing pitch, roll rate, and airspeed.
- Continue the maneuver through the specified number of symmetrical loops. Maintaining straight-and-level flight when complete.
At the 180° reference point, the pilot must meet the following criteria:
- Altitude ±100 feet from entry altitude.
- Airspeed ±10 knots from entry airspeed.
- Heading ±10° from entry heading.
Conclusion
Becoming proficient in flying lazy eights is a true benchmark for piloting skills. For those aiming for a commercial license, acing this maneuver proves you have what it takes to be a pro pilot.
While the maneuver initially seems straightforward, a closer look reveals the challenges. But if you put the knowledge learned in this article into practice, you’ll be on your way to passing your flight test.
Are you looking to take your coordination skills to the next level? A strong, gusty crosswind will push your stick and rudder skills to the limit. Check out our latest article on crosswind landings here.