
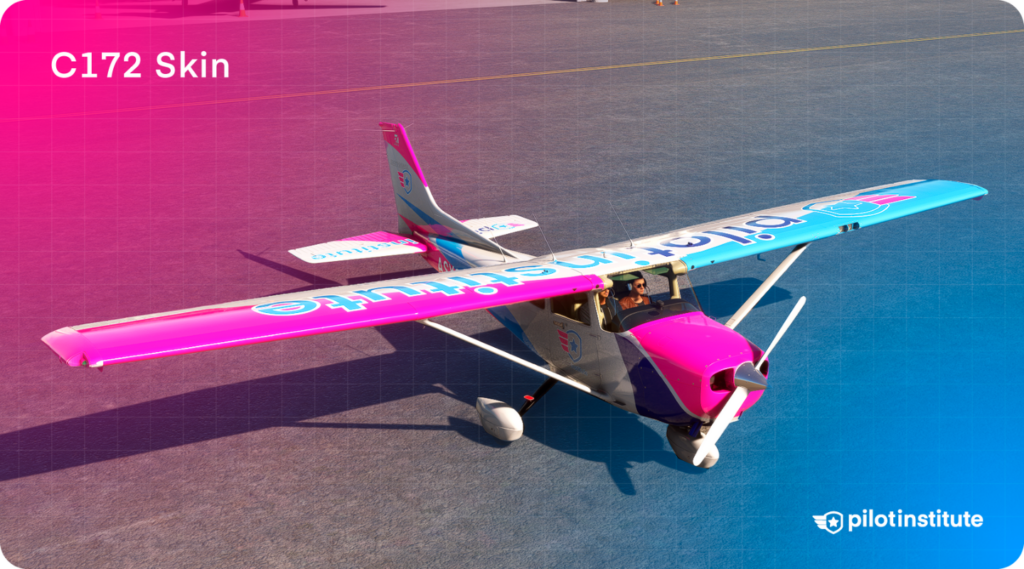
Pilot Institute has created exclusive aircraft skins for the DA40 and C172, and they’re free to download for Microsoft Flight Simulator!
Enter your email, and we’ll send you the download link. We’ll add you to our newsletter, but you can unsubscribe anytime (we hate spam)!
If you’re not sure where to start, this guide has a step-by-step tutorial to help you install them quickly and get flying.
Share screenshots of your flights using our skins on Instagram, and tag us @pilotinstituteairplanes!
How to Install Your New Flight Simulator Skins

1. Locate Your Microsoft Flight Simulator Community Folder
The Community folder is where you’ll place the new skin files to make them available in Microsoft Flight Simulator. The location of this folder can vary depending on where you purchased the game.
Here’s how to find it:
- For Steam Users:
- Go to C:\Users\[Your Username]\AppData\Roaming\Microsoft Flight Simulator\Packages\Community
- For Windows Store Users:
- Go to C:\Users\[Your Username]\AppData\Local\Packages\Microsoft.FlightSimulator_\LocalCache\Packages\Community
- Custom Installations:
- If you selected a custom location during installation, the Community folder will be in the directory you chose. Look for a folder named “Community” within your chosen installation folder.
If you’re not sure of the exact location, you can open Microsoft Flight Simulator and then:
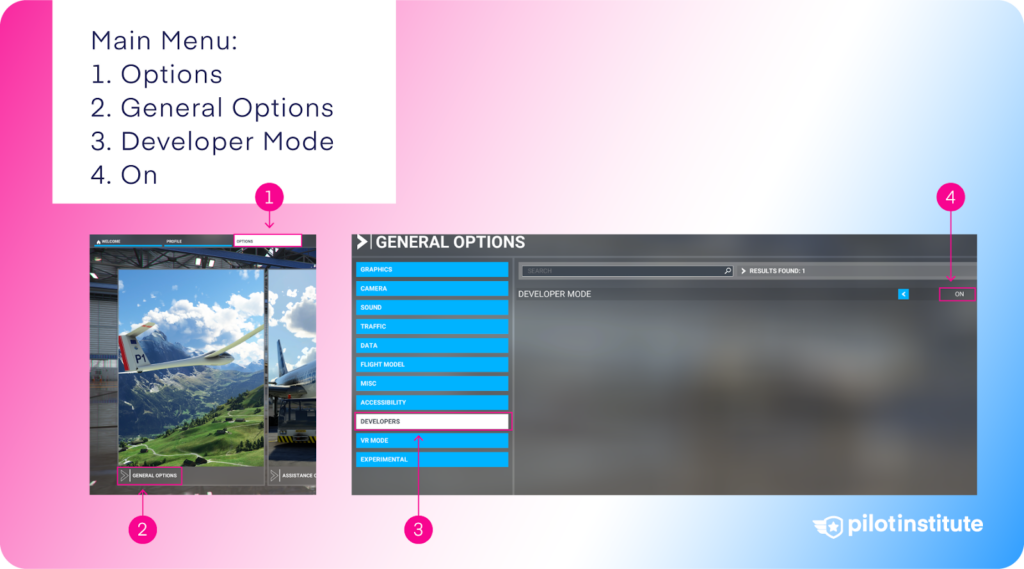
- Go to “Main Menu” > 3rd Tab from top > “Options” > “General Options” > Developers Tab > “Developer Mode” > “On”
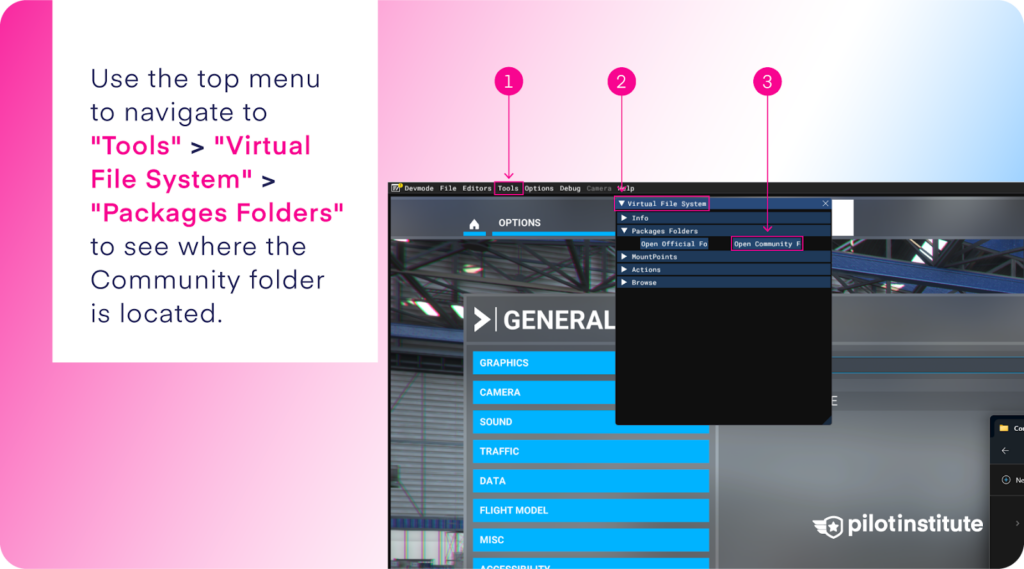
- Use the top menu to navigate to “Tools” > “Virtual File System” > “Packages Folders” to see where the Community folder is located. Make sure to click the “Open Community Folder” button, not the “Open Official Folder” button.
2. Download and Extract the Skin Files
Once you click the download buttons from the “Where to Download Our Flight Simulator Skins” section of this article, the skin files will be saved as a ZIP folder.
Here’s what to do next:
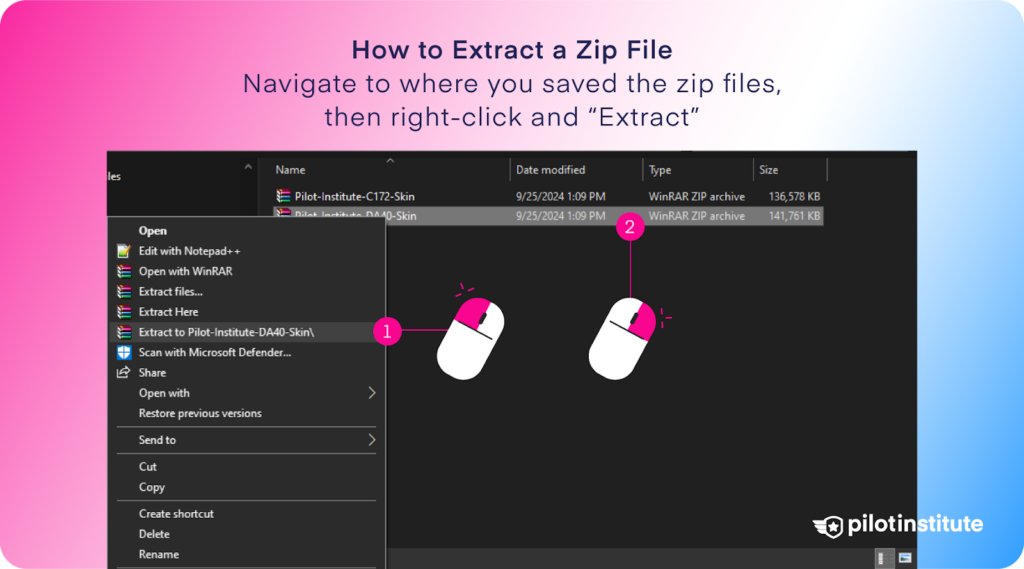
- After downloading, locate the ZIP file in your Downloads folder.
- Right-click the ZIP file and choose “Extract All” or use a third-party tool like WinRAR or 7-Zip to extract the contents.
You should now see a folder with the skin’s name (e.g., “Pilot-Institute-DA40-Skin” or “Pilot-Institute-C172-Skin”).
3. Place the Skins in the Community Folder
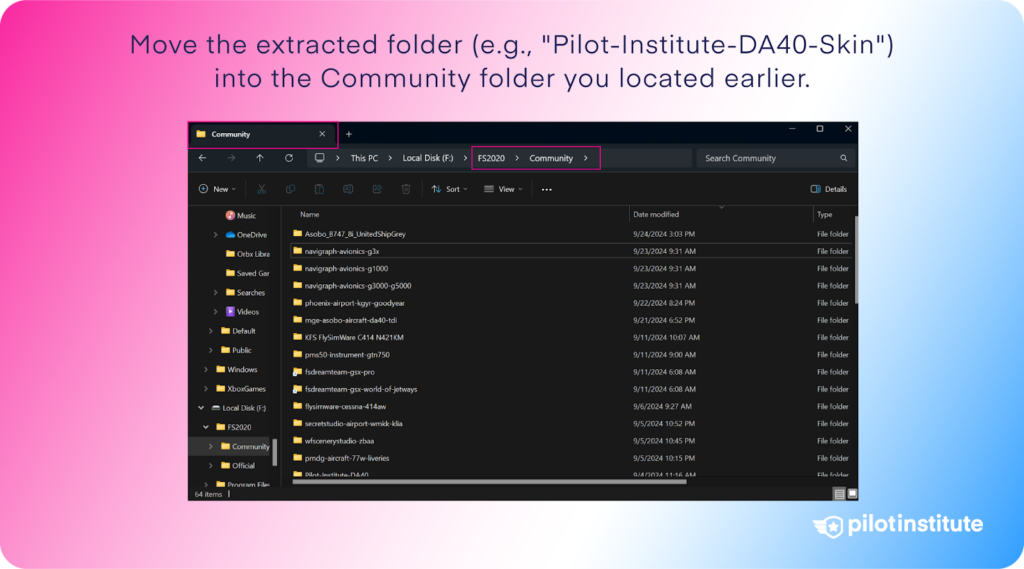
Now that you’ve extracted the skin files, it’s time to install them:
- Copy or move the extracted folder (e.g., “Pilot-Institute-DA40-Skin”) into the Community folder you located earlier.
- Make sure each skin’s folder contains a manifest.json file along with other files (this confirms it’s in the correct format for MSFS to recognize).
4. Launch Microsoft Flight Simulator and Enjoy!
Share screenshots of your flights using our skins on Instagram, and tag us @pilotinstituteairplanes!