-
Key Takeaways
-
What Is a No-Flaps Landing?
- Scenarios for No-Flaps Landings
- Common Training Scenarios
- Differences From Standard Landings
-
Effects of No-Flaps on Aircraft Performance
- Increased Landing Distance
- Lift and Drag Modifications
- Higher Pitch Attitude
-
Step-By-Step Guide To Performing a No-Flaps Landing
- Pre-Landing Checklist
- Sight Picture Adjustments
- Firmer Touchdown
-
Common Challenges and How To Overcome Them
- Airspeed Control Techniques
- What To Do if You’re Too High?
- Power Management on Final
-
Tips for Practicing No-Flaps Landings in Training
- Ideal Practice Environments
- Comprehensive Training Exercises
- Analysis and Debriefing
-
Conclusion
Have you ever thought about landing an airplane without using flaps? It might sound a bit scary, but it’s a valuable skill for a pilot to master.
Think about these scenarios: maybe the flaps stop working, or you’re flying an older airplane that doesn’t even have them. Whatever the reason, knowing how to handle a no-flaps landing provides you with a great backup plan.
By the end of this guide, you’ll know the ins and outs of landing without flaps and feel ready to take them on.
Key Takeaways
- No-flaps landings require precise airspeed and altitude management for a safe touchdown.
- Pilots must adapt their approach and landing technique during flap failure.
- Understanding aircraft performance changes to maintaining control during no-flaps landings.
- Proper training and practice are essential for successfully executing no-flaps landings.
What Is a No-Flaps Landing?
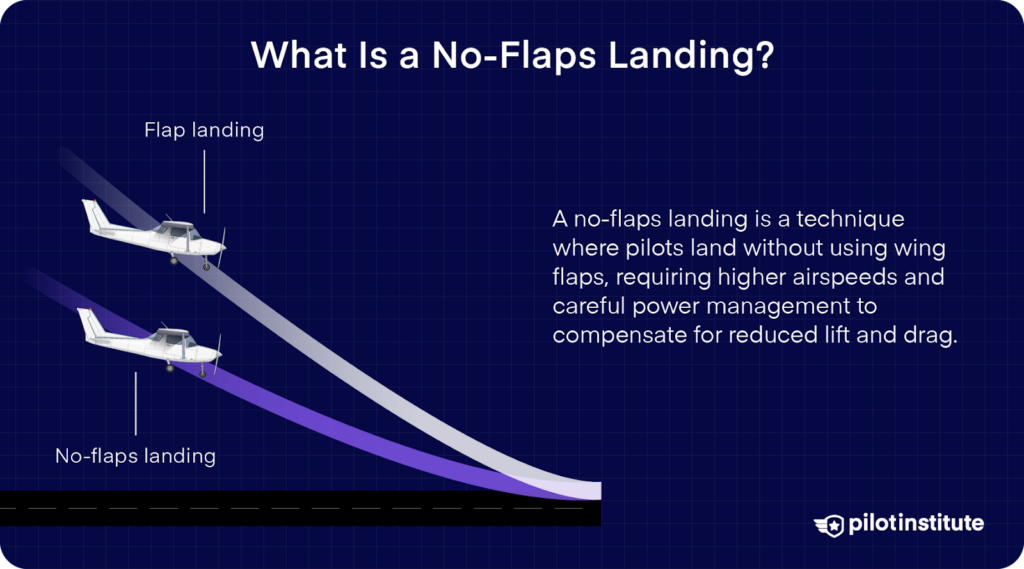
A no-flaps landing is a vital skill that teaches you to land an aircraft without flaps. What is the purpose of flaps? The flaps on an aircraft are used for controlled descents with slower airspeed during the approach and landing.
When landing without flaps, pilots must adjust their techniques to compensate for higher approach speeds, a shallow descent angle, and longer landing distances. For most light aircraft, a no-flaps landing is not considered difficult or risky.
Scenarios for No-Flaps Landings
A no-flaps landing is necessary in many situations and requires good pilot skills.
1. Equipment Malfunction
A no-flaps landing is required if the flap mechanism suddenly experiences malfunctions, such as a mechanical or electrical failure. What other issues could lead to flap failure? Poor maintenance and overspeed can cause issues with flap extension.
2. Instructor Training
Hands-on training will teach you how to be prepared and successfully manage a no-flaps landing. How can training make you more confident? An experienced instructor can teach you about airspeed management, sight picture adjustments, and power control.
3. Certain Conditions
Certain conditions, such as severe icing or busy airspace (request for faster approach), may require a no-flaps landing. Also, learning a no-flap landing is required on some older aircraft like the Piper J-3 Cub or Piper Vagabond, which don’t have flaps.
Common Training Scenarios
Simulated Flap Failures: During your training, the instructor will simulate real-world flap failures.
Crosswind Landings: Learning no-flap crosswind landings can help improve aircraft control in high-wind conditions. This is important because crosswinds can make it difficult to control the aircraft at low speeds, so a no-flaps landing can teach you how to land with a higher approach speed.
Designated Touchdown Spot: Practicing with your instructor can improve your ability to bleed off excessive airspeed and safely land at the designated touchdown spot.
Differences From Standard Landings
How does a no-flaps landing differ from a standard landing? Compared to standard landings, no-flaps landings require certain adjustments in aircraft handling, such as:
- Higher approach speeds (5-10 knots faster than normal).
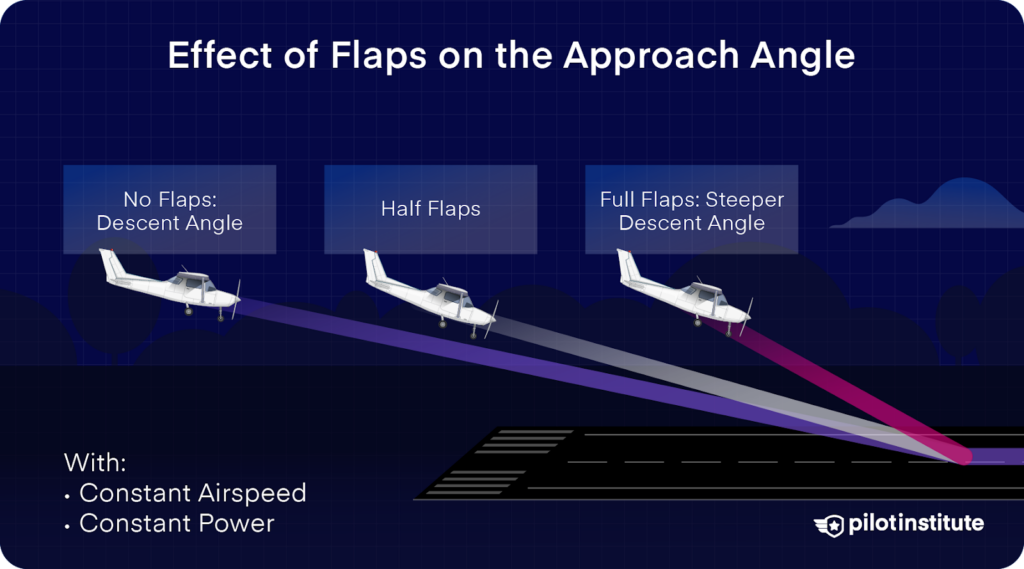
- Flatter approach angle (due to less drag).
- Increased landing distance (due to higher touchdown speed).
- More aggressive energy management.
- Better situational awareness.
Note: No-flap landings are a required skill for Private Pilot certification. Learning no-flap landings makes sure that you can confidently handle flap failure situations if needed.
Effects of No-Flaps on Aircraft Performance
No-flaps landings create unique challenges for pilots. That’s why you need to be aware of these performance changes to perform a safe landing.
Increased Landing Distance
What potential dangers arise from no-flap landings? When the flaps are not deployed, your aircraft will have:
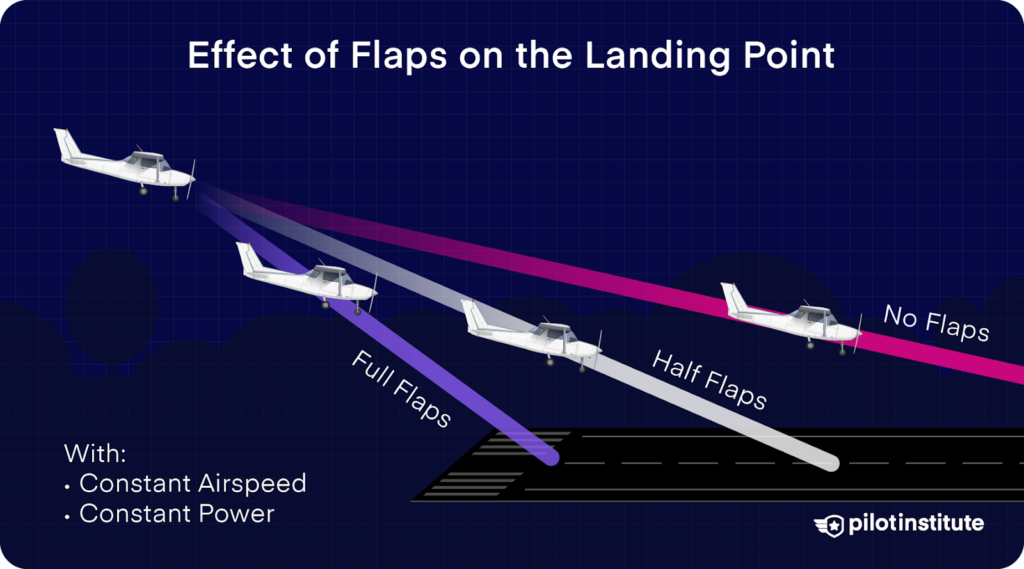
- Longer ground roll after touchdown.
- Higher kinetic energy upon landing.
- Increased stopping distance.
How can you safely manage longer landing distances? A no-flaps landing generally requires more runway for stopping, with the distance that can increase by as much as 50% depending on the aircraft and conditions.
Lift and Drag Modifications
A no-flaps landing significantly reduces drag and lift, which is why the approach is flown at a higher speed. In such a situation, you need to maintain lift by adjusting the angle of attack and airspeed, which requires precise control.
Higher Pitch Attitude
To maintain altitude, it’s normal for your aircraft to have a higher pitch attitude. This can make the aircraft feel like it’s climbing rather than descending. So, you should practice maintaining the correct sight picture by aligning the runway threshold with a fixed reference point on the windscreen.
Step-By-Step Guide To Performing a No-Flaps Landing
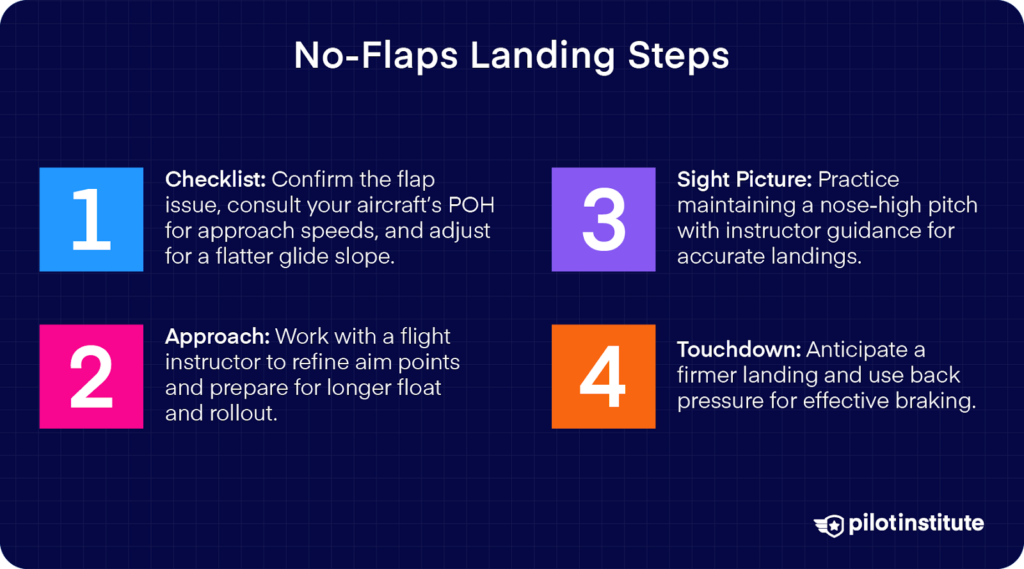
Let’s explore the steps to take for a no-flaps landing.
Pre-Landing Checklist
1. Verify Flap Problem
First, confirm that the flaps are inoperable and if you have a full or partial flap failure. Then, refer to your aircraft’s Pilot Operating Handbook (POH) for speed guidelines. For example, in a Cessna 172S, the approach speed increases from 60-70 knots with full flaps to 65-75 knots without flaps.
2. Performance Calculations
Performance calculations are important during a no-flaps landing. What do you need to do before landing?
Know Your Numbers: Check the POH if you have one. For most trainer aircraft, the approach speed is usually 5-10 knots more without flaps.
Flatter Approach: Be prepared for a shallower glide slope when flying without flaps, and adjust your descent plan accordingly.
Longer Ground Roll: Expect a longer rollout. The POH generally gives landing distance information for no-flaps scenarios.
Adjust Your Aim Point: Modify your sight picture so your touchdown point factors for the reduced drag, lift, and longer float.
Sight Picture Adjustments
Without flaps, your approach will have a slightly nose-high pitch, which can confuse some students. What should you do? Start by adjusting your view to maintain the glide slope and shift your aim point further down the runway to compensate for the flatter descent.
During your training, you should regularly practice landing on your set aim/touchdown point. This will help you build the required sight picture for no-flaps landings.
Also, while landing, the aircraft will float more than usual. The flatter approach makes it difficult to lose energy quickly during the flare, resulting in a longer float.
Note: When landing, avoid forcing the airplane by pushing the nose down or flaring excessively.
Firmer Touchdown
You should anticipate a firmer touchdown due to higher approach speeds. What should you do after touchdown? After the touchdown, maintain back pressure on the yoke to increase brake effectiveness and counter the higher ground speed.
Common Challenges and How To Overcome Them
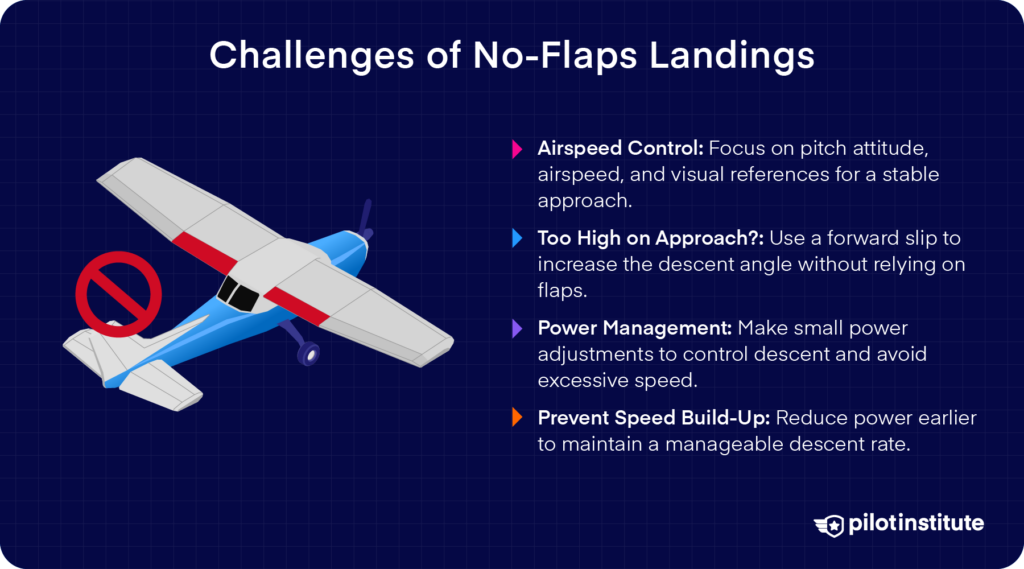
Let’s explore the common challenges of no-flaps landings.
Airspeed Control Techniques
Managing airspeed during no-flaps landings requires technical skill and aircraft handling. You must use proper power management techniques to have a stable approach and landing. On the final approach, pay close attention to the pitch attitude and airspeed, and use visual references to land.
What To Do if You’re Too High?
Use a forward slip to increase the descent angle when necessary, particularly if you are too high during the approach. A slip will allow you to maintain the airspeed without depending on flaps for additional drag.
Power Management on Final
Another thing to know is that your aircraft will require less engine power without the drag from flaps to maintain the glide slope. You need to make small, controlled power adjustments to manage the descent rate and airspeed.
Most importantly, you need to prevent the aircraft from picking up too much speed, as it is easy to get too fast and harder to slow down. To avoid such a situation, you should reduce power earlier in the descent or approach.
Tips for Practicing No-Flaps Landings in Training
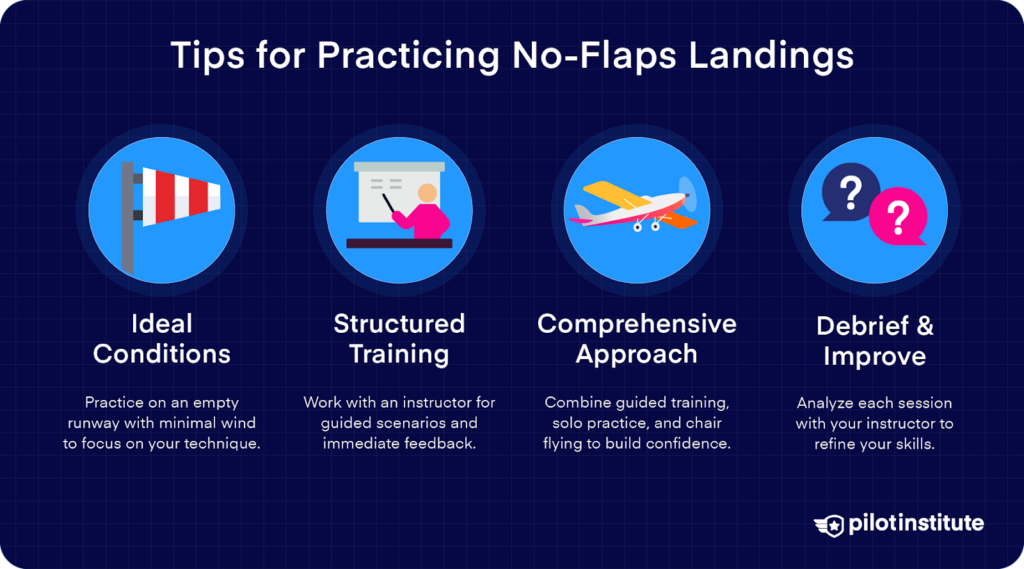
Use the following tips for practicing no-flaps landing during your training.
Ideal Practice Environments
Creating the ideal environment for no-flaps landing training involves several factors. You should find an empty runway that has enough space for practice. Pick a time with minimal wind conditions so you can concentrate on no-flaps approaches without any distractions.
What type of training is best for no-flaps practice? Structured training scenarios provide a systematic learning experience that gradually improves your skill level. Also, having an instructor present makes sure you receive immediate feedback and guidance.
Comprehensive Training Exercises
No-flaps landing training requires a well-rounded approach with guided training and solo flying. Your instructor will create a training program that mimics various no-flaps landing situations, pushing you to adapt to different challenges.
At home, consider using chair flying to aid in your training, as it provides a safe space to practice landing techniques without the risks of real-world flying.
Analysis and Debriefing
Analysis and debriefing are key parts of the no-flaps landing training process. Why is debriefing needed? Each practice session presents valuable learning moments, where your instructor will sit you down to review performance, pinpoint areas for improvement, and develop safe landing strategies.
Conclusion
No-flaps landings might look a little different from your usual touchdown. Keep practicing them until they become just another tool in your pilot toolkit. Follow the steps, stay calm, and believe in your own abilities. Before long, you’ll find no-flaps landings are just another day at the office—or in this case, the cockpit!

