-
Key Takeaways
-
The Importance of Clear IFR Radio Communication
-
The 4 W's of an IFR Radio Call
- Who
- Where
- Why
- With
-
Common IFR Radio Call Scenarios
- Departure Clearance
- Enroute Calls
- Approach Calls
-
Tips for Learning and Practicing IFR Radio Calls
- Building Your Skills on the Ground
- Tips for Practicing in the Cockpit
-
Conclusion
Talking to air traffic control (ATC) while flying IFR is challenging in the beginning, but with time and practice, you can master it!
Just like following a recipe, IFR radio calls have a simple structure you can learn and practice.
Knowing what to say, when to say it, and how to say it keeps you on track during your flight.
This guide will walk you through the basics, show you examples of common calls, and give you tips to build your radio talking skills.
Get ready to pick up the mic and talk like a pro.
Key Takeaways
- Master the 4 W’s (Who, Where, Why, With) to simplify IFR radio calls.
- Use the CRAFT acronym to note down departure clearances quickly.
- Practice common IFR scenarios to build confidence in radio communication.
- Browse FAA guides while listening to real ATC calls to learn without wasting time.
The Importance of Clear IFR Radio Communication
If you’re on an IFR flight, chances are you’re dealing with clouds and low visibility. You can’t rely on visual cues to avoid other traffic – or even navigate accurately.
This leaves you and your passengers’ safety in the hands of instructions from ATC (Air Traffic Control).
Any misunderstanding of those instructions could put you in another aircraft’s path. Or you might stray off course and into bad weather or obstacles.
At the very least, not doing what ATC wants could get you into trouble with the FAA.
Here’s what you can do to sharpen your skills and prevent mistakes.
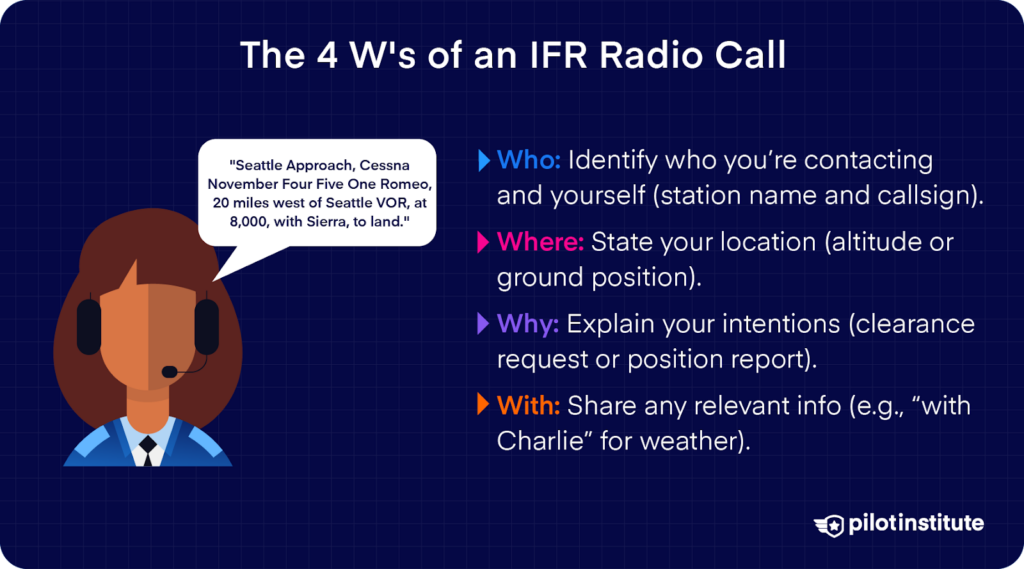
The 4 W’s of an IFR Radio Call
Let’s address the most intimidating thing about radio calls. It’s true that they can seem fairly complex, especially IFR calls.
Try thinking of them as just part of normal conversation. You can break an ATC call into four simple questions.
Who
Who’s talking?
This question has two parts since there are two parties in the conversation.
First, name the station you’re trying to contact.
Then, identify yourself using your aircraft’s callsign.
Mentioning the recipient and the sender helps avoid misunderstandings. If you tune a wrong frequency, that station would catch your mistake when they hear you address someone else.
Where
Where are you speaking from?
Give your current location and altitude. This makes it easier for controllers to distinguish your aircraft from others in the area with a similar callsign.
Why
Why are you calling?
What are your intentions? You may be asking for a clearance or reporting your position.
With
Do you have any relevant information to add context? If you have weather information, Sierra, then you say you’re ‘with information Sierra.’
Putting it all together, you can create one complete radio call.
For example:
- Pilot: “Seattle Approach, Cessna November Four Five One Romeo, 8,000, with information Sierra.”
Common IFR Radio Call Scenarios
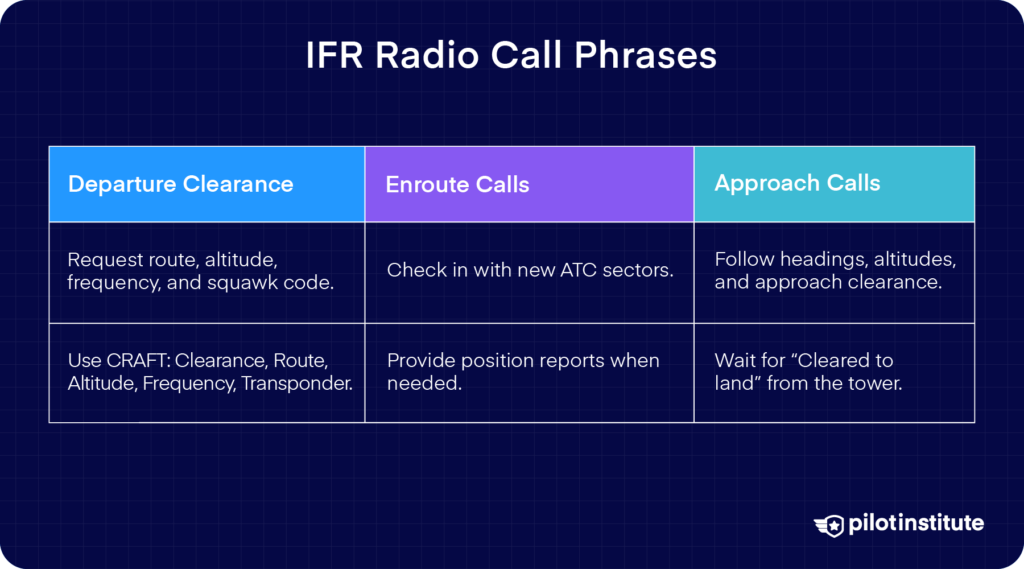
You may have already heard the more famous radio calls such as “Cleared for takeoff.” Every flight has those. Some radio calls, however, are unique to IFR flights.
Let’s review the calls you’ll likely encounter while flying IFR.
Departure Clearance
The departure clearance is a special type of radio call. It gives you permission to fly in controlled airspace under IFR. ATC also uses it to provide essential information about your route and expected altitude.
This is usually the longest, most complex radio call in the entire flight. Controllers know how complex it is and may give you a heads-up by asking if you’re ready to copy the departure clearance.
Large airports usually have a dedicated frequency called Clearance Delivery. Smaller airports are less busy, so they just use Ground Control to handle these calls.
Using the 4 W’s in Departure Clearance
What does a departure clearance look like? And how can the 4 W’s make it easy to understand? Here’s an example.
- Pilot: “Dallas Clearance Delivery, Cessna November Four Five One Romeo at the east ramp. Ready to copy IFR clearance to Denver with Information Delta.”
It seems complex, but here’s how to break it down into the 4 W’s.
- Who: Cessna November Four Five One Romeo (that’s you!) is talking to Dallas Clearance Delivery.
- Where: You’re starting from the east ramp.
- Why: You’re requesting IFR clearance to Denver.
- With: You’ve looked up the ATIS, and the latest weather information you have is Delta.
ATC will provide your clearance, which will include:
1. Clearing you to fly to your destination.
This is just a phrase that acts as formal approval of your clearance. It’s also a way to confirm your destination. For example, “November Four Five One Romeo is cleared to Cleveland as filed.”
2. The departure runway and the departure procedure.
This can be a published SID (Standard Instrument Departure) procedure used at large airports.
Controllers can say you’re cleared, for example, via the Kennedy 5 departure. In that case, just open up the Kennedy 5 departure chart and follow the instructions.
It’s also possible they’ll give you specific directions.
For example,
ATC: “Fly runway heading until two miles from Kennedy VOR, then turn right, heading one zero zero. Radar vectors to GAYEL. Then proceed as filed.”
That last bit means ATC will guide you to the waypoint GAYEL after you make the turn. From there, you’re free to follow your filed flight plan.
3. The initial altitude clearance and expected altitude.
ATC may say, “Climb and maintain two thousand. Expect eight thousand, five minutes after departure”.
This doesn’t mean you can start your climb to 8,000 feet all on your own!
ATC only gives you the expected altitude to help you manage your workload. You have to wait for their explicit clearance to continue climbing.
4. The departure frequency.
ATC gives you this frequency so you can tune it in after takeoff.
Since that’s a high-workload period, it helps to have the frequency with you beforehand. This reduces the chances of mistakenly tuning the wrong frequency at a critical time.
5. The squawk code.
This is a four-digit number that identifies your aircraft during the flight. Key in the code to your transponder so that ATC knows who you are.
6. The ground frequency.
Clearance Delivery doesn’t issue taxi instructions. You’ll have to switch over to ground control to get cleared to taxi.
Small airports don’t use a separate frequency for clearance delivery, so they omit this step.
That’s a lot of information. To ensure there’s no misunderstanding, you must read it back to the controller. That means you repeat what they said in the same manner and order they said it.
The controller will let you know if your readback has any mistakes. If everything checks out, they’ll say “Readback correct” and ask you to contact Ground for taxi instructions.
Using the CRAFT Acronym
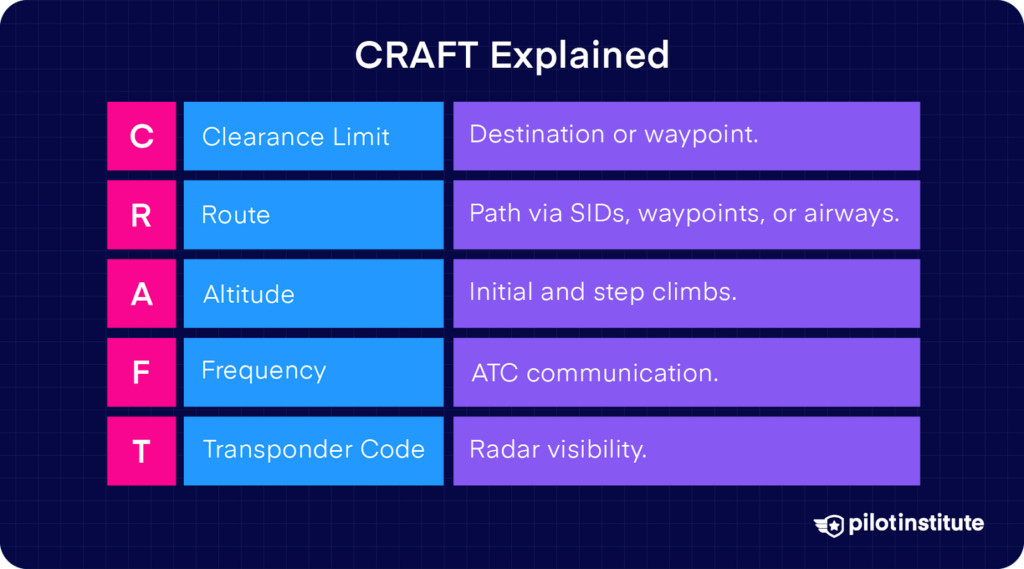
Writing the departure clearance on paper while you hear it is an excellent idea. Since you must write while listening, use shorthand to jot down the points quickly.
You can use the CRAFT acronym to make sure you note all the key points in the message.
- C — Clearance Limit: The destination or fix to which you are cleared.
- R — Route: The route you’ll follow, including any SID or waypoints.
- A — Altitude: The initial altitude and any additional altitude instructions.
- F — Frequency: The departure frequency you’ll contact after takeoff.
- T — Transponder Code: The squawk code assigned for your flight.
Enroute Calls
As you fly, you’ll pass through different sectors of airspace managed by different ATC centers. You’ll need to check in with the new controller whenever you change frequencies.
For example:
- Pilot: “Albuquerque Center, Cessna November Four Five One Romeo at eight thousand.”
Here’s where flying IFR makes things easier for you. The controller already knows your intended route and destination. That saves you from repeating that information.
But what happens when you’re over an ocean or a remote area? You might be asked to make a position report. Here’s an example:
- Pilot: “New York Center, November Four Five One Romeo, over ELFUS at 1530 Zulu, 8,000. Estimating GIPSO at 1555 Zulu, next fix MINKA.”
Confused? Use the W’s!
Who: You are talking to New York Center, and your callsign is November Four Five One Romeo.
Where: You’re currently over the waypoint ELFUS. Your altitude is 8,000 feet.
Why: You intend to inform ATC when they can expect you at the upcoming waypoints. You estimate crossing GIPSO at 1555 Zulu time. The fix after that will be MINKA.
Notice something missing?
The fourth W (With), can be omitted in your initial call. You don’t generally have to listen to ATIS for airports where you don’t mean to land. ATC will let you know the current altimeter setting in their reply. For example:
- ATC: “November Four Five One Romeo, roger, radar contact. Altimeter 30.02”
Approach Calls
The approach clearance is also slightly complex since it has instructions for your approach.
The controller will clear you for the approach when you get close to the airport. Here’s an example:
- ATC: “November Four Five One Romeo, you are nine miles from the airport. Turn right, heading zero four zero. Descend and maintain two thousand feet until established on the localizer. Cleared ILS runway six approach.”
The first sentence is merely for your information. You don’t have to repeat it. The rest of the message has instructions that you must repeat. Your reply would be:
- Pilot: “Turn right to zero four zero. Descend and maintain two thousand until established. Cleared for ILS runway six approach, November Four Five One Romeo.”
Does this mean you’re cleared to land?
Not quite. This is just the approach clearance from the approach controller.
You’ll get your landing clearance from the tower. It will include the words “Cleared to land.” Make sure you wait to hear that specific phrase before proceeding to land.
Tips for Learning and Practicing IFR Radio Calls
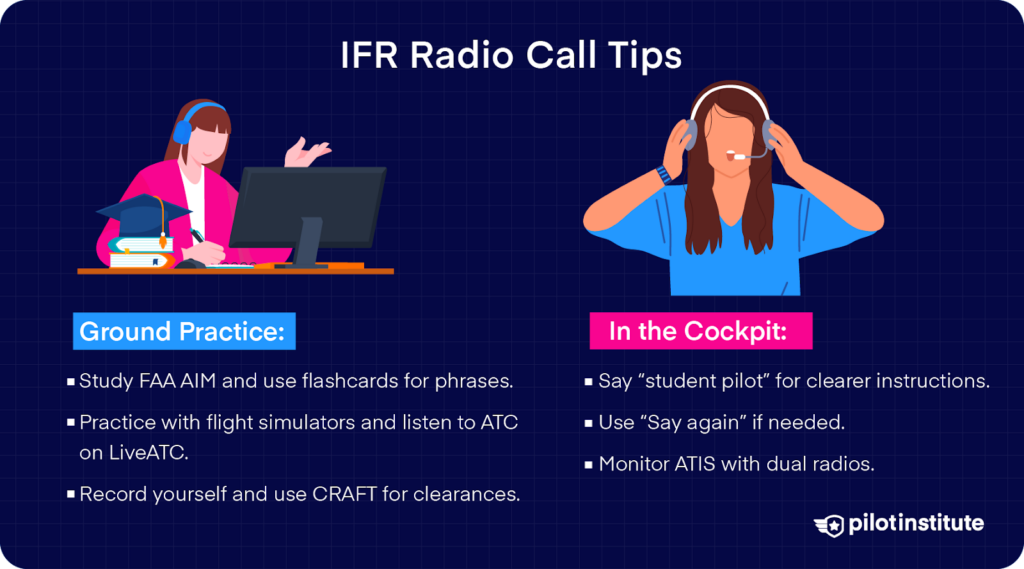
Learning aviation radio calls takes practice, but there are several ways to improve your skills.
Building Your Skills on the Ground
- Start by familiarizing yourself with the terminology. The best way to do this is through the FAA’s AIM (Aeronautical Information Manual). This section is particularly useful for tips on radio technique.
- Make a script or flashcards to memorize standard phrases and responses. Keep developing it as you learn more.
- Practice noting down departure clearances on paper. Don’t forget to use the CRAFT acronym.
- Record yourself practicing. Speaking aloud and recording yourself can help you hear how you sound and what needs improvement.
- Listen to real ATC conversations using websites such as LiveATC.
- Keep the FAA’s Pilot/Controller glossary on hand in case you hear a new phrase.
- Practice flying the aircraft while using the radio on a flight simulator. This helps you get used to managing both tasks simultaneously.
- Once comfortable interacting with simulated ATC, move on to the next level. Join online networks like VATSIM to interact with real people acting as ATC. This increases realism while keeping the pressure low.
Tips for Practicing in the Cockpit
You’ve done all you could on the ground. Here’s how to make things easier in the air.
Adding “student pilot” to your calls is a good idea whenever you contact a new controller.
For example:
- Pilot: “Dayton tower, November Four Five One Romeo, student pilot.”
This lets controllers know you’re a beginner. They’ll take extra care to speak slowly and clearly to you.
If you didn’t catch what the controller said, don’t be afraid to ask them to repeat themselves. There’s a particular phrase for this purpose:
- Pilot: “Say again for November Four Five One Romeo.”
While doing IFR flight training, see if you can get an aircraft fitted with two communication radios. This allows you to monitor an extra frequency.
It makes switching frequencies easier and lets you listen to ATIS without worrying about missing radio calls.
Conclusion
Mastering IFR radio calls is a skill every pilot can learn. Once you get the hang of the 4 W’s and practice common call scenarios, talking to ATC will feel as natural as flying itself.
Don’t be afraid to make mistakes—controllers are there to help, and they appreciate clear, calm communication.
Keep practicing, stay patient, and soon enough, IFR radio calls will be just another part of your flying routine.
Safe travels!

